Category Archives: Lion Dance Equipment

Happy Year of the Monkey

Happy Year of the Fire Monkey everyone!

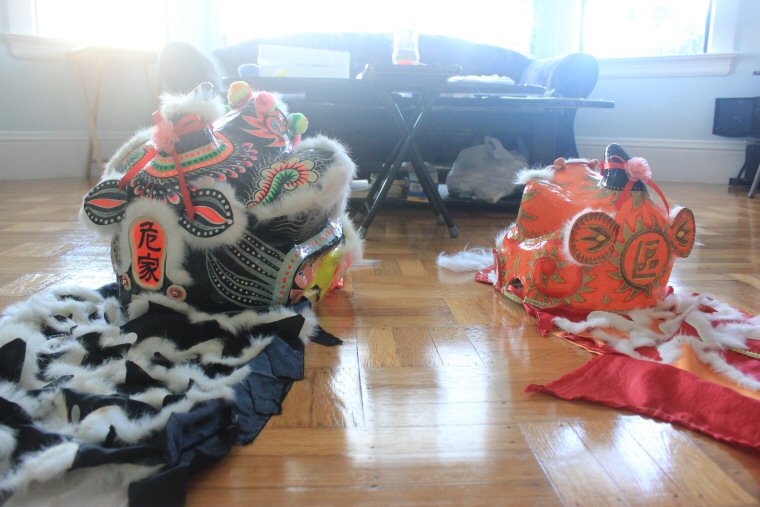
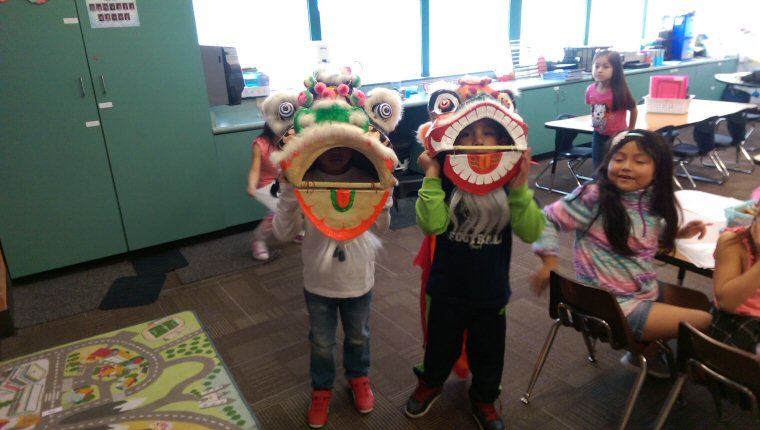
Remember last year when Annie brought her baby lion to La Joya for a parade through her school? Well, we didn’t eye-dot the lion before she brought it out and her cell phone took a huge blow to the concrete floor rendering it useless. Whether or not it was bad luck caused by the unblessed lion we will never know! But this year, we decided to perform a makeshift Hoi Gwong ceremony for her lion before the parade in case it decided to curse her cell phone again. Since Hoi Gwong ceremonies take quite a bit of effort, we decided to eye-dot my baby lion too. This way, she can bring two lions to her classroom for more fun! But before that could happen, we needed to sew a new tail for my baby lion.

Let’s rewind about a decade to hear the story about my baby lion.

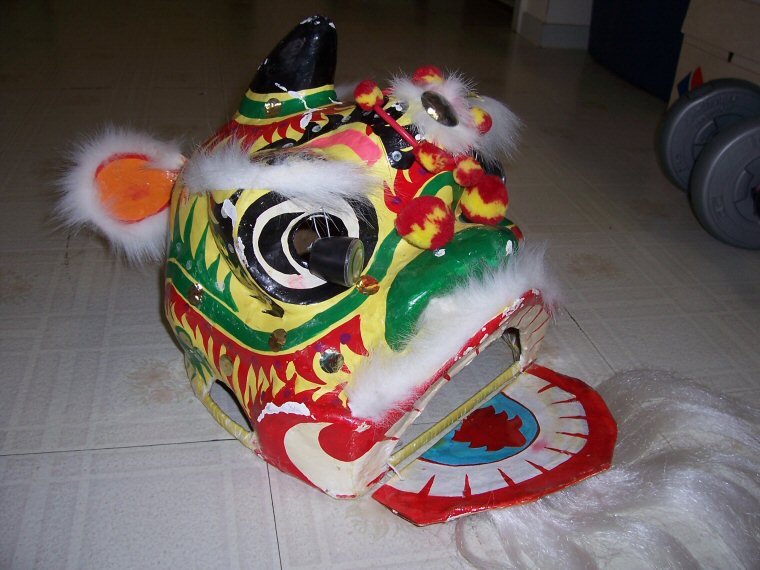
How my baby lion originally looked

I got this lion when I was nine years old during my first trip to China. It was my first lion head ever and I took great care of it, but after a few years it started chipping. When I was fifteen years old, I decided my first ever lion project would be to repaint this baby lion to an orange color. Of course, the original tail didn’t match the new paint job, but I didn’t know how to sew a new one. After I finished painting it, the lion was mostly hidden away unused in a plastic bag.

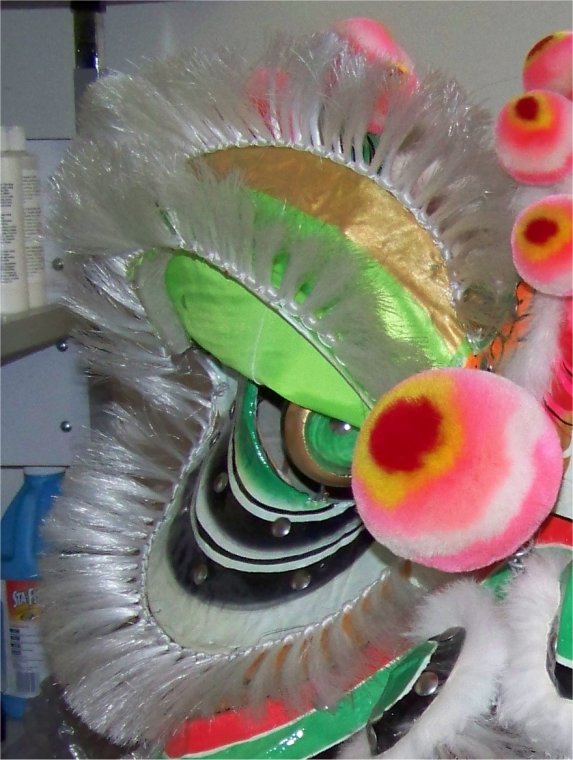
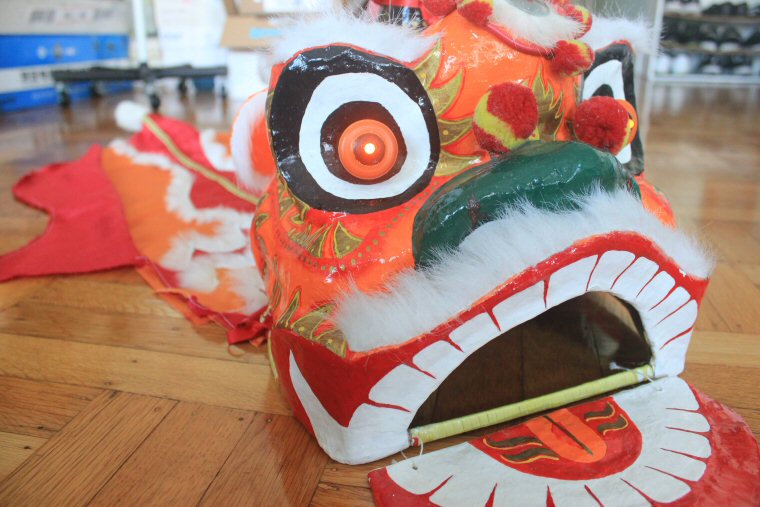
New orange and gold design

Side view

Fast forward to now, Annie knows how to sew! So we set out to sew an orange lion tail to match the orange paint job before we would bless both baby lions at the same time. Actually, she did most of the work (probably more like all of the work haha) since I have no clue about sewing! The whole project took about ten hours. Thank you Annie for all the hard work!

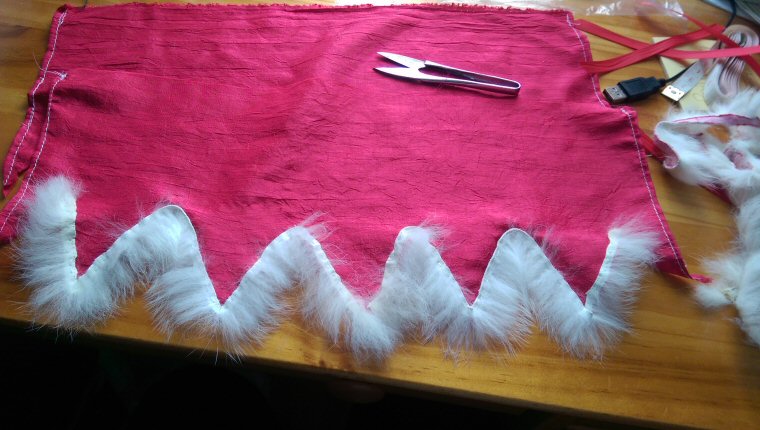
Planning and cutting the tail pieces

She started sew the fur with the machine, but it was difficult. After many attempts, she ended up sewing it by hand, which was also less difficult.

Sewing the fur on

Annie sewing the tail together

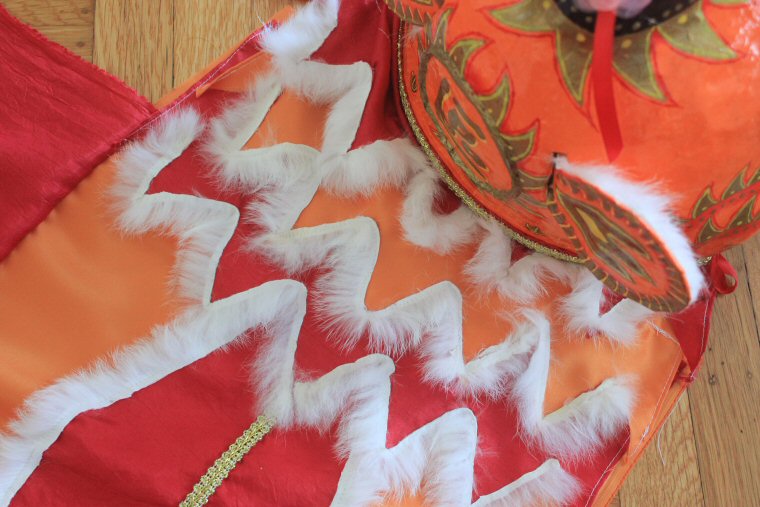
Complete!

We attached the tail to the lion with small Velcro dots and tied the corners to the handlebars with ribbon.

Tail attached to the lion

The hardest part of sewing the lion tail

Cutest part of the lion

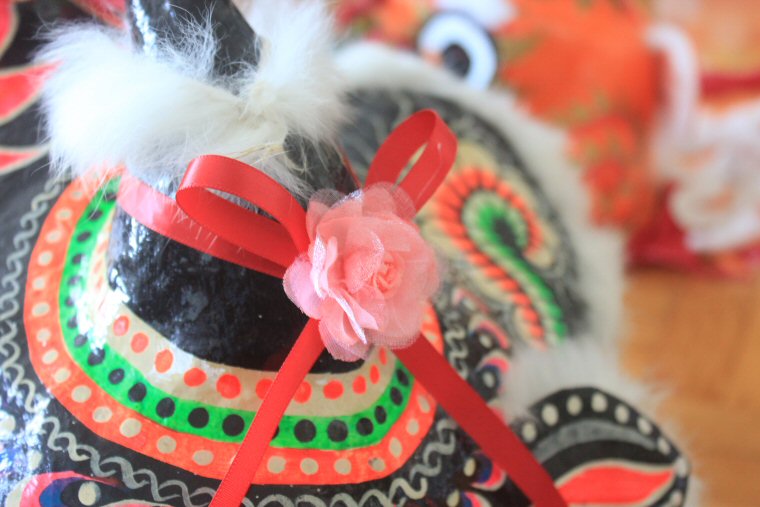
After the tail project, it was time to get both lions ready for the Hoi Gwong ceremony! I made my own red flower ribbons using red ribbon and rhinestones. I also attached a pink flower to the back of the whole thing to hide the glue.

Front of the flower ribbon

Back of the flower ribbon

Light three incense to initiate the ceremony.

Yes, that is an old sauce jar  LOL

Ready for the Hoi Gwong ceremony!

One dot on the mirror, the lion awakens

Two dots left then right, distinguish wrong from right


Two dots on the nose, the senses open

One dot in the mouth, all senses unite

From tip to tail, all becomes one

Ready for blessings

Time for both lions to parade and bless the school!

Preparing for the parade

Parading around the school

Parading around the school

When doing things the first time, there are always improvements that can be made. The tail was falling apart after only one use!

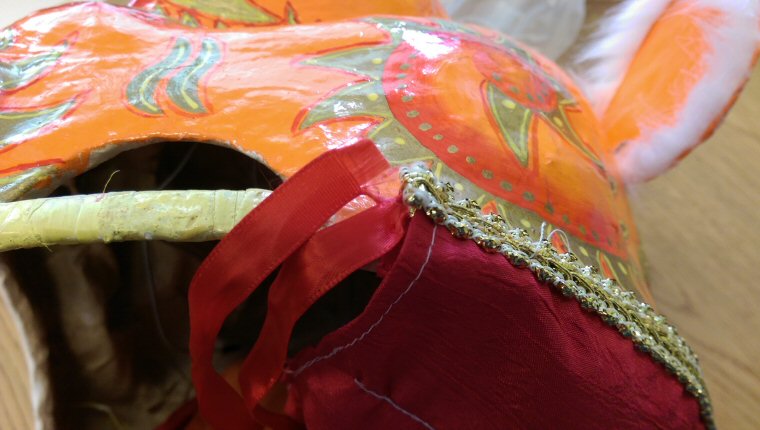
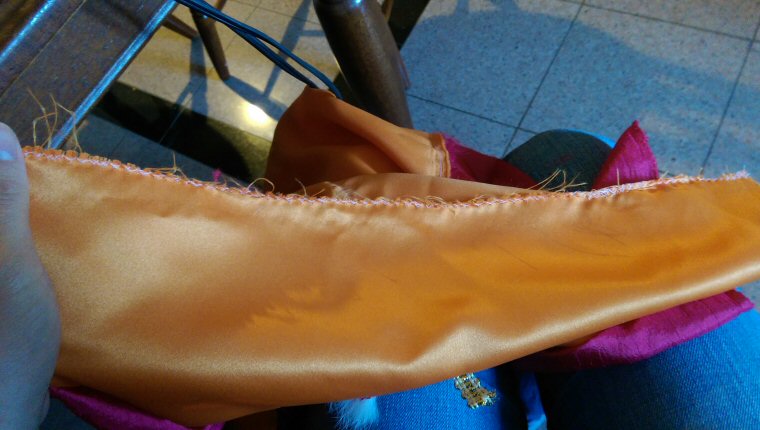
Edges fraying

Ribbons torn out from the rest of the tail

Fortunately, Annie fixed it by using a zigzag stitch keep the raw edge of the fabric from fraying. She took a lot of the tail apart and had to re-sew it. She also sewed the ribbons back on in a different way to make it more secure.

Sealing up the edges

Woot woot! Back to the closet until next year!


Project T7 Painting Update

I just wanted to give a quick update on the status of Project T7. Unfortunately, I didn’t get much painting done during the last break, but there is at least some color on T7 now! I’ll have another blog post next weekend on something completely different. In the meantime, enjoy this post.

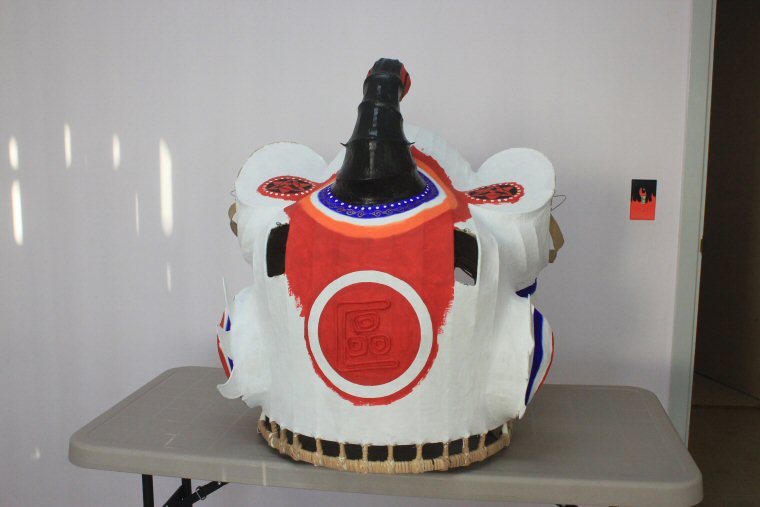
Back view with unfinished Zhao Pai

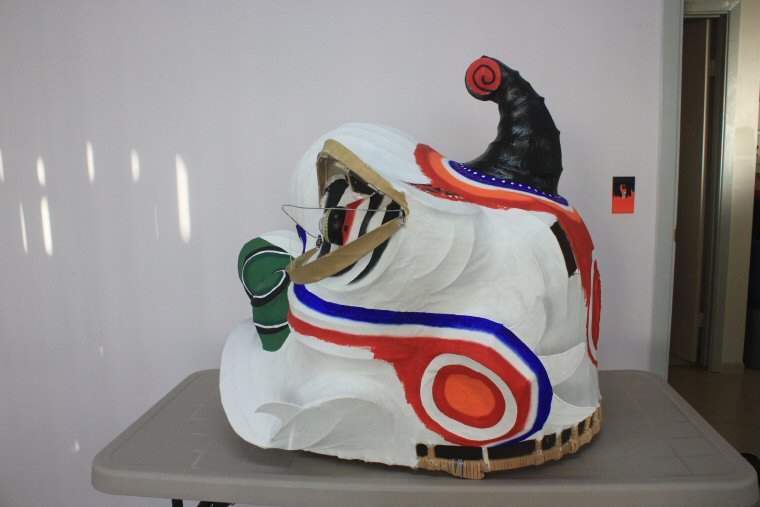
Side view

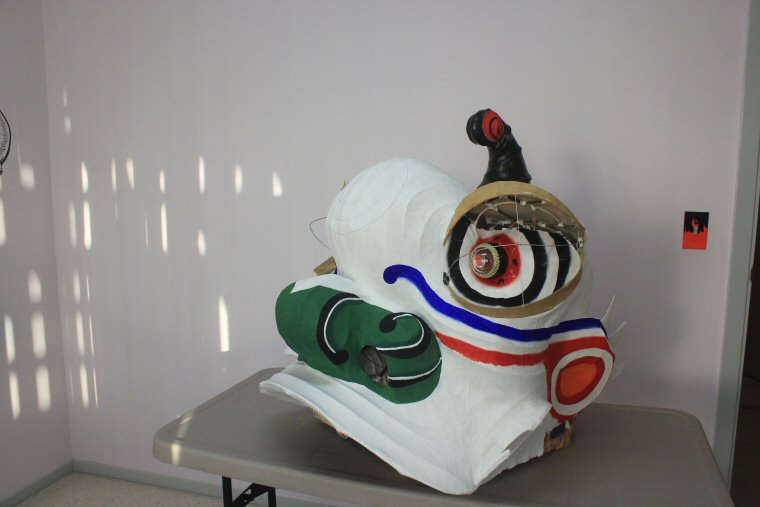
Angled view. How do you all feel about the nose with two greens blended into each other?

A glimpse at the top

Does anyone know why it’s called Project T7 yet?


Slowly Pasting Paper

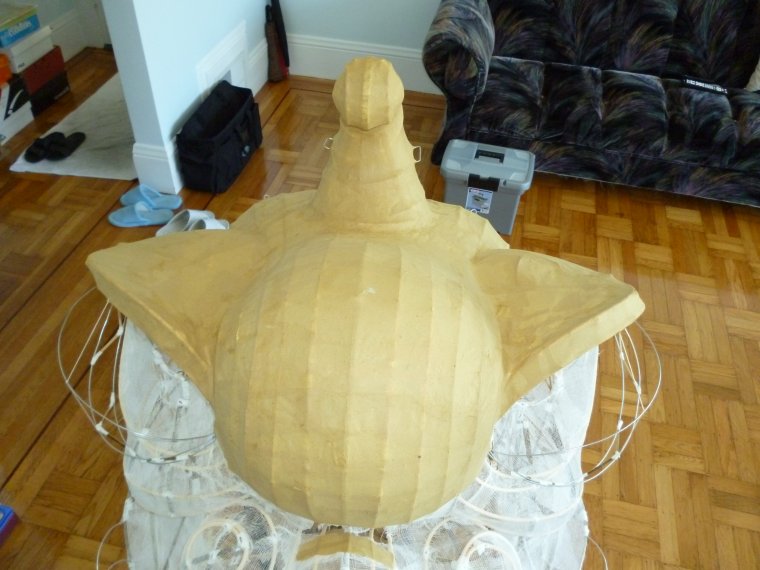
Break started two weeks ago, so I finally had some time to work on the Lion Brothers Project again. Last time, I finished attaching gauze to the frame I built from scratch and also paper mache’d about half of it. This time, I finished pasting the first layer of paper mache and got about half done with the second layer.

First layer of grass paper pasted!

For the first layer, I used a brown grass paper instead of the typical white rice paper. My friend recommended this type of paper to me several years ago and I’ve found it to be a bit stronger than some of the white calligraphy papers I’ve used. When both grass paper and rice paper are combined, they become a very strong and crisp surface to paint on. By the way, I don’t think rice paper is actually made from rice. It’s made from rice straw and other fibrous remnants from other plants like mulberry. It makes me wonder what combinations of fibers make the strongest paper. I’ve heard my parents tell me multiple times that Xuan paper is the best stuff for calligraphy, but I wonder if there’s better stuff for papering lion heads.

Second layer started. The other side does not have a second layer.

Only about half of the second layer is done so far. I used white calligraphy paper instead of grass paper to keep track of the number of layers pasted. That means the next layer will be grass paper again. One thing that I’d do differently next time is to double up on the grass paper for the first layer, since remoistening it with starch to attach the second layer made everything very wrinkly.

I’m planning to do a total of 4 layers of paper on the outside and 1 layer on the inside, for a total of 5 layers of paper with one layer of gauze. Should make a nice and beefy frame to paint on!

On a side note, I’ve been wondering about doing cloth mache for the other frame that I’ve repaired. I’ve read online that cloth mache is much stronger than paper mache. What if I did a base layer of cloth mache then finished it off with one layer of paper mache? So many ideas!

Anyway, school is starting again in a few days so I’ll have to continue papering the lion during winter break. Until then!


Lion Brothers Project – Completed Frames

It’s been a while, but I’m back! Then I’ll be gone for a while again…

I’ve been on break for the past several weeks and made some good progress on the Lion Brothers project. Unfortunately, school is starting again tomorrow, so the project will be on hold once again.

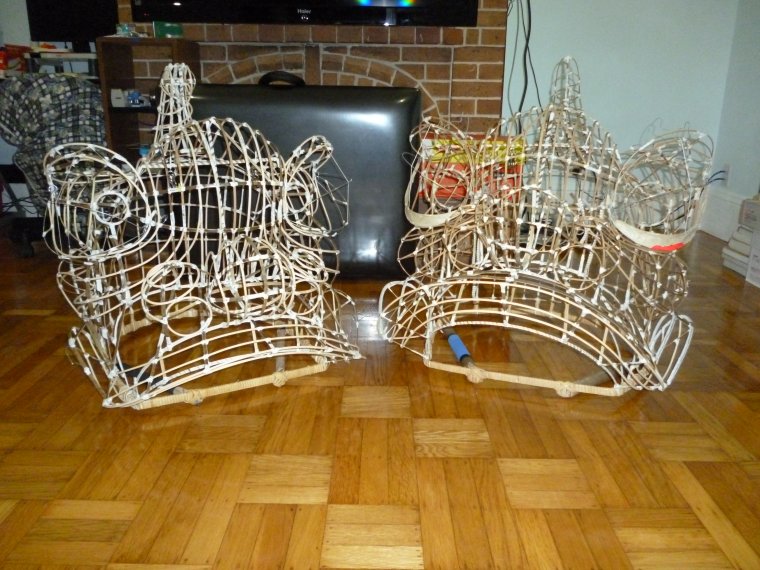
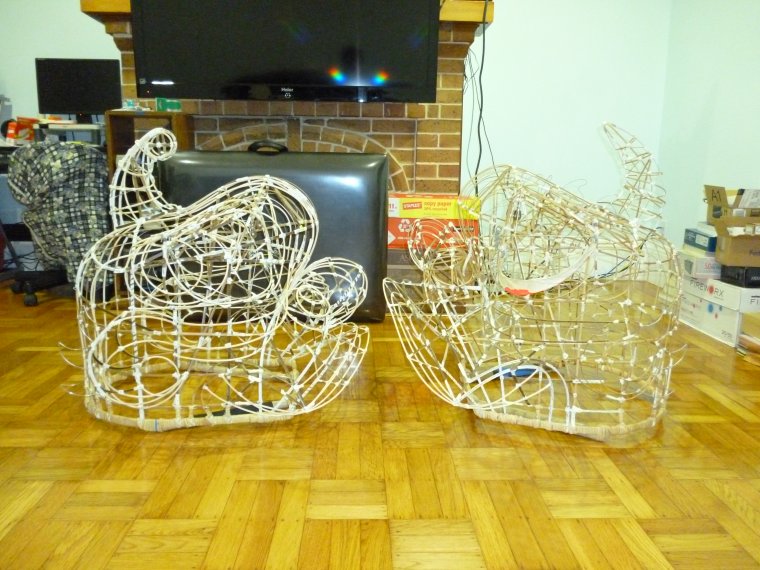
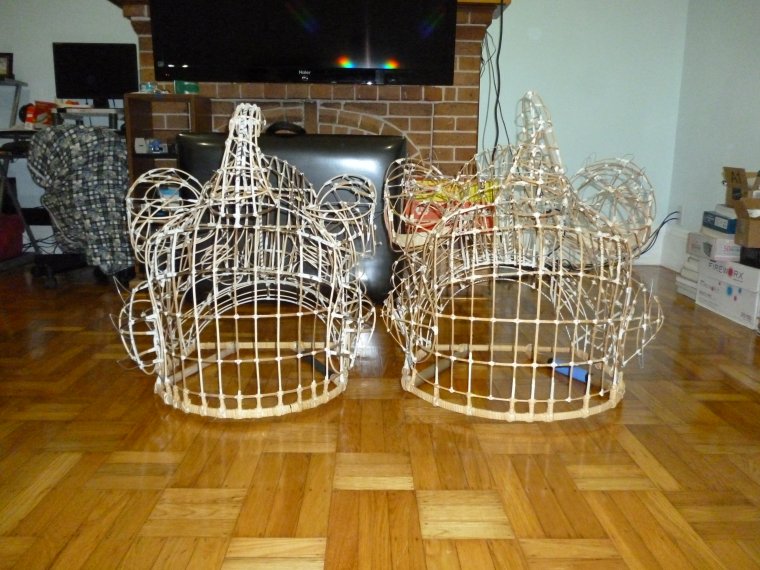
I last left off with a completely repaired frame and a partially completed frame that I was building from scratch. I’ve finished both frames now! Woot woot!

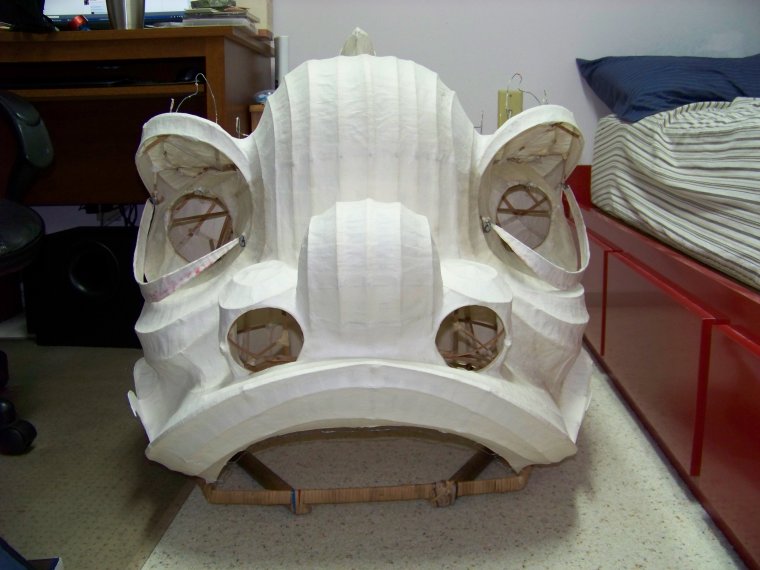
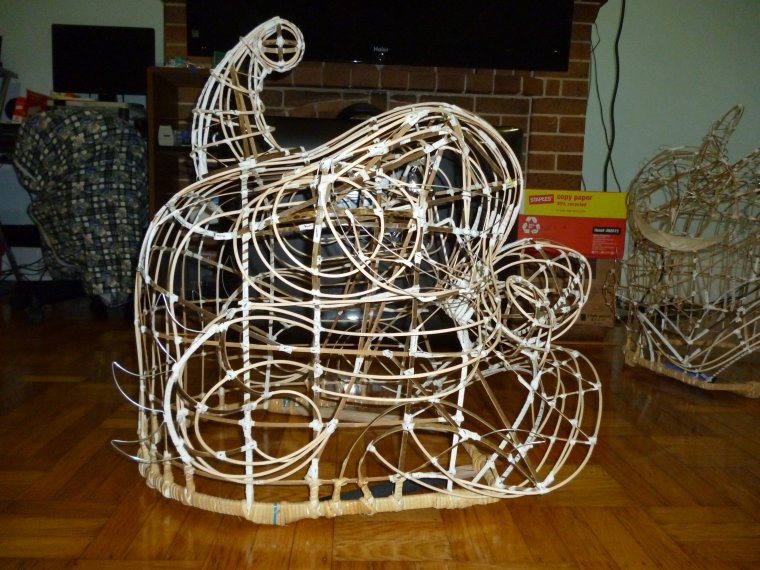
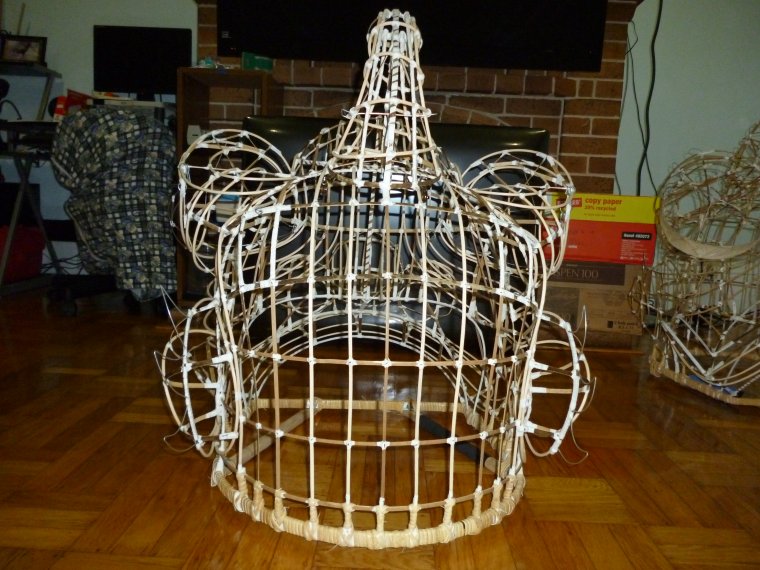
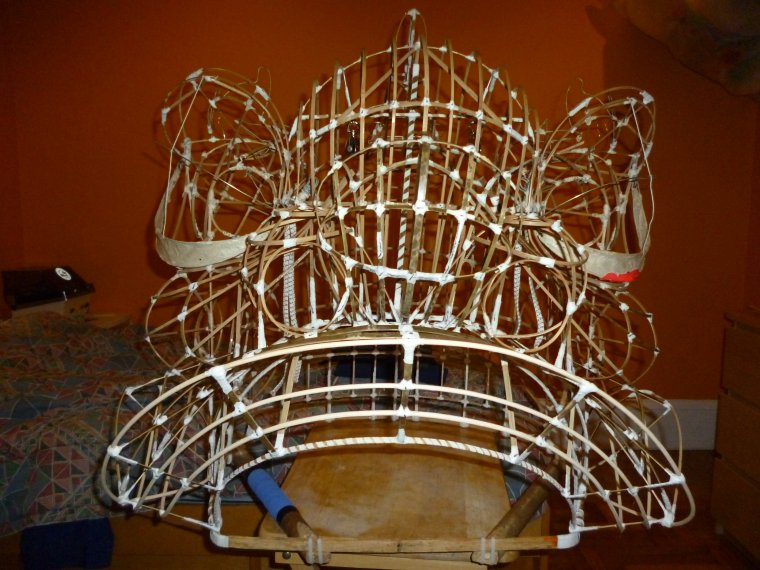
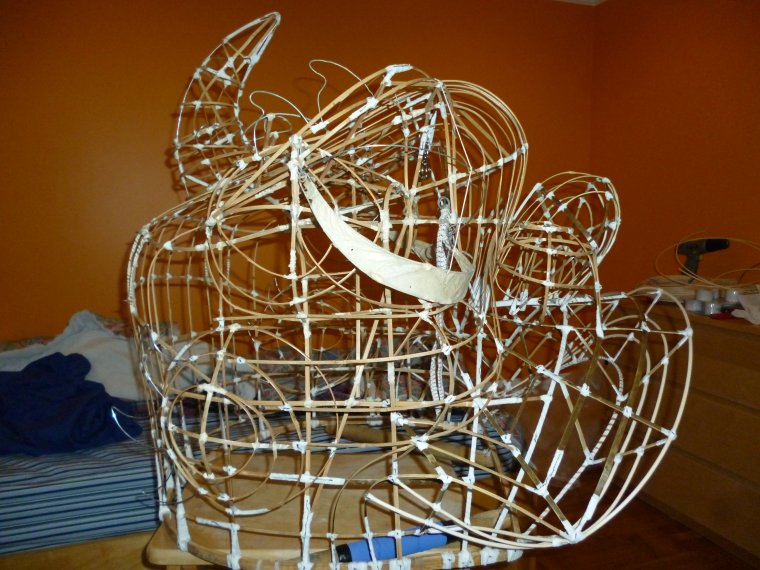
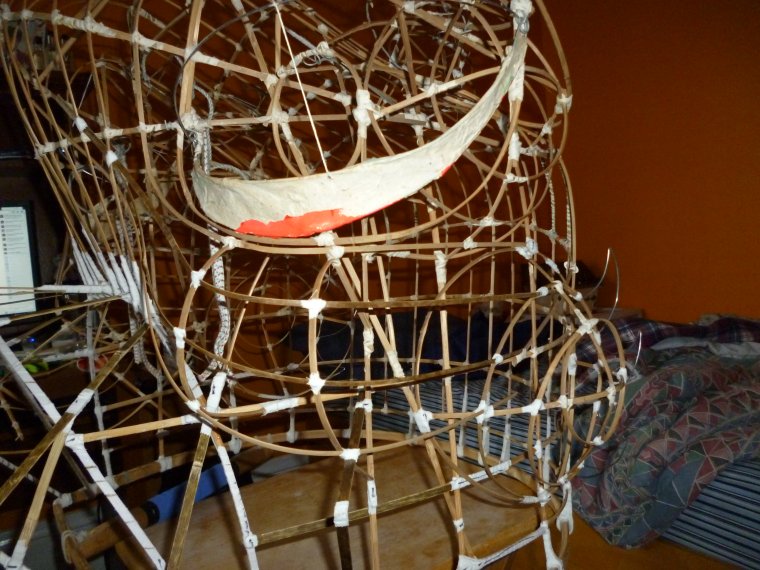
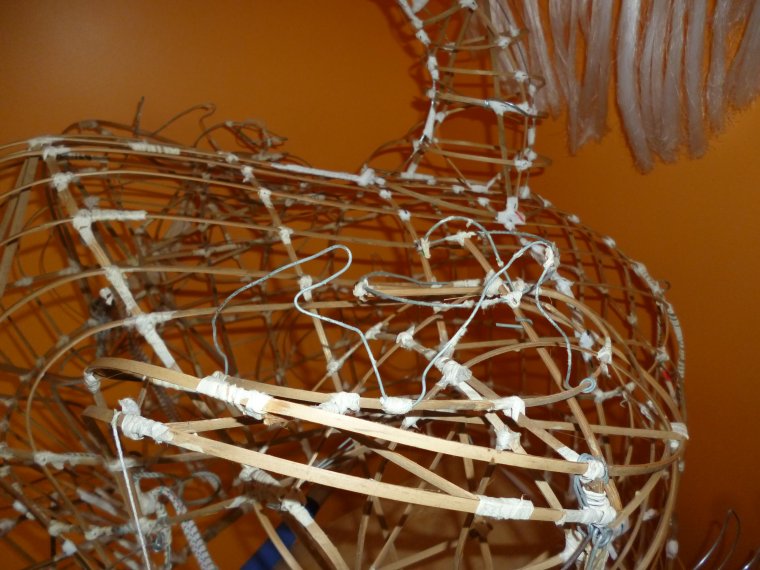
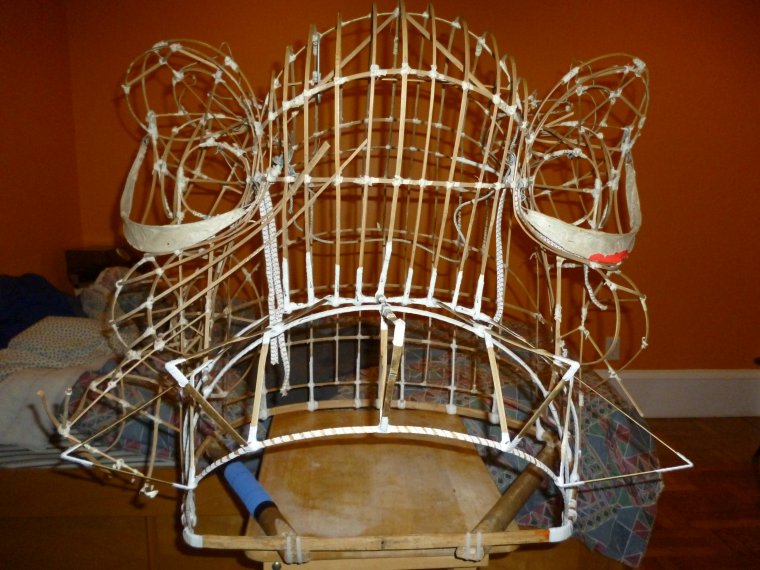
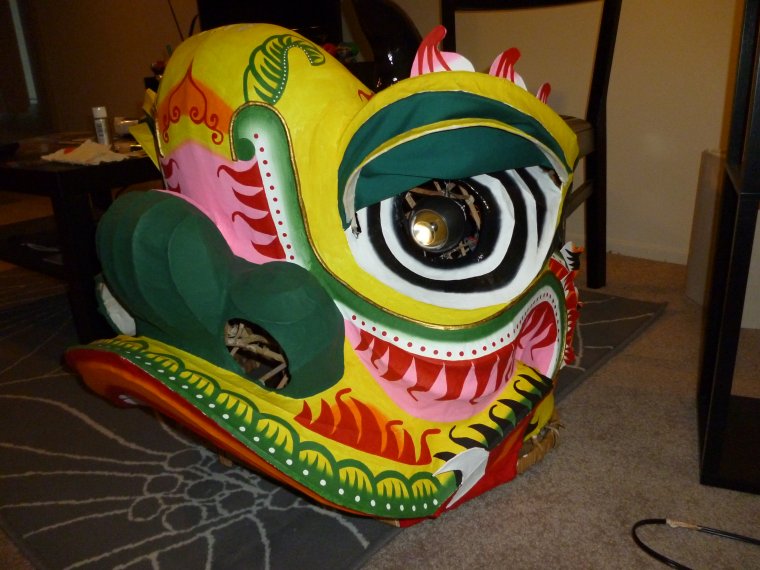
Front view of both lion frames

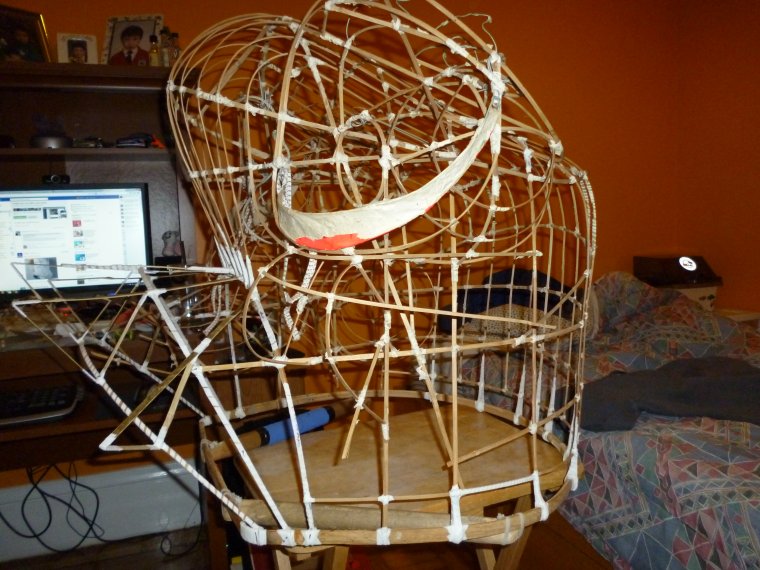
Side view of both lion frames

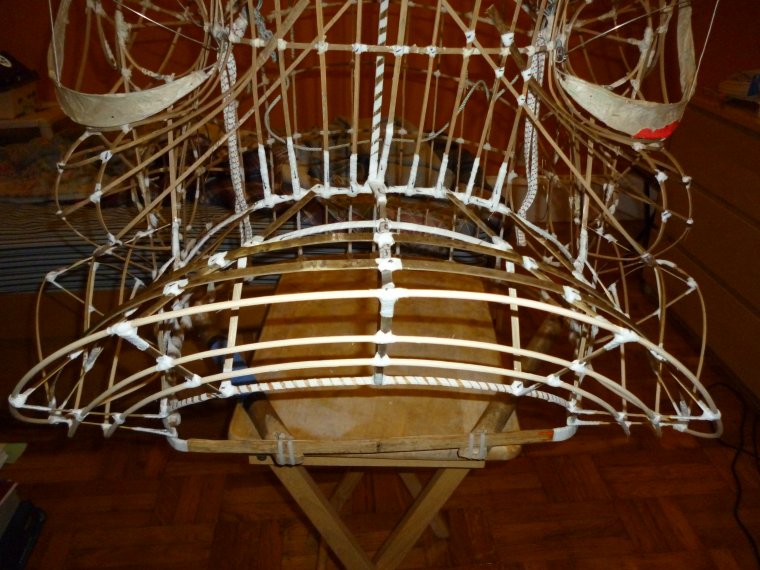
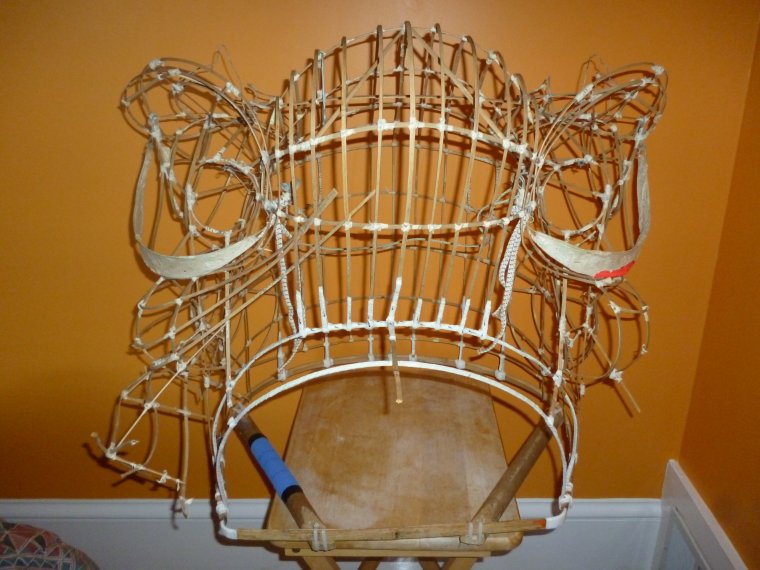
Back view of both lion frames

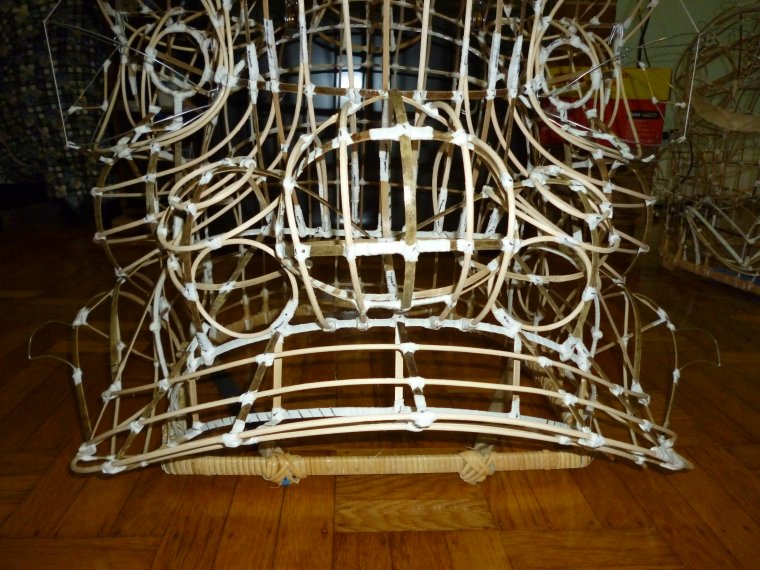
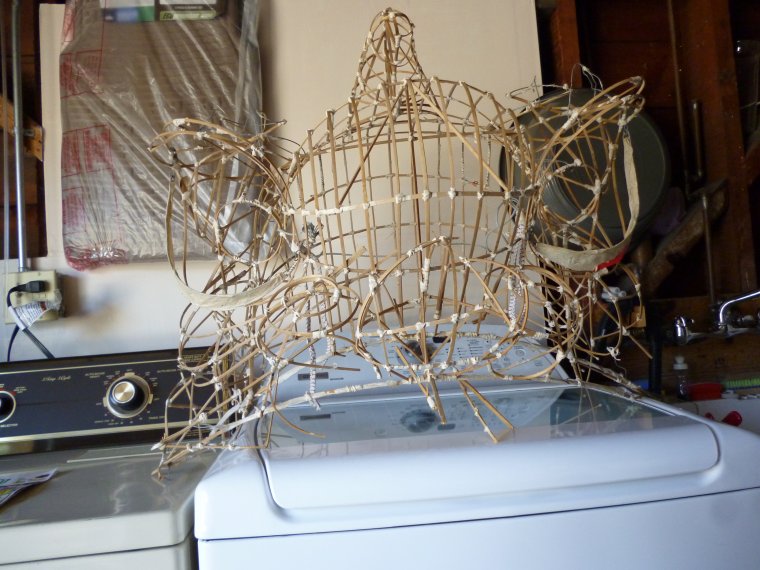
The frame built from scratch was quite a challenging process. Originally, I was going to copy the exact measurements from the other lion, but the two base rim measurements were too different. I decided to improvise some of the measurements. Oh yea, something random – I changed the color of the handlebar grip on the lion frame built from scratch because I’m not sure of the colors I want to use anymore.

Nose and upper lip of lion frame built from scratch

As shown above, the nose has a really bulged out center piece. Not sure if I like it, but we’ll see after the lion is done. Unfortunately, the upper lip turned out way lower than I wanted. From certain angles, it looks really weird.

Eyes of lion frame built from scratch

For eyes, I decided to make the eye socket circles snug with the shape of the eyeball to prevent the lazy eye look. Unfortunately, this also made the eye socket higher up than normal, which may be blocked by the eyelids with fur after the lion is complete. We’ll see how it turns out when the lion is done.

Side view of attempted Hok San eye

Also, I tried to add a more Hok San look to the eyes by pulling back the corners of the eyes just a bit. Not sure if I was successful or not.

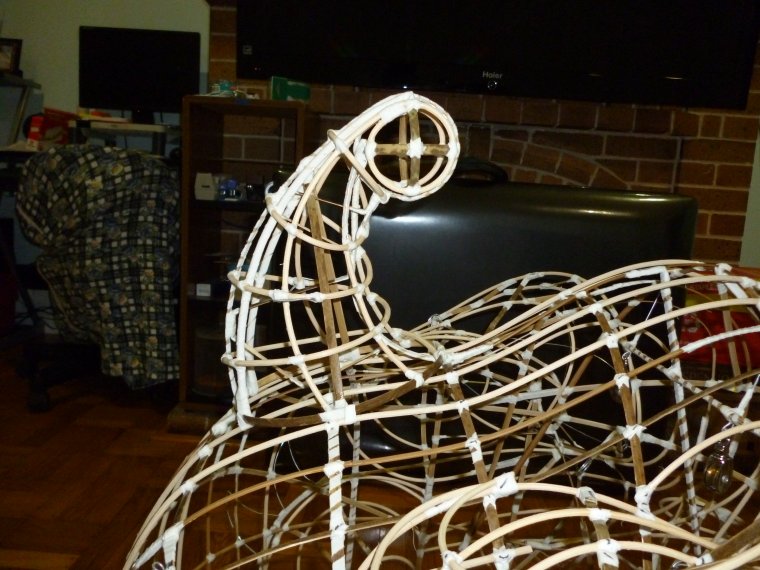
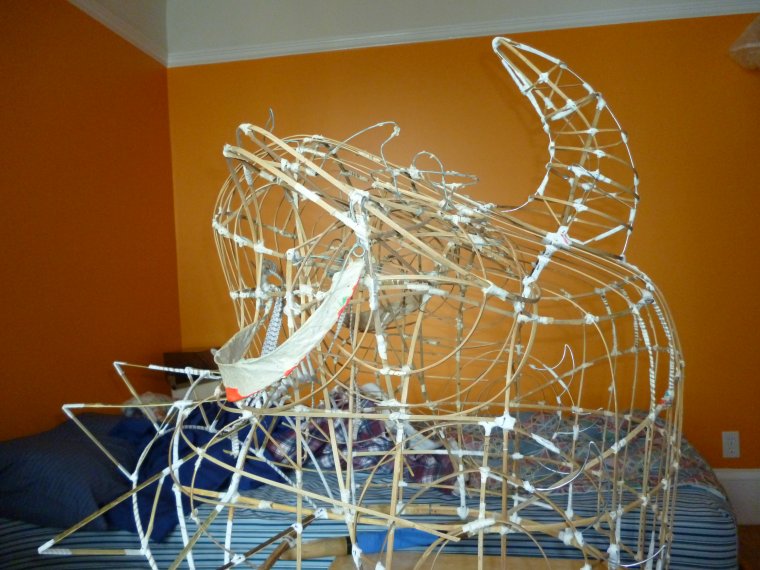
Fist horn

I gave this lion a fist horn because I was aiming for a Fut Hok lion. This horn was much more complicated to build than a bamboo shoot horn.

Single soy

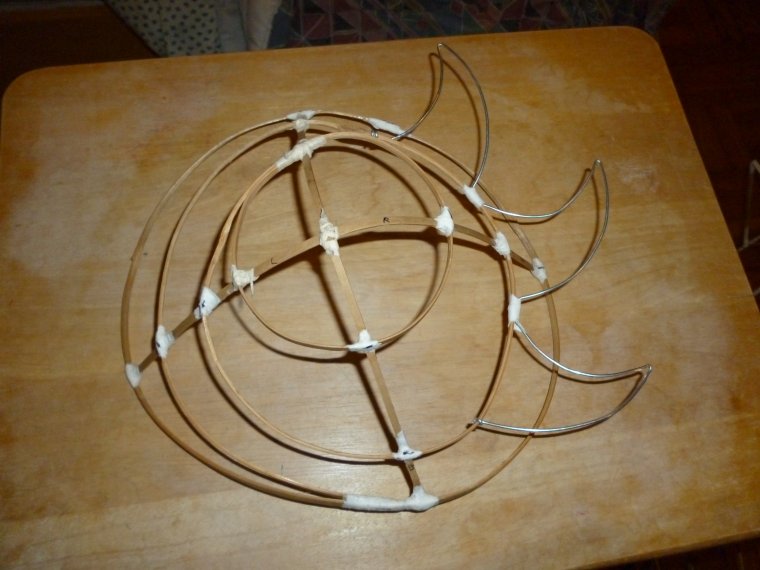
Because the other frame had the circular gills, I gave this one a single “soy” for contrast. The fins are the same as the other frame though.

Side view of entire lion frame

Back view of entire lion frame

Honestly, I have no clue how the final product will look. There’s at least one thing on each part of the lion that didn’t turn out as I wanted. Oh well!

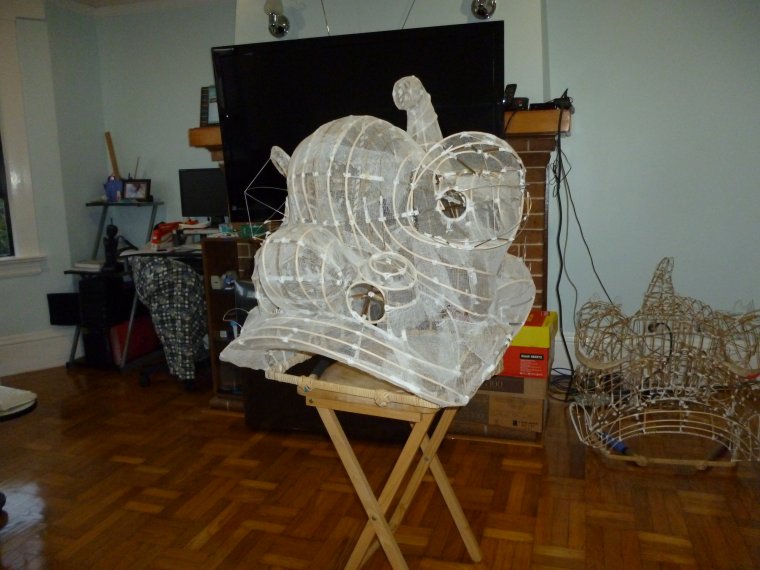
Entire frame layered with gauze

This is my first time using gauze for the entire lion head. In previous projects, I’ve only used gauze for certain parts of the frame that had huge gaps. I’m glad I used gauze for the entire frame because it made papering much easier.

First layer of paper


First layer of paper

As of right now, I was only able to put a first layer of paper on the back, top, horn, and forehead. The project is getting really exciting! More updates coming during my next break.


Annie’s Baby Lion Complete!

Woot woot! I finished fixing up Annie’s baby lion. Less words, more pictures. Let’s go!

Here’s a front view of the complete lion.

Front view.

Check out the lighted eyes that I installed!

Lighted eyes.

I also put a new mirror and used a different method to mount the pom poms.

New mirror and remounted pom poms.

Here’s a side view just for kicks.

Side view.

And finally, here’s a back view with the completed Zhao Pai. I retied the ears with elastic so it can’t droop.

Back view with retied ears and complete Zhao Pai.

Hoping to eye-dot this lion along with my baby orange one sometime in the future!


Annie’s Baby Lion Zhao Pai

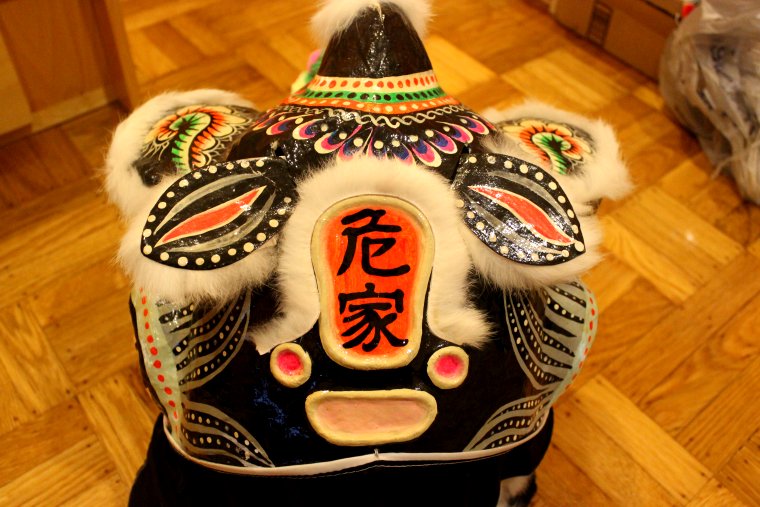
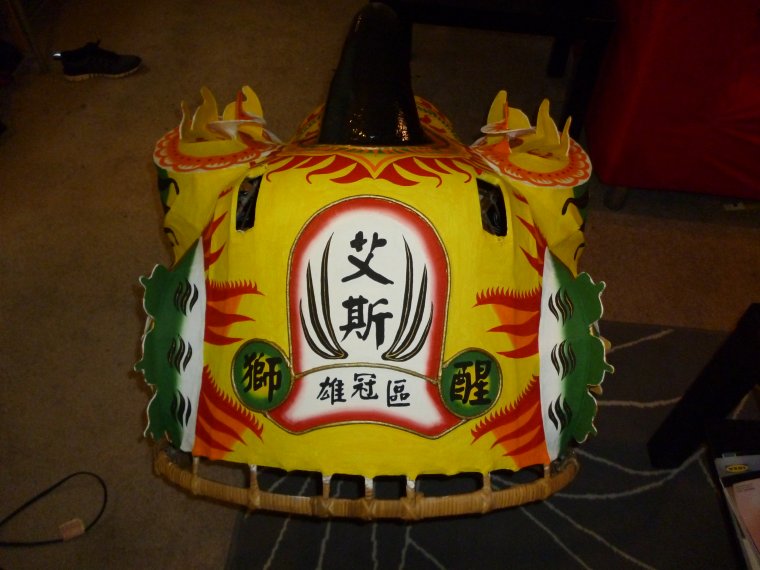
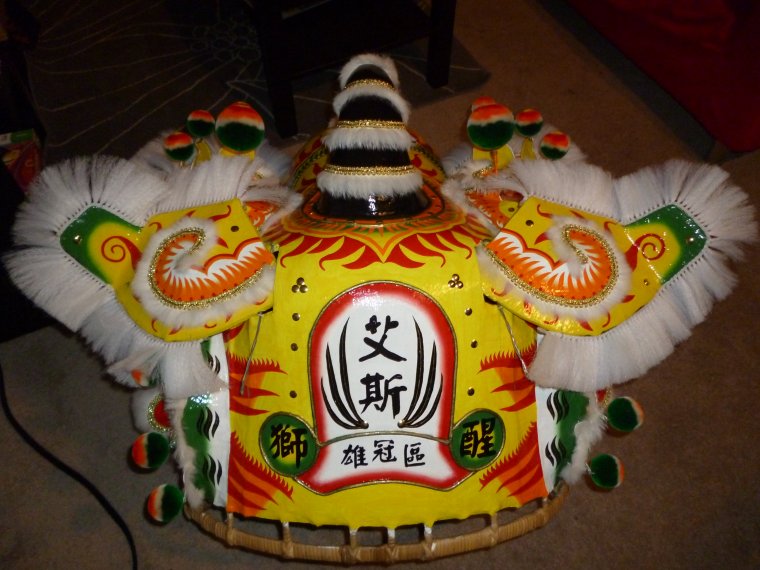
I took a break from studying today by finishing up the Zhao Pai on Annie’s lion. Normally, the two circles on the side would have the two characters for awakened lion (醒獅), but they were way too small to write anything in it. I was planning to glue metals disks inside the circles, but decided on trying something else that I’ve been thinking about for a long time. The idea is to glue small bells in place of metal disks. Originally, I was going to use this idea around Ace’s horn, but decided that it might be too obnoxious with the large amount of bells. Since this lion will only have two bells, I decided to try it out. The truth is, I can barely hear the bells when the lion moves. Even with ten bells glued on a lion head, I don’t think it will be too obnoxious. We’ll have to find out when I actually do it!

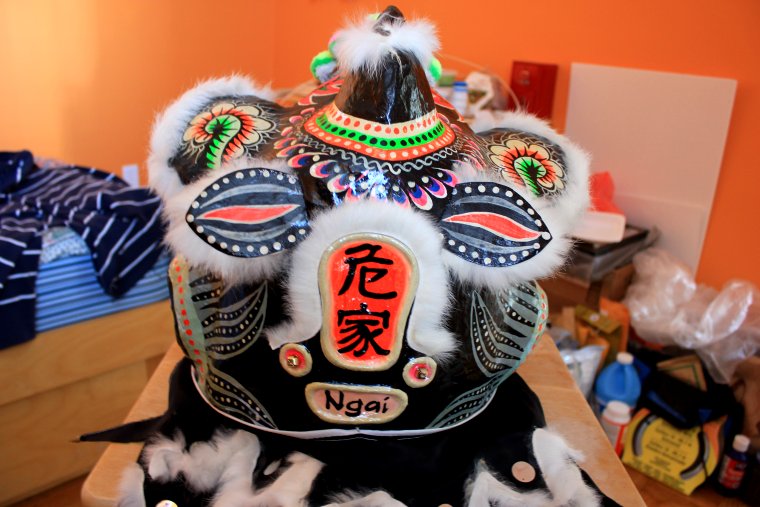
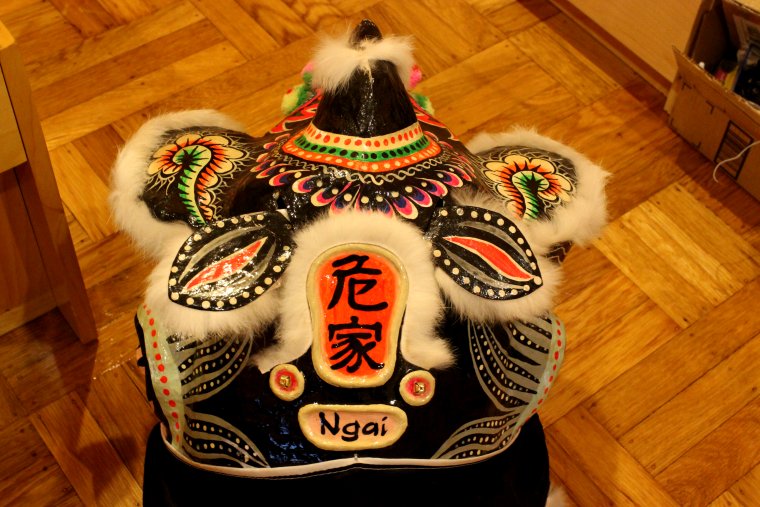
I was also stuck on what to put in the rectangle at the bottom of the Zhao Pai. Initially, I was thinking of writing the two characters for awakened lion (醒獅), but Annie came up with a better idea! Why not write their last name in English? It would fill up the space pretty well. And so I did it, and here’s the result:

Completed Zhao Pai.

You guys may be wondering why I’m not working on the frame that I’ve started from scratch. No worries, I’ll be getting back to it soon…hopefully…

Back to Annie’s lion, I’ll be cleaning up other parts of the lion soon and then it’ll be like new again (or at least close to new?).


Quick Side Project – Painting Last Name

One thing that slightly bugs me is when I see a lion head with a blank Zhao Pai on the back. In my interpretation (and only mine haha), a lion with a blank Zhao Pai has no owner and therefore is untamed, or at least not as tame as it could be. I find it important to paint a last name or school’s name onto the back of the lion as a means of identification and ownership. Of course, this is only my opinion and not culturally based in any way. I’m probably just finding an excuse to get bugged by blank Zhao Pai’s. 😛

Anyway, I spent a little bit of time painting my girlfriend’s last name onto her lion. Here’s a picture:

Ngai Family Lion


Annie’s Baby Lion

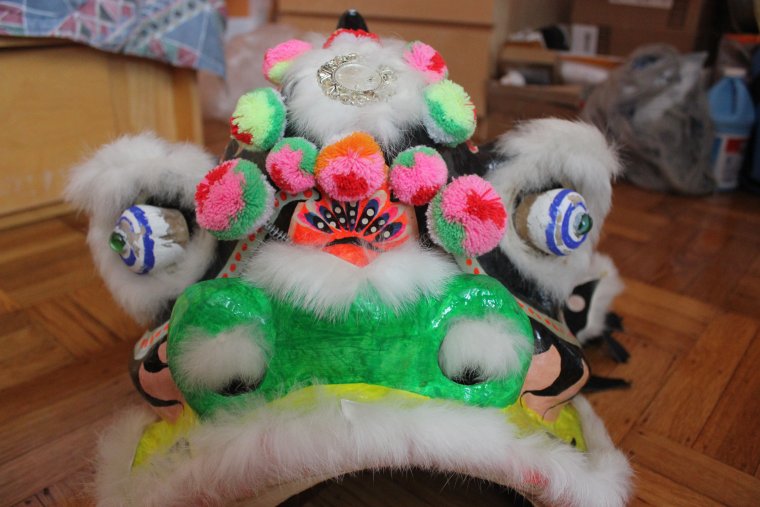
My girlfriend brought over her childhood lion head this weekend so we were able to take some detailed pictures of it. The original plan was to restore this lion, but we decided not to because it’s still in pretty good condition. Also, the original paint and tail design are really nice for a baby lion (much better than a lot I’ve seen). I’m just gonna touch up some of the chipped off paint and clean it up a little bit.

The newly planned project is to make a copy of the lion with a different color scheme and maybe some changes to the paint design. Target completion year = 2050 hahaha

Enjoy the pictures!

Front view of the lion.

We’re gonna have to do something about those reverse crossed-eyes haha

The reflective part of the original mirror is missing, but plastic piece around it is still there!

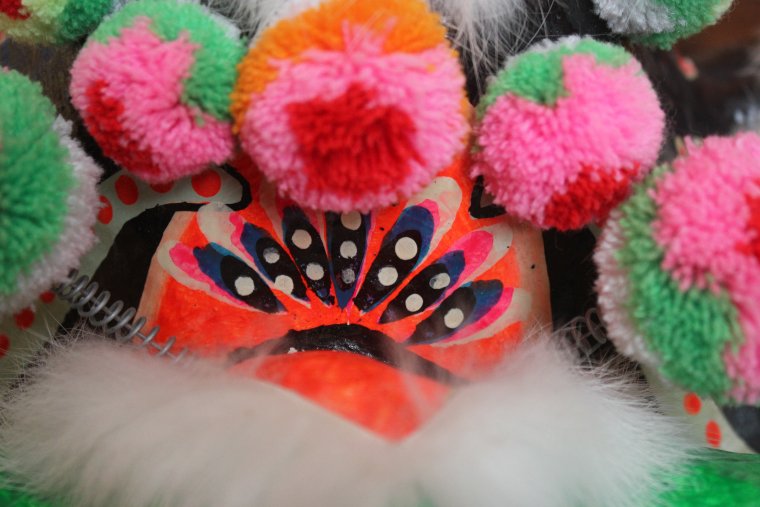
The paint design above the nose.

They used marbles for the pupils. Gonna have to clean up the paint around it.

I really like the design around the horn.

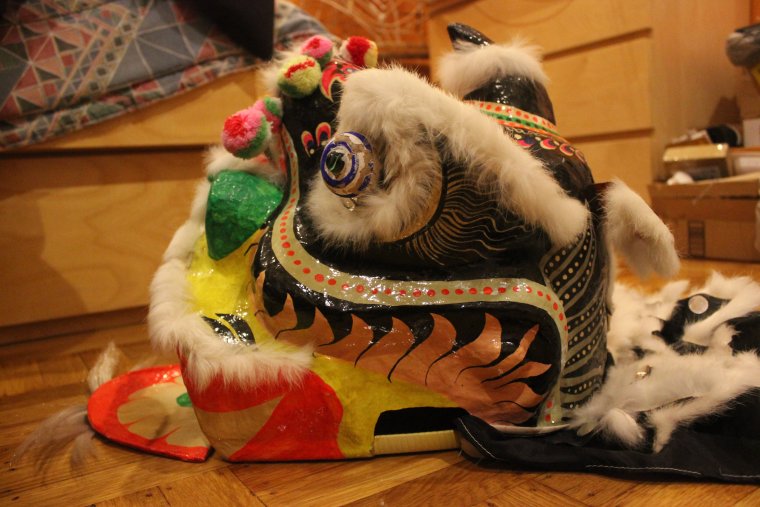
Side view of the lion.

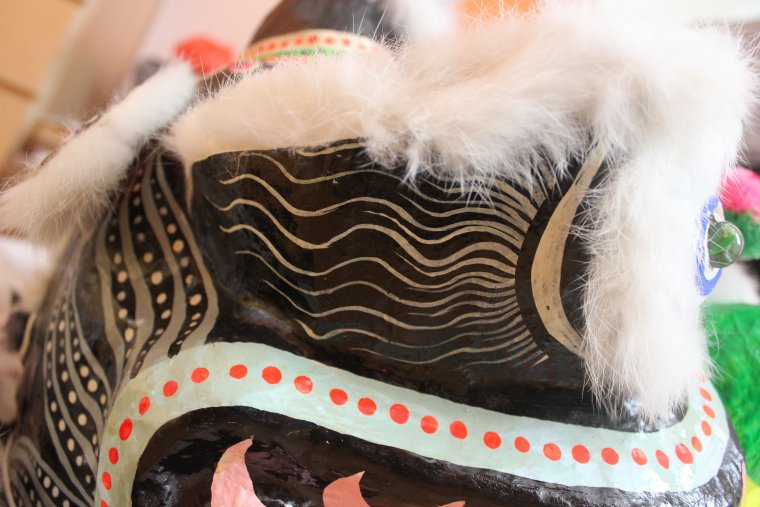
Although simple, I really like the design behind the eyes.

The design behind gills.

The design above the eyes. Really eye-catching!

Back view.

The lion tail is also really cool. It’s different than many of the baby lion tails I’ve seen.

Here’s the manufacturer’s label glued inside the lion. Anyone ever heard of them? I think they’re supposed to be a garment factory of some sort?


Lion Brothers Project – Main Part Complete

I finished the main part a little over a week ago but haven’t had the chance to blog about it. Here’s a picture:

Check out that forehead bulge!

Compared to the first frame, this one has a much bulkier and pronounced forehead. I will be trying to change the dimensions of the mouth and eyes to match this shape better.

Also, I am taking detailed measurements of every single step for this frame. Who knows, maybe the shape will turn out amazing and someone will want to duplicate it? In my dreams…haha


Lion Brothers Project – Blossom and the 2nd Part

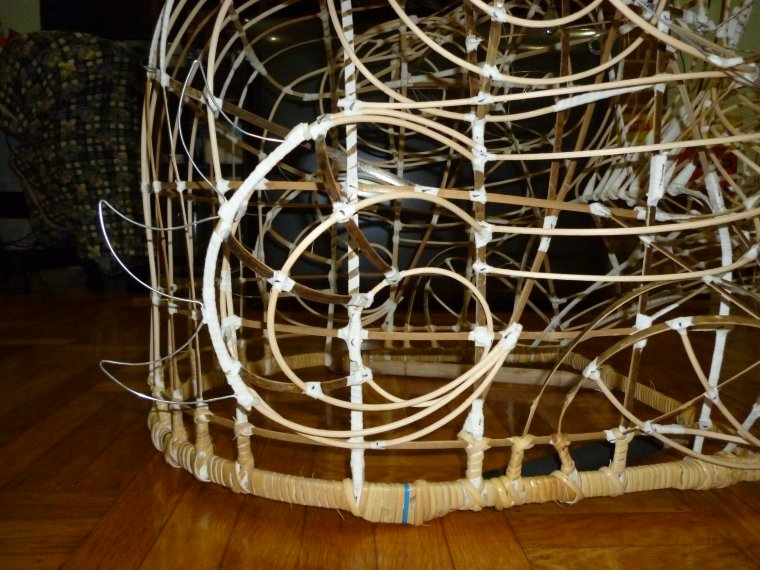
You guys are probably wondering why the title says “blossom”, huh? Here’s a sneak peak of the prototype I’m working on that will be part of the lion frame that I’ve already finished.

Glowing Blossom

The first part of the Lion Brothers Project will be now officially named “Blossom”. The rest of the explanation will remain a mystery until I’m done with the entire lion head. 😉

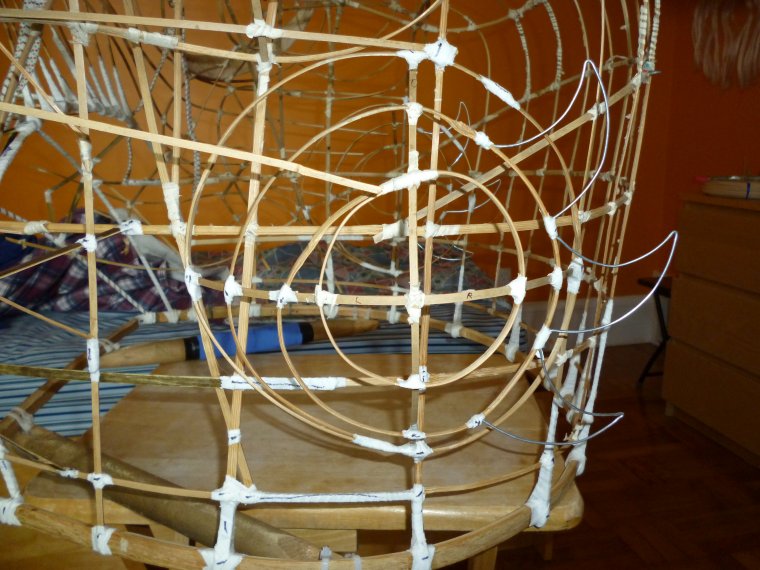
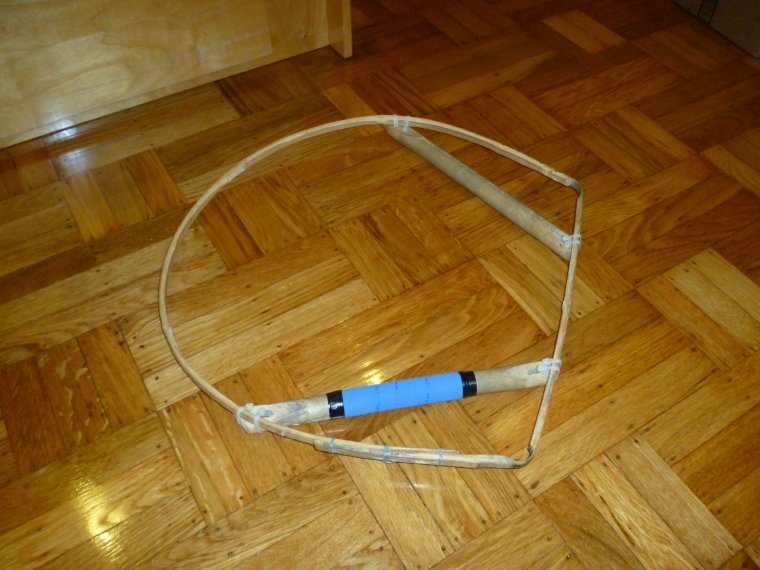
As for the 2nd part of the Lion Brothers Project, I’ve already begun building the lion from scratch. Mad respect to those who have already built one from scratch – it is indeed very challenging. I started by cutting handlebars from an old broomstick and attaching them to the salvaged rim I acquired.

Base rim with handlebars attached. Can anyone guess the color scheme of this lion?

I then started adding bamboo strips to form the basic shape. This part was the most challenging so far, because each strip I added changed the shape of the previous strip. That is when Chris Low mentioned the A frame/inverted V frame. It is supposed to temporarily keep the bamboo pieces in the right shape until enough strips are put on so it can hold its own shape. It can also help with keeping the frame symmetrical. This method was actually mentioned to me a long time ago but I completely forgot about it! Hope the shape comes out okay without the A frame/inverted V frame.  Here is a picture of what I’ve done for the first two days:

Two days worth of work

More updates coming soon!


Lion Brothers Project – Wrapping the Base

I spent several hours today wrapping the base with cane/rattan. This step is actually really important because it keeps the handlebars tight and the lower joints secure. You can probably tell that I’ve only done this once in the past from the messiness in the picture below. Practice makes perfect! Hopefully, it’ll be neater on my next one.

Base all wrapped up!


Lion Brothers Project – Pulley System, Mouth and Nose

I’m pretty much done with the lion frame! There are a few pieces of bamboo I want to add and some fins to modify. I also need to make the ears and lip, but other than that, the frame is finished.

After finishing the fins last week, I decided to repair the cross brace inside the lion and install a pulley system for the blinking eyes. Installing the pulley system was actually a really helpful tip given to me by my mentor, Corey Chan, many years ago, but I’ve started seeing pulley systems being installed in lions made by Emplion. The pulleys reduce friction between the wire loops and rope, which in turn prevents the eye-blinking ropes from snapping during a performance. It also allows for a faster, sharper blink. At 2-3 dollars a pulley, it’s a really good investment.

Pulley system installed.

Next, I started working on rebuilding the mouth. Since the mouth was practically nonexistent when I got the lion frame, I had a really hard time trying to figure out the proportions and measurements. In the end, I decided to just wing it and rebuild the mouth by improvisation. It turned out okay, so I’m glad!

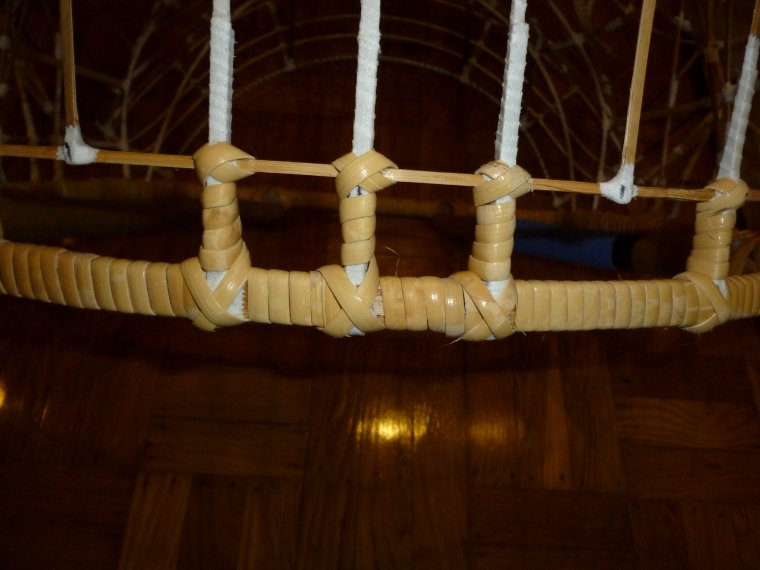
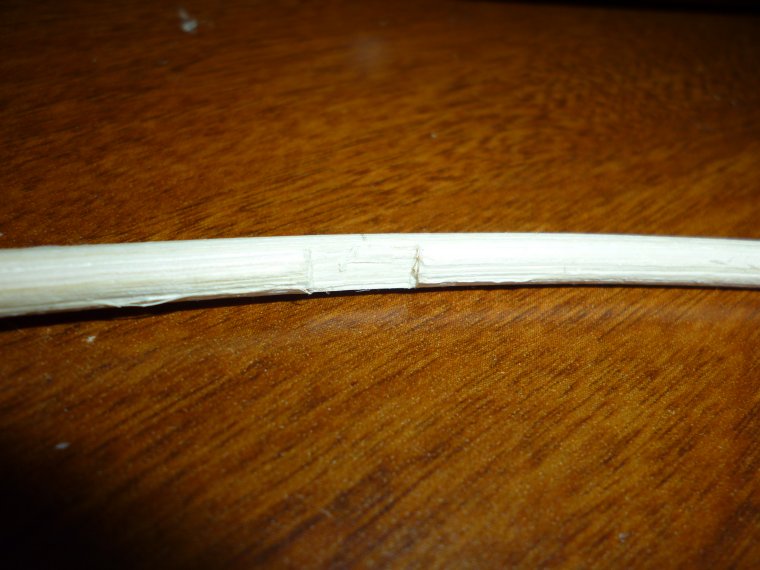
I decided to use rattan for some pieces of the mouth, since some of the bends would have been a little harsh for the thick bamboo strips. Plus, I had a whole coil of rattan lying around! Here’s something I figured out though: cutting a small groove in the rattan will keep it from slipping while binding. It also increases the surface area of contact, which I’m assuming would give a stronger joint. I only cut a groove for the more important joints that are prone to slipping, since it’s quite time consuming to do it for every single joint.

Cutting a groove in the rattan prevents slipping of the joint while binding.

Side of the mouth.

Front of the mouth.

Lastly, the nose was rebuilt. This was a lot more confusing than I was expecting. To make matters worse, the original nose shape turned out to be really weird, so I won’t be using it as a template for the next build. I kept it for this lion frame though since I worked so hard on it and was recycling bamboo strips from the old nose.

Nose complete!

*edit* 7/22/2013 @6:45pm *edit*

Here’s a side view of the completed frame. By the way, some people are probably wondering what those black marks are on the joints. I use this marking system to keep track of which joints have been coated with glue and which joints are fresh.

Side view of the completed frame.


Lion Brothers Project – Eyelid, Left Cheek, and Fins

These past few days, I’ve been doing some small/miscellaneous repairs and modifications scattered throughout the frame.

First, I modified the eyelids by adding a piece of wire to hold the eyelid up while the eye is open. For some lions, this piece of wire is unnecessary – it all depends on the shape of the eyes. In the past, I’ve noticed that some Bak Wan replica lions have the droopy eye syndrome, where the eyelid covers a small portion of the eyeball.

Droopy eye syndrome on a Bak Wan replica.

Some people like this feature but I prefer the eyelids to be fully retracted when the eyes are open. I’m not sure if the shape of the eyes for this frame would produce the droopy eyelids, but I put the wire in there as a precaution. It’d be too much trouble to put the wire in after the eyelids have already been put on.

Eyelid wire suspended with string.

Next was the repair of the left cheek. The old cheek had some pieces of bamboo missing, so I just took it all off and rebuilt it from scratch. Splitting bamboo evenly was a challenge for me, so the middle piece is actually a lot thinner than the top and bottom pieces. Hopefully, it won’t bring any problems.

Front view of left rebuilt left cheek.

Side view of rebuilt left cheek.

Lastly, I repaired the two original fins and added a third fin. Oddly enough, the original lion only had two fins on top of the eye. Maybe I’m just used to seeing three fins, but I decided to add a third fin to this frame.

The two original fins were either crushed or misshaped.

Original fins repaired with the addition of a third fin.


Lion Brothers Project – Gill and Horn Reattachment

During the last week or so, I’ve been slowly repairing different parts of the frame. Last time, the left gill was taken off for repairs and the addition of three new fins. I did the same to the right gill and reattached both of them back onto the main frame.

Gills reattached.

I used some parts of the broken horn to build a new one and also reattached it back to the main frame.

Horn built from old parts.

Horn reattached to main frame.

Updates on the mouth and cheek area as I repair it!


Lion Brothers Project – The Beginning

The Lion Brothers project started in early June with the restoration/rebuild of a damaged frame that I got from a friend. I started by remounting the handlebars onto the base rim with plastic cable ties. Originally, the handlebars were attached by two pieces of wire with a thickness of around 14-16 gauge. Although this method holds the handlebars really securely initially, the hardness of the wire eventually digs into the softness of the wooden handlebars, loosening them from the base rim. Since plastic is much softer than metal, I opted for the cable ties instead. Also, the width of the cable ties spreads the force of the attachment over a larger surface area than the wires, which should minimize them from digging into the wood. Not to mention, plastic doesn’t rust like metal does.

Base rim with handlebars reattached.

There are two more things noticeable about the base rim. First, it is asymmetrical. I was thinking of ways to make it symmetrical again but couldn’t come up with anything. I decided to move on and hope for the best. So far, the asymmetry hasn’t given me any problems. Second, the corners were really thin compared to the rest of the base rim. I wrapped them with two layers of sports tape and brushed a layer of glue on it. Hopefully, this is enough reinforcement to keep the corners from cracking.

After the handlebars were mounted, I proceeded to reattach the rest of the frame onto the base rim. One of my mentors once told me that the key to a solid attachment is actually the vertical strips of bamboo folding back up around the base rim. Unfortunately, they were all broken off already. I improvised and used a second piece of bamboo to wrap around the vertical strips and base rim. Lots of sports tape and glue held everything in place.

Frame reattached to the base rim.

Because the mouth area was so damaged, I had to take off the nose to repair the mouth. The nose itself is actually damaged too, so I might just end up making a whole new nose for this lion.

Nose off for mouth repairs.

Repairing the mouth area is still not finished as of today. It’s pretty challenging since I have no reference/template to work off of. I had to look for hints of old attachment points, different lengths and areas of crossing, etc. Of course, there was also a lot of guesswork involved. I eventually got four of the main mouth supports on.

Mouth supports attached.

Next, I took off the left gill to repair the side of the mouth. Since the gill was off, I tightened all of the joints and added three fins to it.

Left gill off for mouth repairs.

Left gill with three new fins.

That’s it for now! More updates coming soon.


Illuminating Mirror

I actually started the Lion Brothers project earlier this month, but never had a chance to blog about it. Blog post on that coming soon!

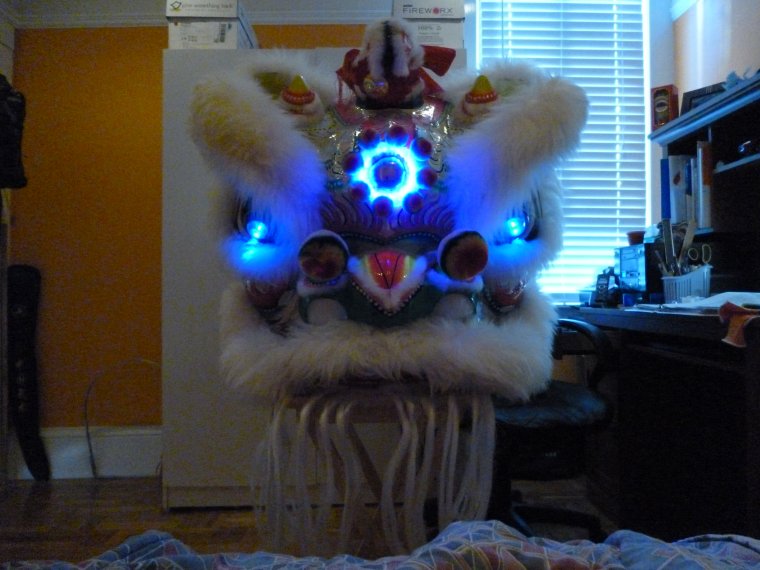
Anyway, here’s a little side project that I did today. Yup, I did it! Jumped on the illuminating mirror bandwagon. 😀 This trend is still not accepted by all lion dancers – people either love it crazily or hate it madly. In my opinion, if it’s done right, the illuminating mirror gives the lion some oomph. Some of the cheaper assembly-line lion heads have it, but the LED ring is clearly shown over the mirror! If hidden underneath a layer of rabbit fur, I think it looks much better. Check it out!

Illuminating mirror and lighting eyes.


What Now?

What Now?

I moved back home to San Francisco last month and have been searching for jobs, unpacking, reorganizing my room, cleaning up, etc. Now that Ace is done, what are my next lion projects? I’ve actually been thinking about it throughout these past few weeks and narrowed it down to three projects, but I’m not sure which I’ll be doing first and when I’ll be starting them.

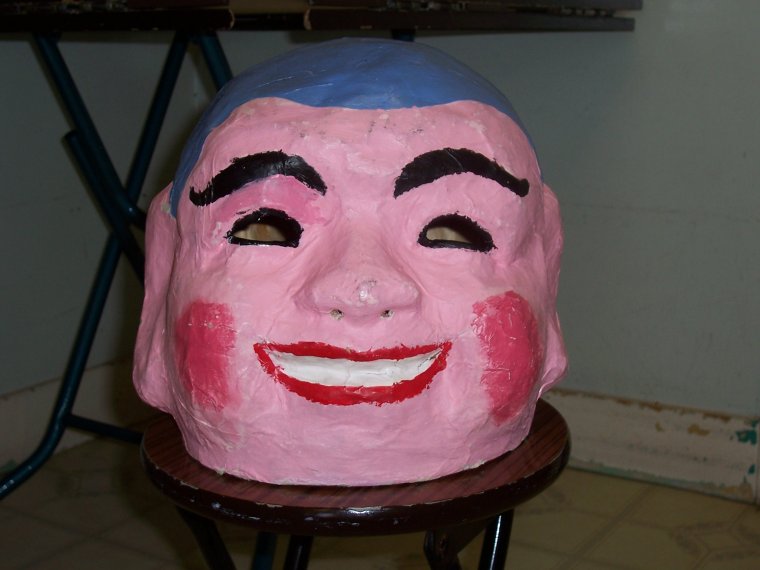
1. Buddha Head Restoration – My friend gave me this Buddha head in 2006. I forgot where he obtained it, but it was in terrible shape. I promptly started the project but never got around to finishing it.

When I first got it, the outside was poorly covered with many layers of brown paper bag material, resulting in a really rough surface. The paint job was also really sloppy.

The Buddha’s head when I first got it.

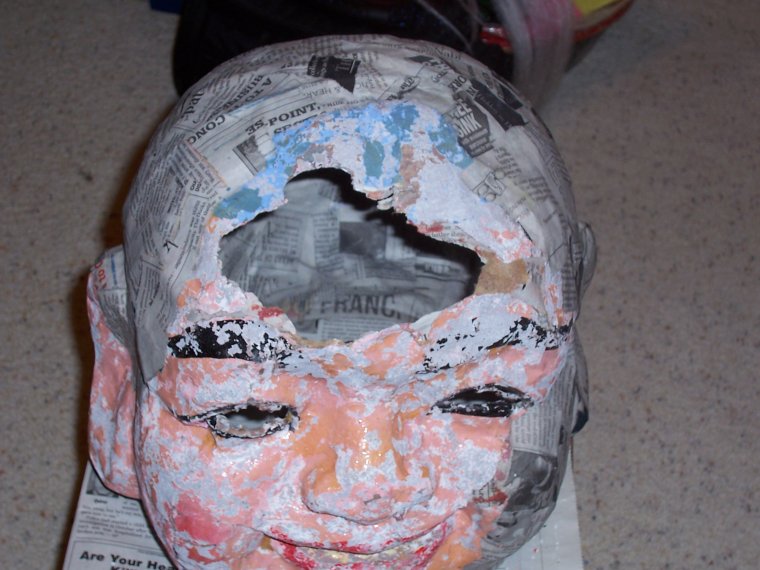
As I started tearing off the outside layers, the original mask was revealed. It seems to be a young Buddha head, but I’m not entirely sure. What shocked me the most was the “feature” on the forehead! 😯 I wonder what happened! I started pasting newspaper on the inside and outside to prevent anymore plaster from cracking off and making a mess.

Had a lobotomy?

To fix the hole, I blew up a balloon and stuck it inside the head so there was a template of the contour. I pasted more newspaper over the balloon to patch the hole and popped the balloon afterward. Plaster was spread all over the surface. I started sanding but never got around to finishing it. Here is how it looks right now:

Where the project currently stands.

A bit freaky, ey?

2. Baby Lion Restoration – My girlfriend has a baby lion just sitting around in her house. It was her childhood toy, although she doesn’t remember playing with it at all. It looks used, but the condition is still pretty good for its age. We’re planning to restore it completely and give it a lavender/blue-colored theme.

My girlfriend’s baby lion.

3. Lion Brothers Project – Probably the most ambitious project so far. The project will consist of rebuilding a frame that completely lacks the mouth area and building a frame from scratch. For the rebuild, most of the frame is still in pretty good condition, but the mouth area was completely destroyed and practically nonexistent. I already took the frame off the base rim to reattach the handlebars. After rebuilding the frame, I will use it as a template to build another frame from scratch. It will start from a salvaged aluminum base rim that I acquired.

The two rims being prepped.

This frame needs a completely new mouth!

Updates soon!


Ace Restoration – Overview and Final Comments

After something like six long years, I’ve finally completed the restoration of Ace on April 24th, 2013. It was definitely not a piece of cake! Initially, I said it probably took about 60 or so hours for this entire project, but that was an underestimate. Now that I think about it, I probably spent over 100 hours.  With that amount of time comes many things learned from this project – both things I would and wouldn’t do again. In the first part of this blog, I’ll give an overview of the project. In the second part, I’ll give some final comments about the restoration, including the things that I wouldn’t do again for my future projects. The third part will be about some fun events with Ace. Let’s get started!

When Ace was first handed to me, the right side of the frame was completely off the base and the damage extended upward toward the cheeks and to the back near the gills.

Ace when I first got him. Notice how the mouth area is sinking toward the bottom due to the broken frame.
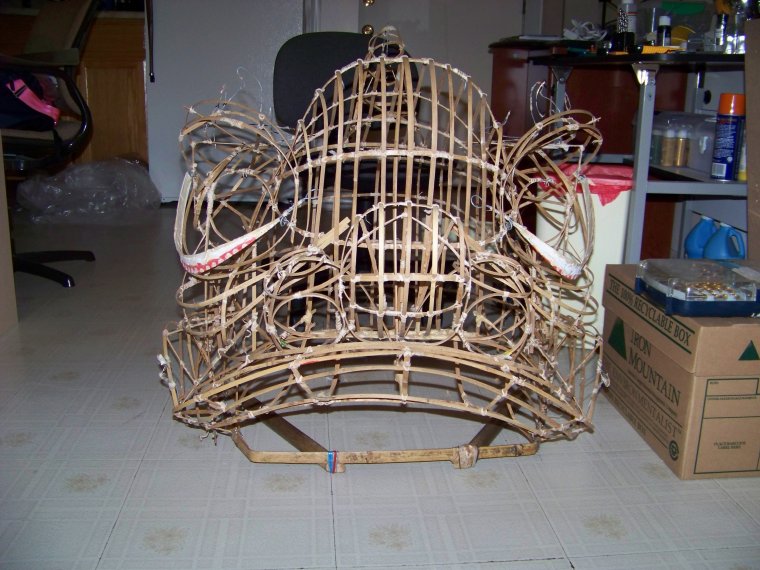
In the process of repairing Ace’s frame.

Notice the detachment even though I already started repairs.

This was one of the most troublesome parts of the project for me, since I didn’t have much experience fixing framework at the time. It took me quite a long time to figure out how everything was supposed to go back together, much like a puzzle.

After fixing the frame came the longest and most tedious part of any lion building/restorations – paper mache. Like Chris Low once said, “lather, rinse, and repeat” pretty much describes this step.

Front view of Ace papered, excluding the top fins.
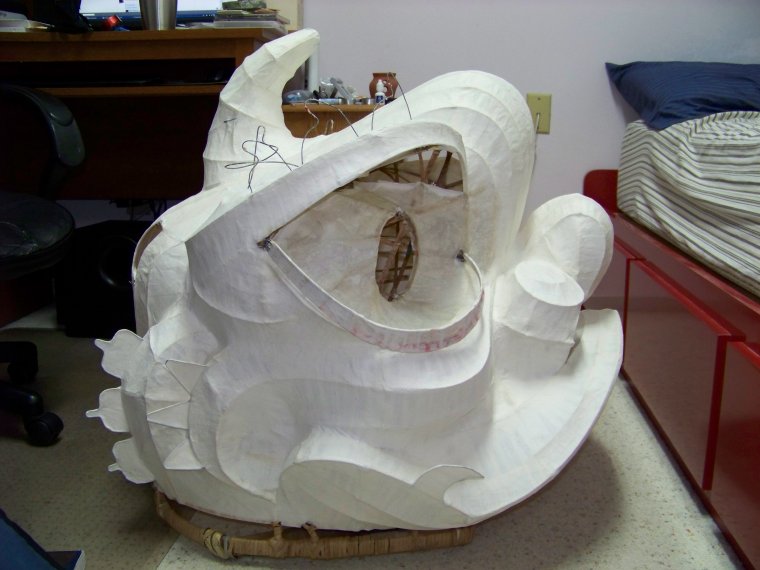
Side view of Ace papered, excluding the top fins.
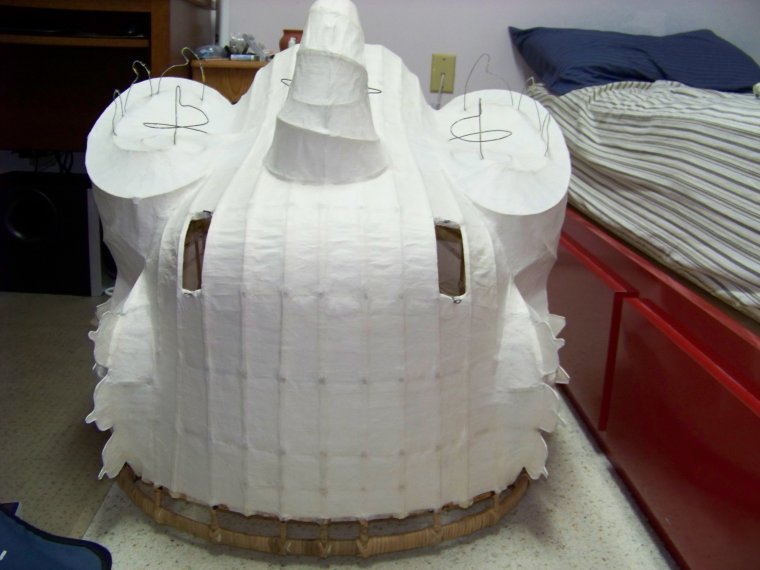
Back view of Ace papered, excluding the top fins.

Top fins papered.

What I did next is something that I didn’t tell many people until recently – automotive body filler. This step was probably even more tedious than the paper mache. One of my mentors told me that some traditional craftsmen back in the day put a really thin layer of plaster over the paper to make the surface smooth. I was taking auto-body repair classes at the time and got the idea of using a thin layer of automotive body filler instead. Boy, was that a bad idea! More on that later. After the body filler step, I glued the relief patterns with rope and pasted grass paper over everything. I then sealed the inside and outside of the lion with sealer-primer and painted a base coat of white. The lion was now ready for the colors and designs!
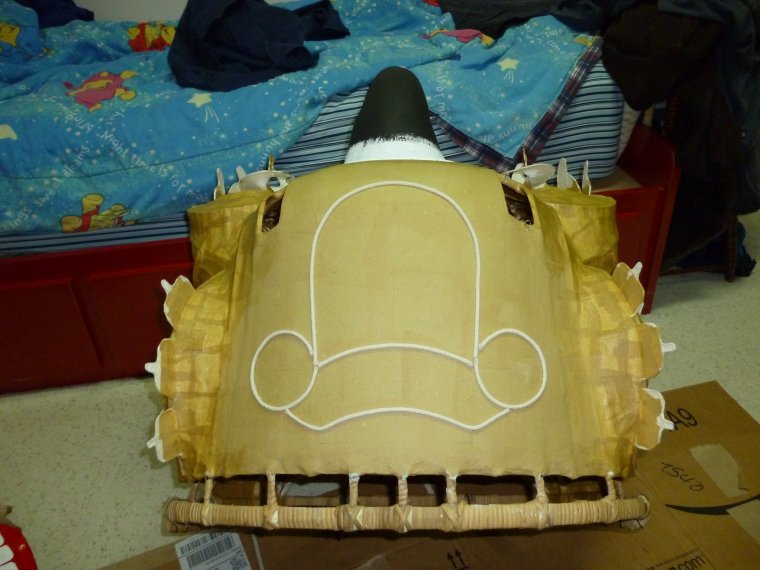
Grass paper over body filler with relief patterns made from rope.

For some reason, my favorite part to paint is the horn area, so I always do that first.

Painting around the horn. Note how the body filler makes a smooth surface.

Skip to several years later, I finally finished painting Ace. A gloss coat was put over the entire head to seal the paint, then embellishment began! A white rabbit fur pelt was cut into quarter-inch strips for various decorations around the head. Half-inch wide metallic gold gimp trim was used to cover the rabbit fur edges. I cut off the sharp part of brass thumbtacks to use the head as metal disks, which were glued around various locations on the lion. White bristle hair was attached by my friend, Andy Ta, since my fingers were cracked and bleeding from all the previous work. Silk balls were attached on their corresponding fins. Unfortunately, I got the silks balls secondhand and there weren’t enough for every single fin. Instead, I glued a metal disk on the inner gill fin tips.
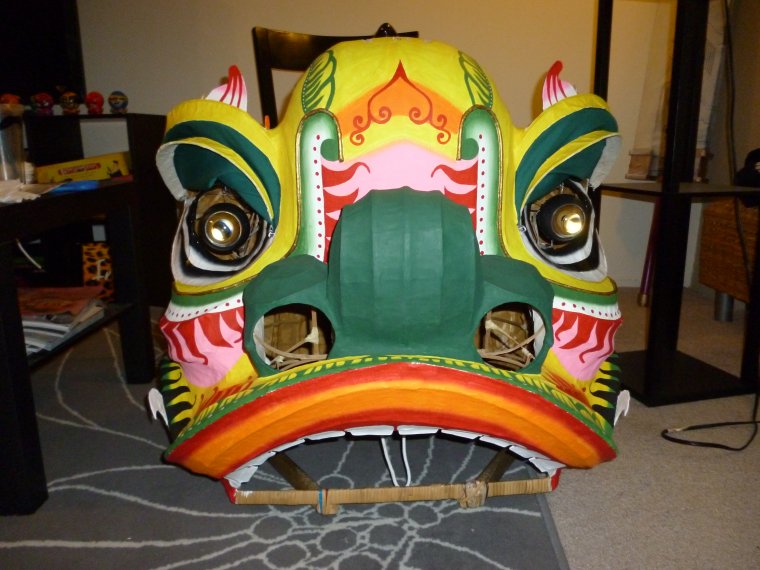
Finished painting Ace!

Rabbit fur and metal disks glued on, bristle hair attached.
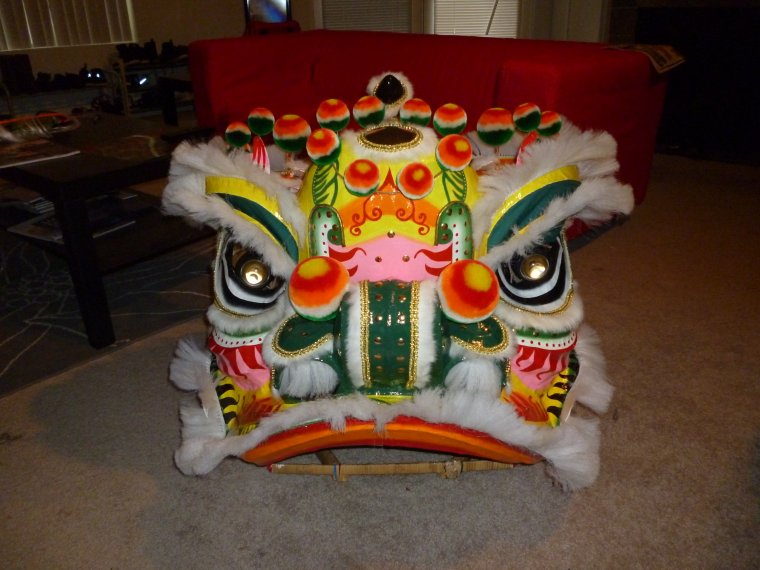
Silk balls attached!

Silk balls attached on the three hind fins. Metal disks in place of silk balls for the triangular fins.

Next, I mounted the mouth and the ears. I worked on these two parts separately as a break from the main lion frame. For the beard, I bought ten 1-inch wide hair extension clip-ons and cut off the clip. I glued each strip side by side on the lip and glued trim over the glued edges. This is another step that I would modify for my next projects.
Ears mounted.

Completed mouth.

Ace’s beard. Notice how thin it is compared to other beards. Taking that into consideration for future projects.

Ace COMPLETE! Image taken by Chris Low.

Here are some shots from various angles.

Ace from a front-side angle.
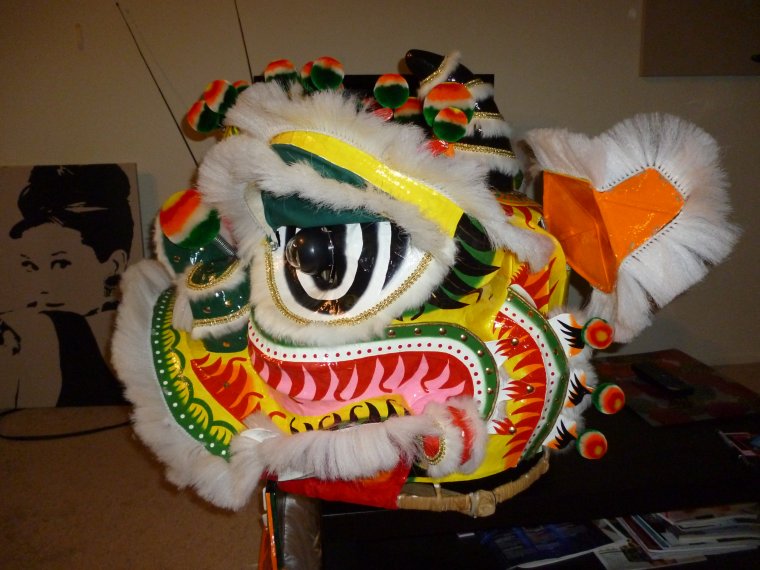
Side view of Ace.

Back view of Ace.
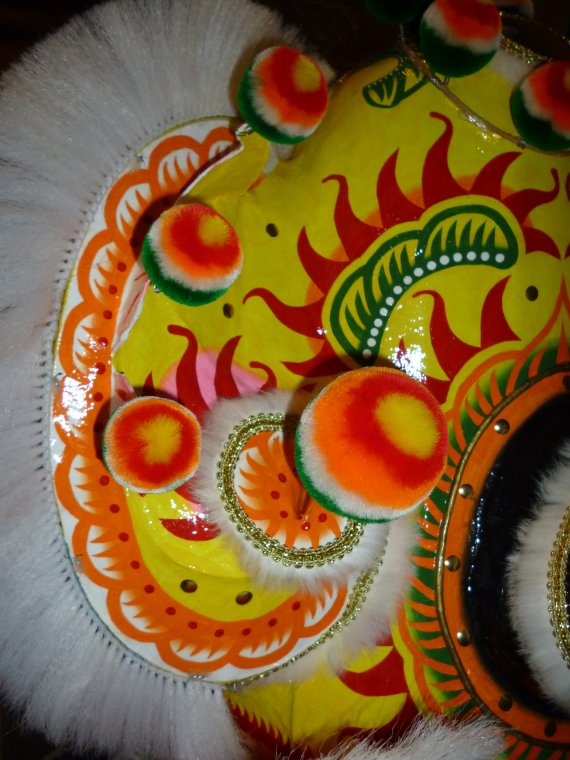
Pattern above the eye.

Completed horn area.

Here are some before and after pictures!

Before and after, front view.

Ear, before and after.
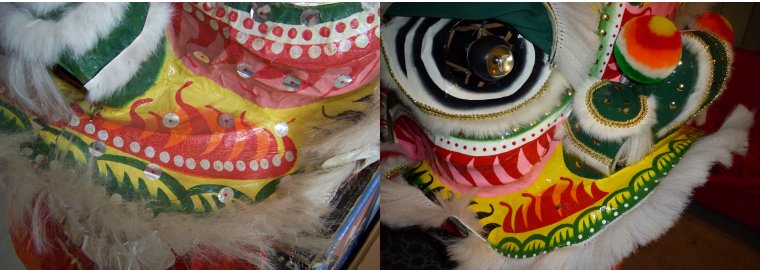
Above the mouth, before and after.
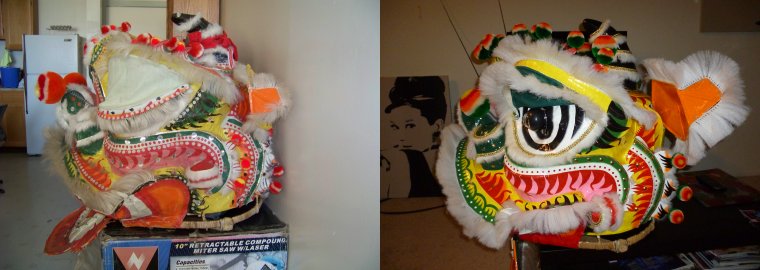
Side view, before and after.
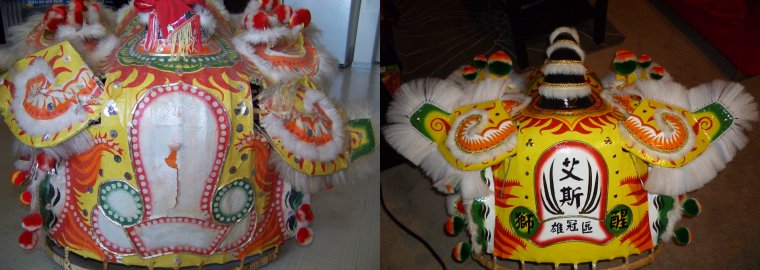
Back view, before and after.

Overall, this was a really nice project for me. It was the first full restoration of an adult-sized lion that I’ve ever done.  Previous projects were either full restorations of baby lions or steps of a larger restoration. I definitely learned a lot of things! Here’s a compilation of all the things I wouldn’t do again (in case anyone want to avoid it too).

  • No more masking tape for binding. That stuff loses its adhesive properties over time and becomes crusty. I really like Thomas’ idea of using first aid/sports tape as a binding medium, so I’ll be using that from now on.
  • No more body filler, EVER! That was probably my biggest regret of the entire project. Yes, it is tough stuff, but when it goes on too thick, it cracks very easily. It was very hard for me to spread a thin and even layer of body filler, since the stuff is like watery clay. Not only that, sanding it was a pain in the butt! I spent MANY hours sanding that stuff. The sanding dust is toxic, so I had to wear a respirator when work with it. After sanding, more body filler was spread on to fill in the small dips and holes. And then more sanding…repeat… Oh yea, I had to use a rotary tool to cut holes for mounting the mirror and some of the bristle hair. Because of the body filler, it took me an unnecessary four hours to mount the mirror.
  • No more cheap paints. I was forced to use it because of the allowed budget, but never again for my personal projects. Most colors took at least 2 coats for full coverage, which was a complete waste of time on my part.
  • No more Americana triple thick gloss glaze for the final gloss coat. Yes, it gives a super shiny glossy look, but applying it took way more time than necessary. It’s so thick that brushing it on was kind of like brushing honey onto a lion head. Imagine that…
  • This is minor, but if I could, I would use 3/8th inch gimp trim next time. I bought a roll of gold gimp trim on eBay that was listed as 3/8th inch, but when it came, it was half an inch! I still used it anyway, and the overall effect wasn’t too bad.
  • For the beard, I really liked the feel of the artificial human hair. Next time, I will try to get that material in bulk and maybe tie my own beard. The gluing method may not be as strong as the traditional method of attaching the beard using wire.
  • The pillow’s size was a huge mistake. I made it a bit too tall, which got in the way of the ears hoops that connect to the rope and elastic. This made the ears point outwards all the time.
  • The LED’s in the lighted eyes weren’t aligned. One was pointing downward more than the other, resulting in an uneven look. Next time, I will try using Chris Low’s method or devise my own.

On April 25th, Andy and I went to Chris Low’s house with Ace to have a little photo session with his lions! Soon after, his kids also jumped in.

Chris Low’s Lo An Kee restoration and Ace. Image taken by Chris Low.

Chris Low, a hobo (just kidding, it’s me), and Andy. Image courtesy of Chris Low.

Horse stance! Image courtesy of Chris Low.

Three generations of lion dancers. Image courtesy of Chris Low.
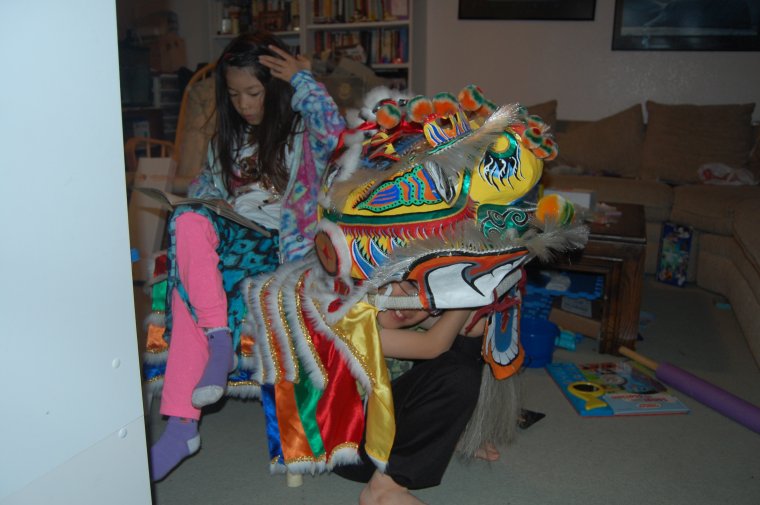
How comfortable! Image courtesy of Chris Low.

Posing with Ace. Image taken by Chris Low.

On April 26th, I brought Ace back to UC Irvine’s Southern Young Tigers during one of their practices. A Hoi Gwong ceremony was planned for that day, which featured Ace and another one of their new modern Fut San lions.
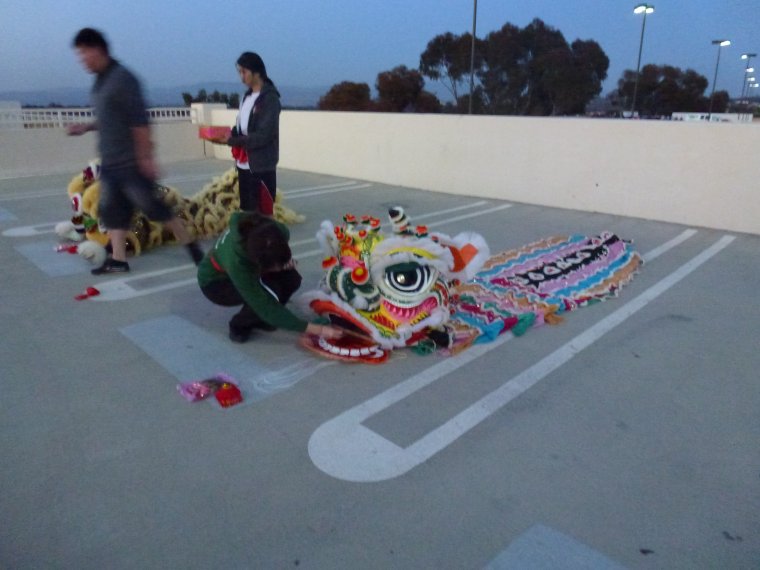
Eye-dotting the lions.
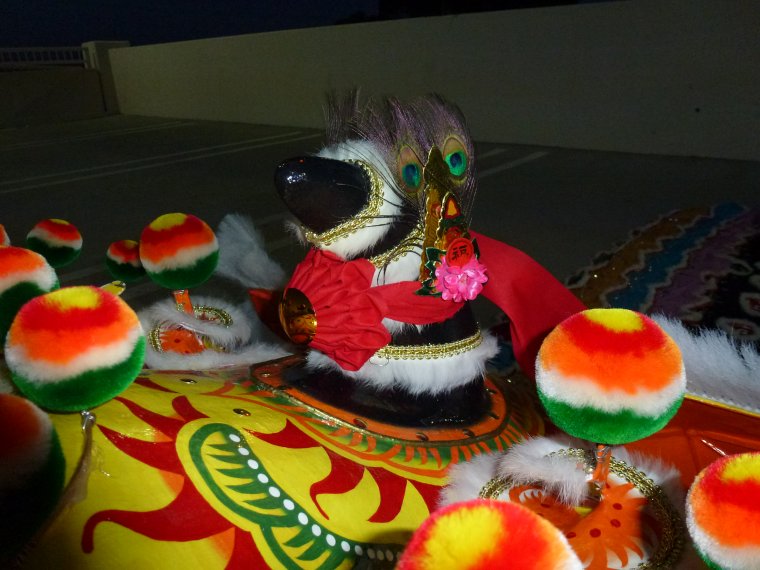
Ace adorned with golden flowers and red ribbon.

The saddest part of the night was when I realized that I spent 6+ years working on Ace, but I had to give it back not even a week after I finished him. There are a lot of memories attached to Ace that I will never forget.

Good bye, Ace.

Special thanks to my girlfriend, Annie Ngai, for helping me paint some parts of the lion and my good friend, Andy Ta, for helping me with the ornamental balls and attaching the bristle hair.
Ace Coming Together!

Ace is finally coming together! I’ve been making a lot of progress over this past week but haven’t updated on it, so here they are!

Saturday – April 20th

Ace’s ears were fully assembled and embellished. I spent the previous few days putting a gloss coat on everything and preparing the embellishments.

Ace’s ears are complete!

Close-up shot of right ear.

I also finished the mouth on Saturday.

Ace’s mouth complete!

Ace’s beard. A little thin this time around so I’ll be changing the way I do it for my next project.

Sunday – April 21st

Ace’s nose was finished. I glued rabbit fur strips, braided trim, and metal discs on it.

Front view of completed nose.

Side view of completed nose.

I also glued metal discs around the entire lion. Many had patterns, but some were just random.

Metal disc pattern along green strip.

Metal disc patterns on front.

Metal discs around horn.

Monday – April 22nd

It took me a horrendous 4 hours to mount the mirror because a lot of complications came up.

Mirror mounted and embellished!

I also glued rabbit fur and braided trim around the horn.

Completed horn.

My friend, Andy Ta, also helped me put on the bristle fur for the lion. A special post about him coming soon! 😀

Mounting the bristle fur.

I also glued rabbit fur and braided trim for the lower eye.
Ace’s lower eye area has rabbit fur instead of bristle fur.

All the bristle fur on!!

This is how Ace looks currently. I know I didn’t meet the Sunday deadline for finishing him, but I’m hoping to finish by Tuesday! Good luck to me, I guess.


Finished Painting Ace!

I’ve finally finished painting Ace. I set the due date for Sunday, but finished one day late. It’s okay though!

After a gloss coat, I will be able to start accessorizing. I’m hoping to finish the entire lion by the end of the week, on 4/21. Let’s see if I can do it!

Here are the pictures of Ace’s paint job.

Front view.

Angled view.

Side view.

Back view.

Top view.

More updates coming soon! Stayed tuned!