Monthly Archives: July 2013

Lion Brothers Project – Blossom and the 2nd Part

You guys are probably wondering why the title says “blossom”, huh? Here’s a sneak peak of the prototype I’m working on that will be part of the lion frame that I’ve already finished.

Glowing Blossom

The first part of the Lion Brothers Project will be now officially named “Blossom”. The rest of the explanation will remain a mystery until I’m done with the entire lion head. 😉

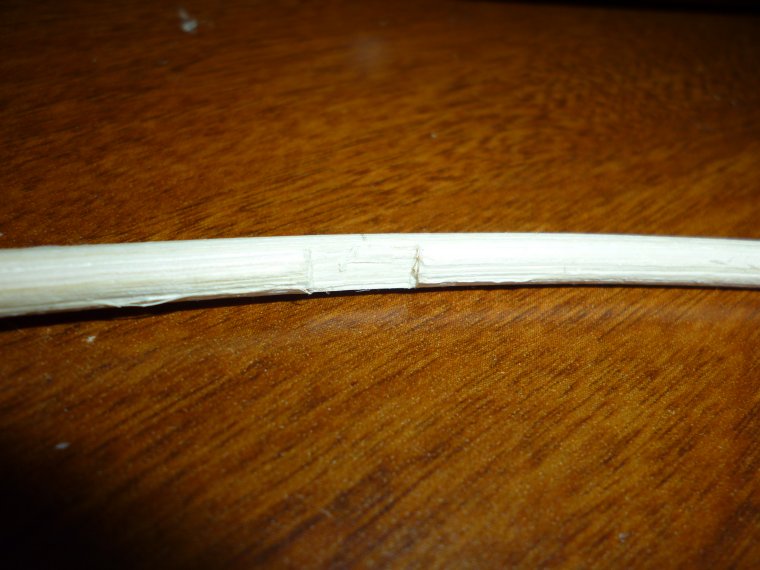
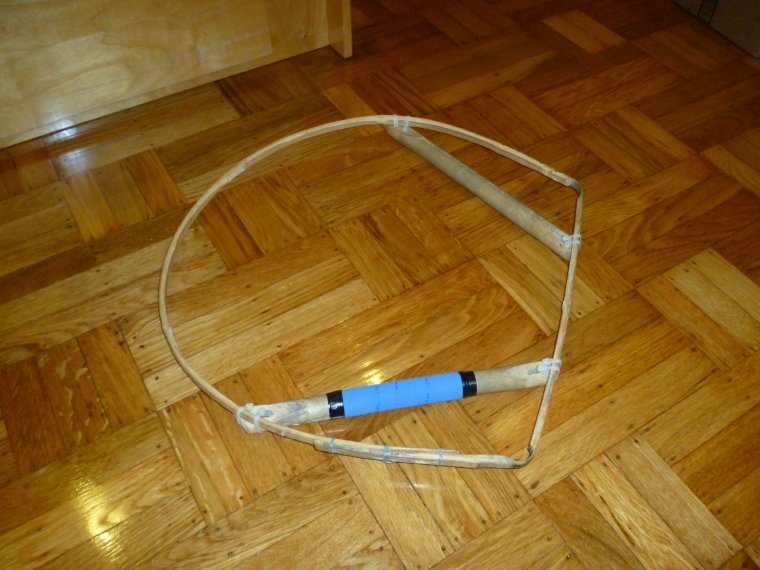
As for the 2nd part of the Lion Brothers Project, I’ve already begun building the lion from scratch. Mad respect to those who have already built one from scratch – it is indeed very challenging. I started by cutting handlebars from an old broomstick and attaching them to the salvaged rim I acquired.

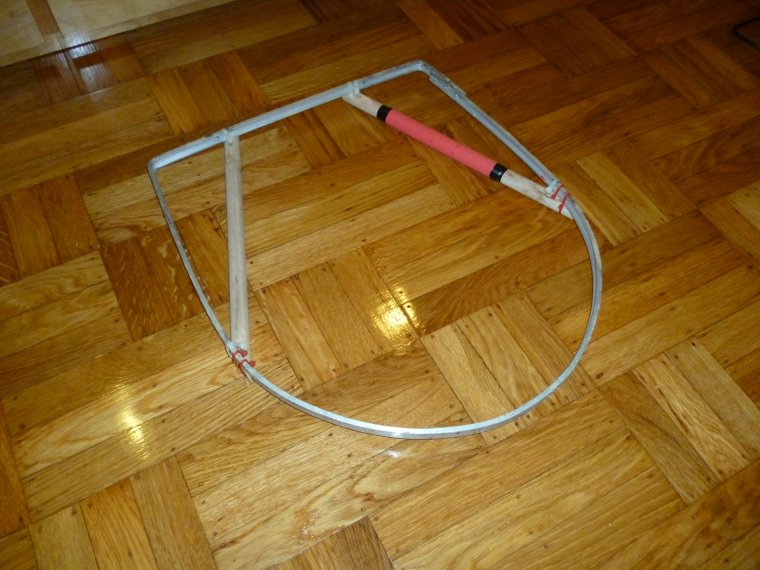
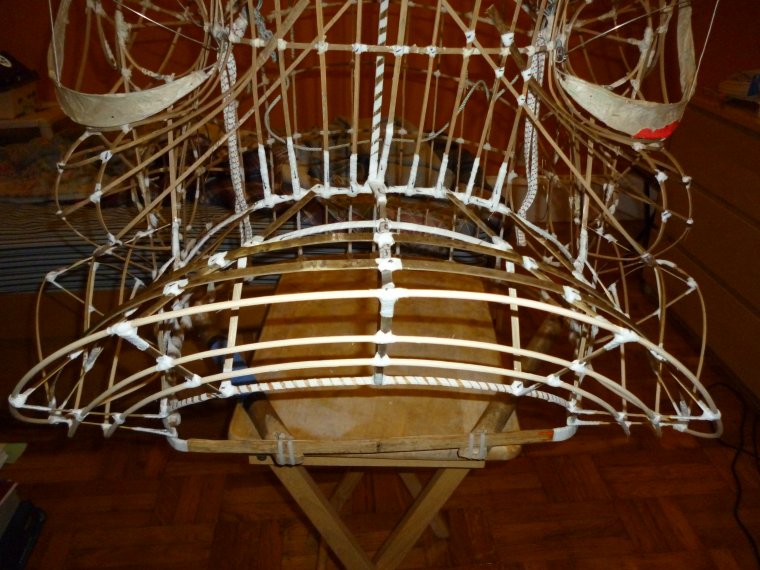
Base rim with handlebars attached. Can anyone guess the color scheme of this lion?

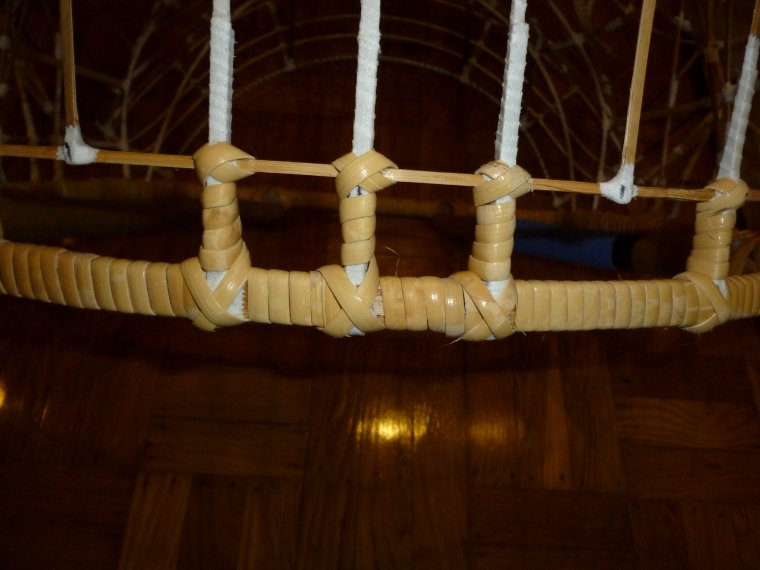
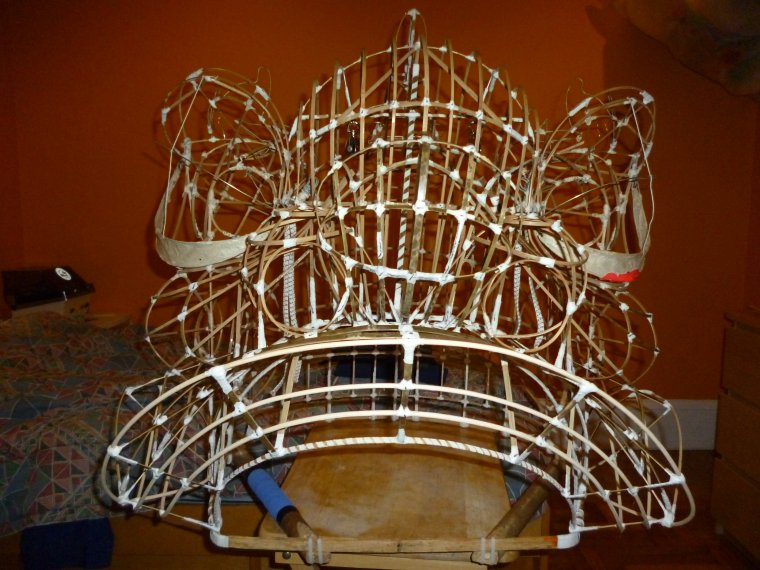
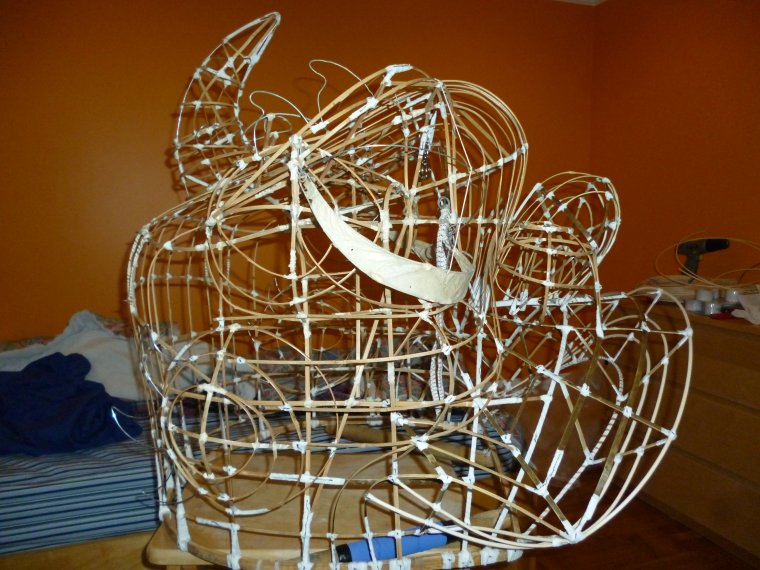
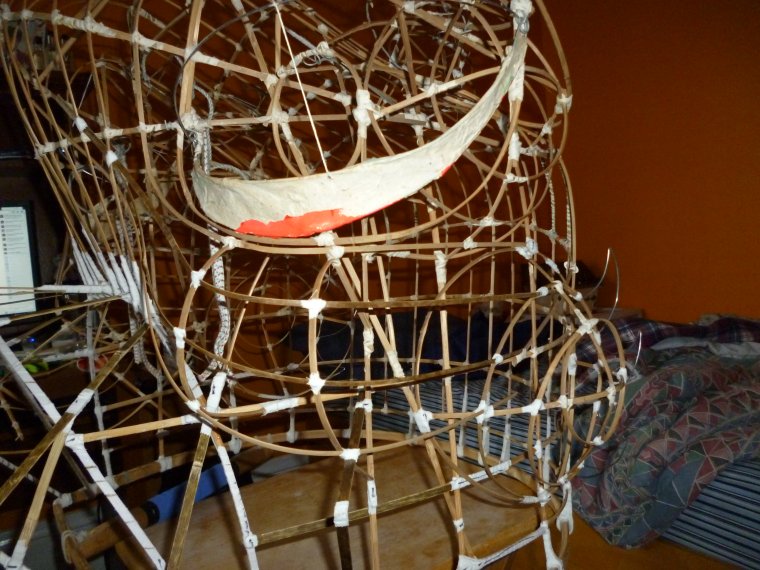
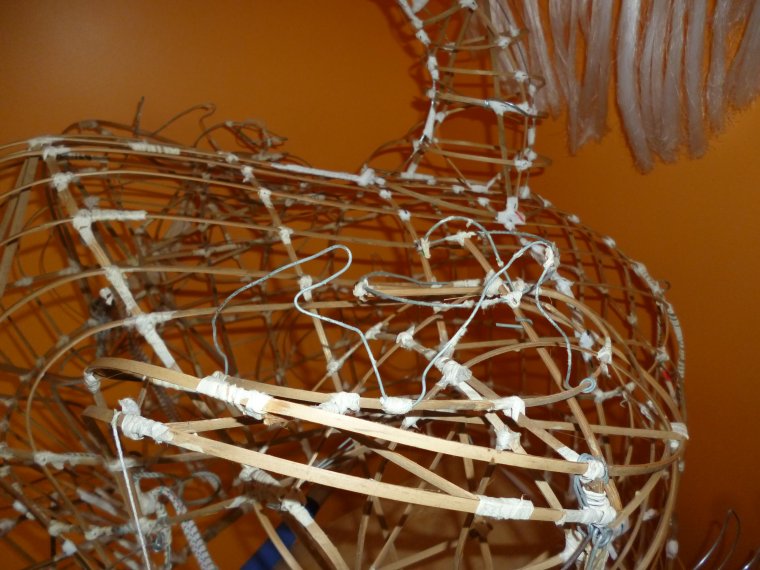
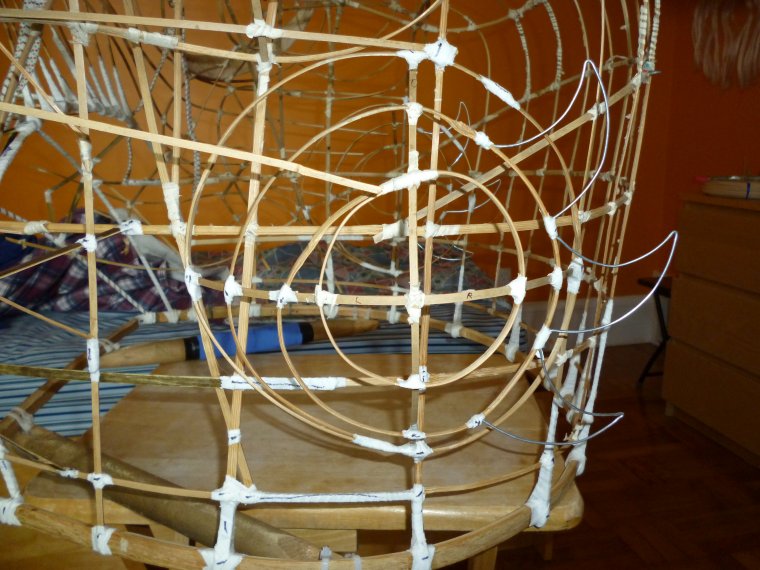
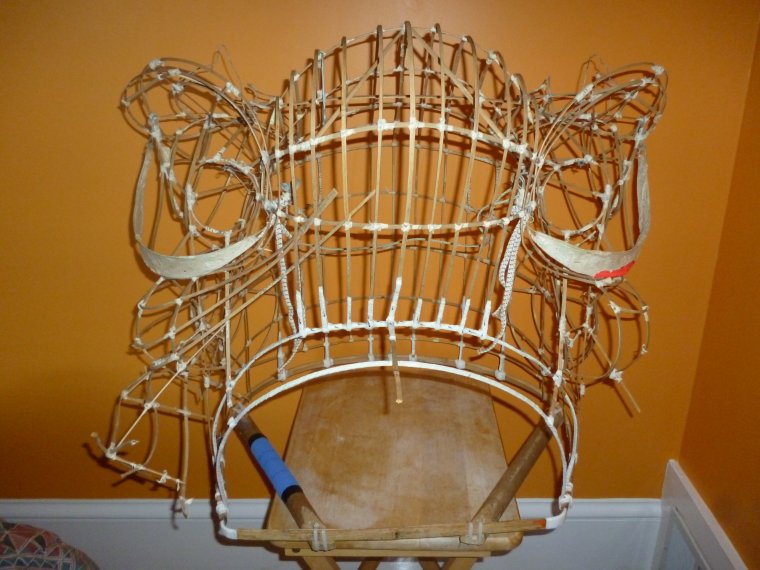
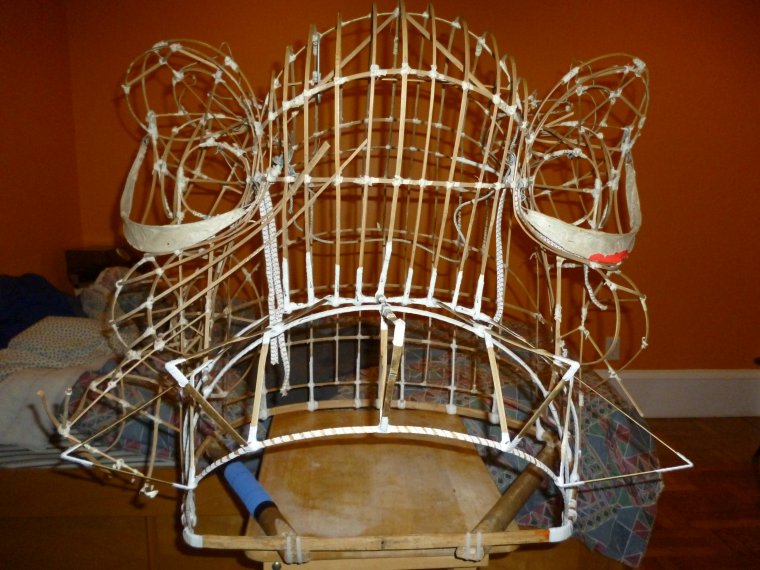
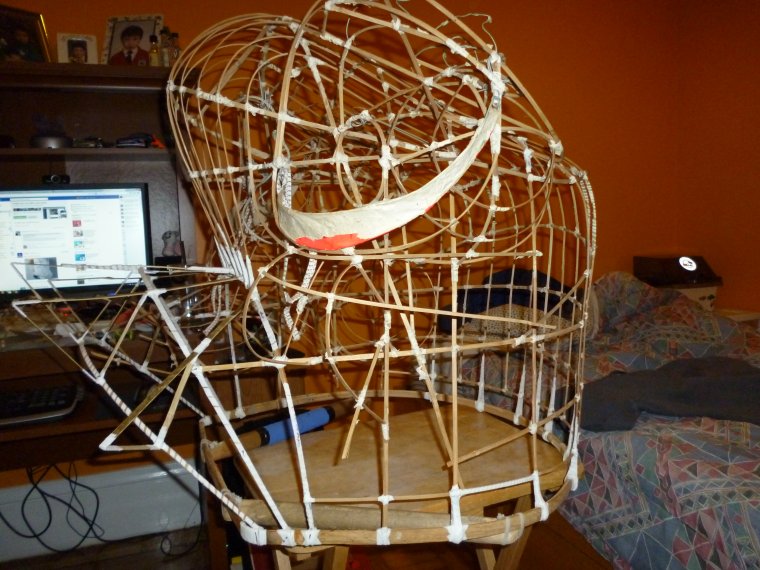
I then started adding bamboo strips to form the basic shape. This part was the most challenging so far, because each strip I added changed the shape of the previous strip. That is when Chris Low mentioned the A frame/inverted V frame. It is supposed to temporarily keep the bamboo pieces in the right shape until enough strips are put on so it can hold its own shape. It can also help with keeping the frame symmetrical. This method was actually mentioned to me a long time ago but I completely forgot about it! Hope the shape comes out okay without the A frame/inverted V frame.  Here is a picture of what I’ve done for the first two days:

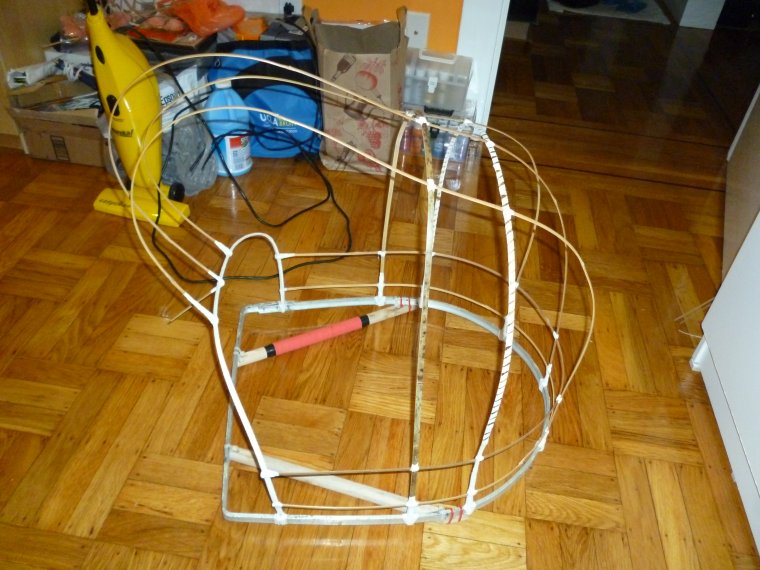
Two days worth of work

More updates coming soon!


Lion Brothers Project – Wrapping the Base

I spent several hours today wrapping the base with cane/rattan. This step is actually really important because it keeps the handlebars tight and the lower joints secure. You can probably tell that I’ve only done this once in the past from the messiness in the picture below. Practice makes perfect! Hopefully, it’ll be neater on my next one.

Base all wrapped up!


Lion Brothers Project – Pulley System, Mouth and Nose

I’m pretty much done with the lion frame! There are a few pieces of bamboo I want to add and some fins to modify. I also need to make the ears and lip, but other than that, the frame is finished.

After finishing the fins last week, I decided to repair the cross brace inside the lion and install a pulley system for the blinking eyes. Installing the pulley system was actually a really helpful tip given to me by my mentor, Corey Chan, many years ago, but I’ve started seeing pulley systems being installed in lions made by Emplion. The pulleys reduce friction between the wire loops and rope, which in turn prevents the eye-blinking ropes from snapping during a performance. It also allows for a faster, sharper blink. At 2-3 dollars a pulley, it’s a really good investment.

Pulley system installed.

Next, I started working on rebuilding the mouth. Since the mouth was practically nonexistent when I got the lion frame, I had a really hard time trying to figure out the proportions and measurements. In the end, I decided to just wing it and rebuild the mouth by improvisation. It turned out okay, so I’m glad!

I decided to use rattan for some pieces of the mouth, since some of the bends would have been a little harsh for the thick bamboo strips. Plus, I had a whole coil of rattan lying around! Here’s something I figured out though: cutting a small groove in the rattan will keep it from slipping while binding. It also increases the surface area of contact, which I’m assuming would give a stronger joint. I only cut a groove for the more important joints that are prone to slipping, since it’s quite time consuming to do it for every single joint.

Cutting a groove in the rattan prevents slipping of the joint while binding.

Side of the mouth.

Front of the mouth.

Lastly, the nose was rebuilt. This was a lot more confusing than I was expecting. To make matters worse, the original nose shape turned out to be really weird, so I won’t be using it as a template for the next build. I kept it for this lion frame though since I worked so hard on it and was recycling bamboo strips from the old nose.

Nose complete!

*edit* 7/22/2013 @6:45pm *edit*

Here’s a side view of the completed frame. By the way, some people are probably wondering what those black marks are on the joints. I use this marking system to keep track of which joints have been coated with glue and which joints are fresh.

Side view of the completed frame.


Lion Brothers Project – Eyelid, Left Cheek, and Fins

These past few days, I’ve been doing some small/miscellaneous repairs and modifications scattered throughout the frame.

First, I modified the eyelids by adding a piece of wire to hold the eyelid up while the eye is open. For some lions, this piece of wire is unnecessary – it all depends on the shape of the eyes. In the past, I’ve noticed that some Bak Wan replica lions have the droopy eye syndrome, where the eyelid covers a small portion of the eyeball.

Droopy eye syndrome on a Bak Wan replica.

Some people like this feature but I prefer the eyelids to be fully retracted when the eyes are open. I’m not sure if the shape of the eyes for this frame would produce the droopy eyelids, but I put the wire in there as a precaution. It’d be too much trouble to put the wire in after the eyelids have already been put on.

Eyelid wire suspended with string.

Next was the repair of the left cheek. The old cheek had some pieces of bamboo missing, so I just took it all off and rebuilt it from scratch. Splitting bamboo evenly was a challenge for me, so the middle piece is actually a lot thinner than the top and bottom pieces. Hopefully, it won’t bring any problems.

Front view of left rebuilt left cheek.

Side view of rebuilt left cheek.

Lastly, I repaired the two original fins and added a third fin. Oddly enough, the original lion only had two fins on top of the eye. Maybe I’m just used to seeing three fins, but I decided to add a third fin to this frame.

The two original fins were either crushed or misshaped.

Original fins repaired with the addition of a third fin.


Lion Brothers Project – Gill and Horn Reattachment

During the last week or so, I’ve been slowly repairing different parts of the frame. Last time, the left gill was taken off for repairs and the addition of three new fins. I did the same to the right gill and reattached both of them back onto the main frame.

Gills reattached.

I used some parts of the broken horn to build a new one and also reattached it back to the main frame.

Horn built from old parts.

Horn reattached to main frame.

Updates on the mouth and cheek area as I repair it!


Lion Brothers Project – The Beginning

The Lion Brothers project started in early June with the restoration/rebuild of a damaged frame that I got from a friend. I started by remounting the handlebars onto the base rim with plastic cable ties. Originally, the handlebars were attached by two pieces of wire with a thickness of around 14-16 gauge. Although this method holds the handlebars really securely initially, the hardness of the wire eventually digs into the softness of the wooden handlebars, loosening them from the base rim. Since plastic is much softer than metal, I opted for the cable ties instead. Also, the width of the cable ties spreads the force of the attachment over a larger surface area than the wires, which should minimize them from digging into the wood. Not to mention, plastic doesn’t rust like metal does.

Base rim with handlebars reattached.

There are two more things noticeable about the base rim. First, it is asymmetrical. I was thinking of ways to make it symmetrical again but couldn’t come up with anything. I decided to move on and hope for the best. So far, the asymmetry hasn’t given me any problems. Second, the corners were really thin compared to the rest of the base rim. I wrapped them with two layers of sports tape and brushed a layer of glue on it. Hopefully, this is enough reinforcement to keep the corners from cracking.

After the handlebars were mounted, I proceeded to reattach the rest of the frame onto the base rim. One of my mentors once told me that the key to a solid attachment is actually the vertical strips of bamboo folding back up around the base rim. Unfortunately, they were all broken off already. I improvised and used a second piece of bamboo to wrap around the vertical strips and base rim. Lots of sports tape and glue held everything in place.

Frame reattached to the base rim.

Because the mouth area was so damaged, I had to take off the nose to repair the mouth. The nose itself is actually damaged too, so I might just end up making a whole new nose for this lion.

Nose off for mouth repairs.

Repairing the mouth area is still not finished as of today. It’s pretty challenging since I have no reference/template to work off of. I had to look for hints of old attachment points, different lengths and areas of crossing, etc. Of course, there was also a lot of guesswork involved. I eventually got four of the main mouth supports on.

Mouth supports attached.

Next, I took off the left gill to repair the side of the mouth. Since the gill was off, I tightened all of the joints and added three fins to it.

Left gill off for mouth repairs.

Left gill with three new fins.

That’s it for now! More updates coming soon.