The martial arts is steeped in traditional gender biases.
Sara Lai here tells her experience of being a female lion dancer. Thank you for sharing, Sara.
The martial arts is steeped in traditional gender biases.
Sara Lai here tells her experience of being a female lion dancer. Thank you for sharing, Sara.
Happy Year of the Fire Monkey everyone!
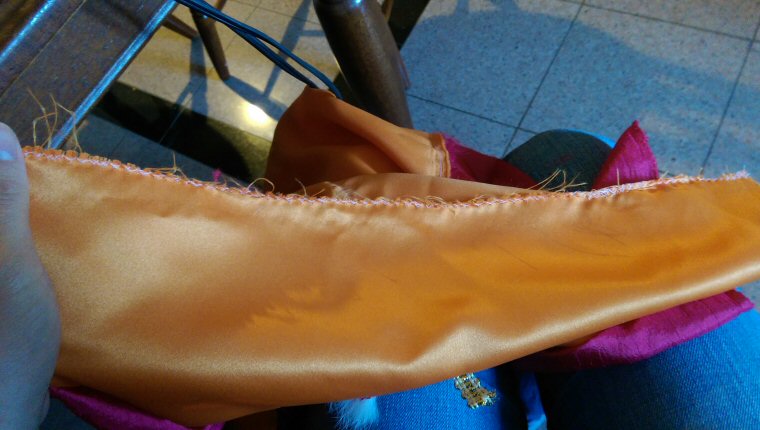
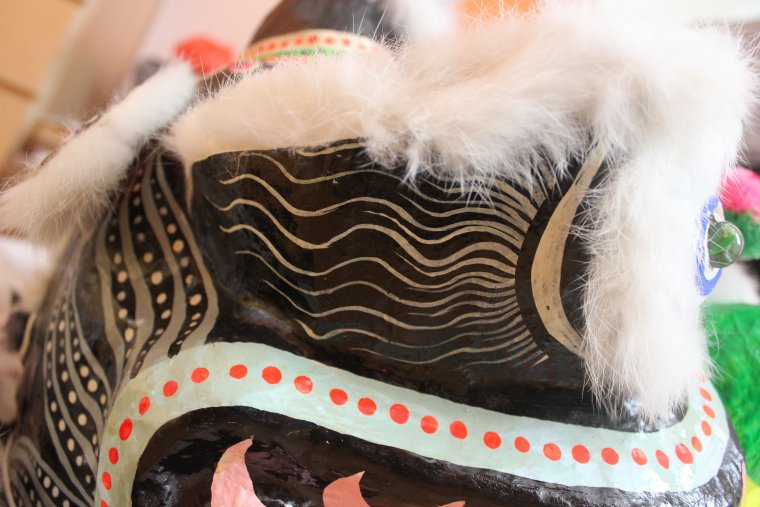
Remember last year when Annie brought her baby lion to La Joya for a parade through her school? Well, we didn’t eye-dot the lion before she brought it out and her cell phone took a huge blow to the concrete floor rendering it useless. Whether or not it was bad luck caused by the unblessed lion we will never know! But this year, we decided to perform a makeshift Hoi Gwong ceremony for her lion before the parade in case it decided to curse her cell phone again. Since Hoi Gwong ceremonies take quite a bit of effort, we decided to eye-dot my baby lion too. This way, she can bring two lions to her classroom for more fun! But before that could happen, we needed to sew a new tail for my baby lion.
Let’s rewind about a decade to hear the story about my baby lion.
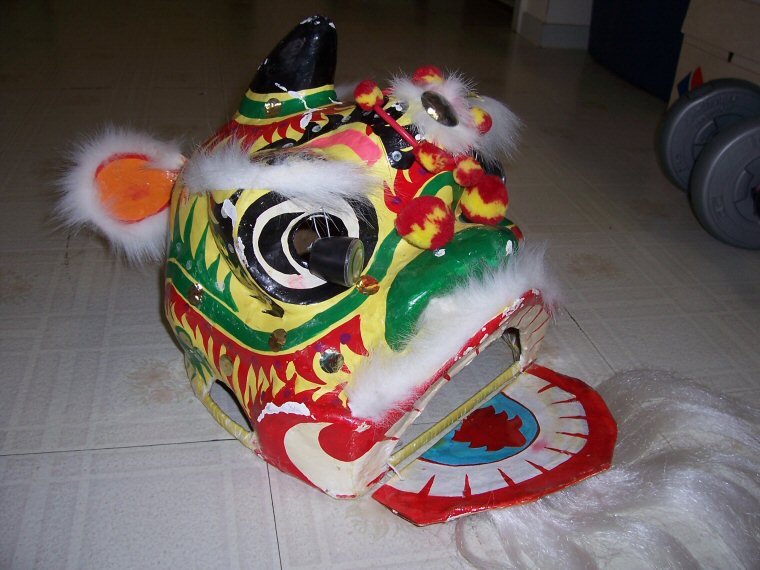
How my baby lion originally looked
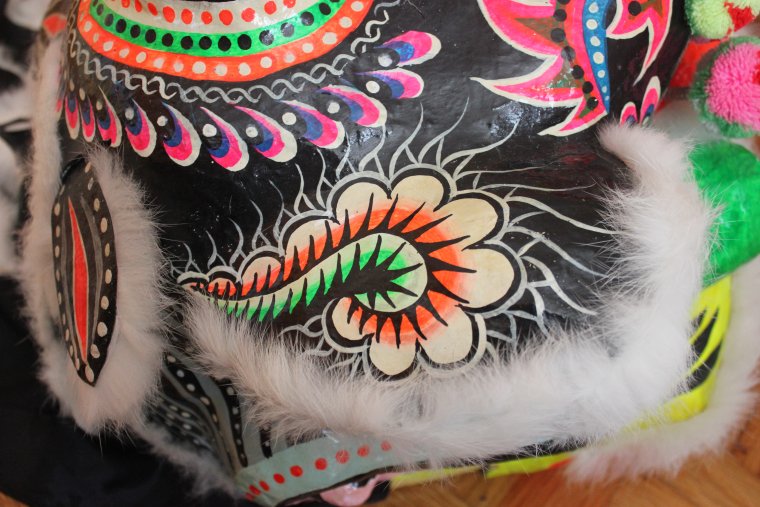
I got this lion when I was nine years old during my first trip to China. It was my first lion head ever and I took great care of it, but after a few years it started chipping. When I was fifteen years old, I decided my first ever lion project would be to repaint this baby lion to an orange color. Of course, the original tail didn’t match the new paint job, but I didn’t know how to sew a new one. After I finished painting it, the lion was mostly hidden away unused in a plastic bag.
New orange and gold design

Side view
Fast forward to now, Annie knows how to sew! So we set out to sew an orange lion tail to match the orange paint job before we would bless both baby lions at the same time. Actually, she did most of the work (probably more like all of the work haha) since I have no clue about sewing! The whole project took about ten hours. Thank you Annie for all the hard work!

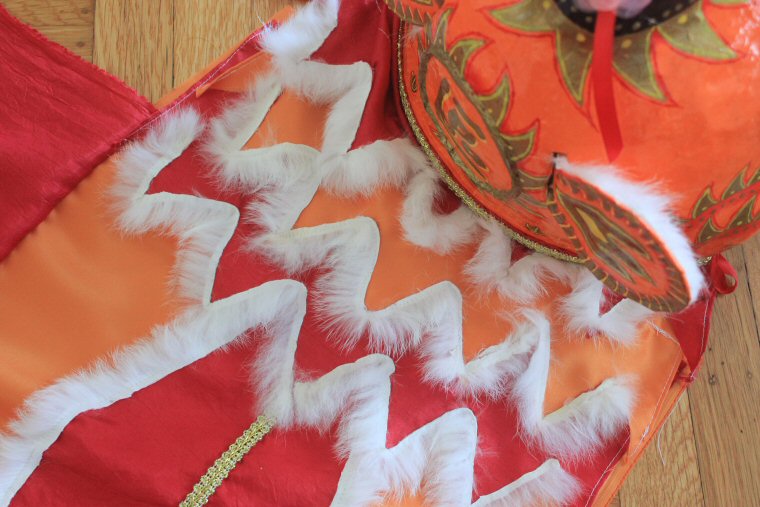
Planning and cutting the tail pieces
She started sew the fur with the machine, but it was difficult. After many attempts, she ended up sewing it by hand, which was also less difficult.
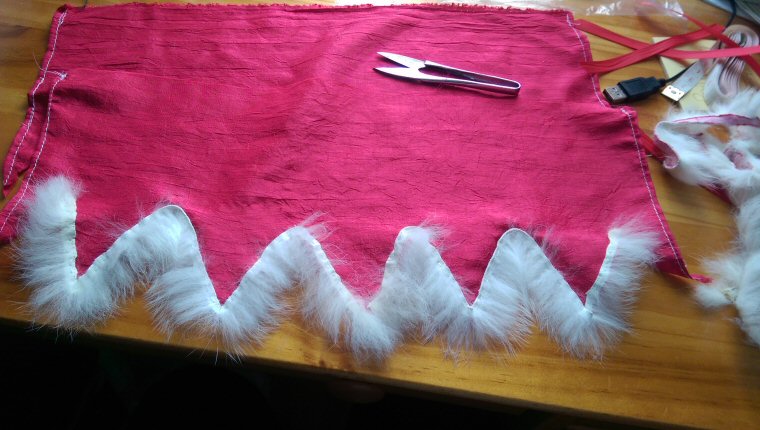
Sewing the fur on

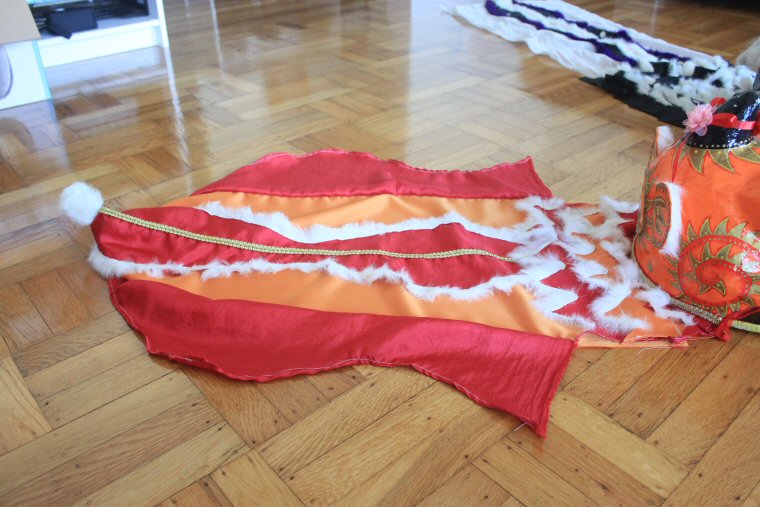
Annie sewing the tail together

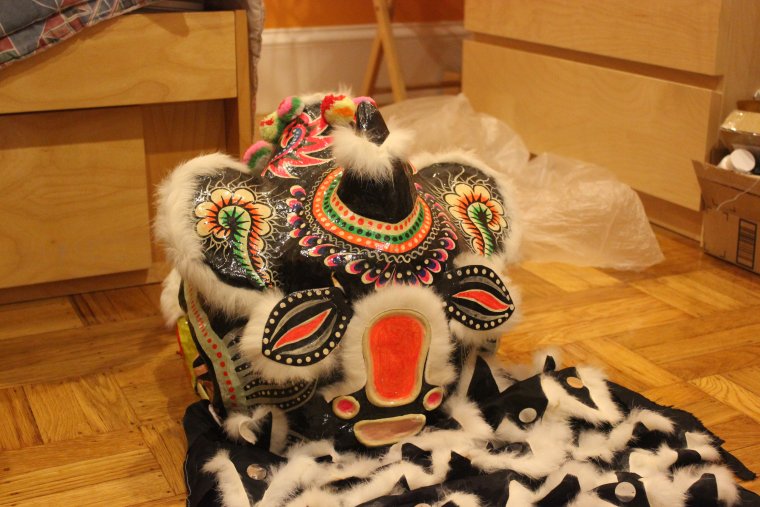
Complete!
We attached the tail to the lion with small Velcro dots and tied the corners to the handlebars with ribbon.
Tail attached to the lion
The hardest part of sewing the lion tail

Cutest part of the lion
After the tail project, it was time to get both lions ready for the Hoi Gwong ceremony! I made my own red flower ribbons using red ribbon and rhinestones. I also attached a pink flower to the back of the whole thing to hide the glue.

Front of the flower ribbon

Back of the flower ribbon
Light three incense to initiate the ceremony.

Yes, that is an old sauce jar LOL

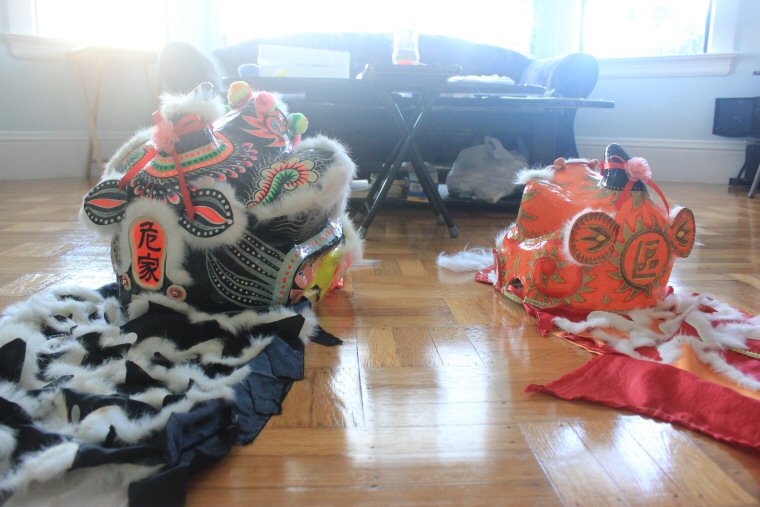
Ready for the Hoi Gwong ceremony!

One dot on the mirror, the lion awakens

Two dots left then right, distinguish wrong from right


Two dots on the nose, the senses open

One dot in the mouth, all senses unite

From tip to tail, all becomes one
Ready for blessings
Time for both lions to parade and bless the school!
Preparing for the parade

Parading around the school

Parading around the school
When doing things the first time, there are always improvements that can be made. The tail was falling apart after only one use!

Edges fraying
Ribbons torn out from the rest of the tail
Fortunately, Annie fixed it by using a zigzag stitch keep the raw edge of the fabric from fraying. She took a lot of the tail apart and had to re-sew it. She also sewed the ribbons back on in a different way to make it more secure.
Sealing up the edges
Woot woot! Back to the closet until next year!
I just wanted to give a quick update on the status of Project T7. Unfortunately, I didn’t get much painting done during the last break, but there is at least some color on T7 now! I’ll have another blog post next weekend on something completely different. In the meantime, enjoy this post.
Back view with unfinished Zhao Pai
Side view
Angled view. How do you all feel about the nose with two greens blended into each other?

A glimpse at the top
Does anyone know why it’s called Project T7 yet?
Remember my friend Andy Ta, the lion dance addict? Well, he and Morris Lam (another lion dance friend) recently came back from an epic trip to Asia where they experienced all things lion dance related. They even brought back some beautiful equipment!

Morris and Andy
Their trip started in Vietnam, where Jow Ga lion dance is very popular. Recently, some Vietnamese-made lion heads have been starting to look more and more like the ones found in China. Before, some styles had moveable horns and other interesting features. Andy and Morris visited Quang Do, a popular lion and dragon maker in Vietnam.

Unfinished Vietnamese lion heads
They didn’t purchase any Vietnamese lions, but brought back a bunch of miscellaneous equipment like flags, banners, scrolls, uniforms, etc.
Their next destination was Singapore, where Jow Ga lion dance is also very popular along with many other styles of kung fu. Supposedly, the story is that many Chinese kung fu masters of various styles fled to different countries during the Cultural Revolution, forming many international branches. Because Andy is a Jow Ga student, he was able to visit the Zhong Wai Zhou Jia Quan Association. Only Jow Ga members are allowed inside!

Zhong Wai Zhou Jia Quan Association

Members only!
Even though Andy is from the USA Jow Ga branch, he was very welcome in Singapore’s branch. Talk about a strongly-knit kung fu family!

Morris and Andy with important people of the Zhong Wai Zhou Jia Quan Association
Next, they went to visit Qing Wei Cultural Troupe, a lion dance team led by Leon Ng. If I’m not mistaken, he also makes lions and dragons as a side hobby. During the visit, they were preparing for a future competition.

Leon Ng
Their last destination in Singapore was Kong Chow Wui Koon, a large Chinese cultural center where they teach many different Chinese performing arts. Andy and Morris were fortunate to visit their lion dance museum thanks to Fatty Cheong (his real name is Chan Tuck Cheong), the chief instructor for lion dance and dragon dance at Kong Chow Wui Koon.

Some ornate styles of lions in Kong Chow Wui Koon

Andy and Fatty Cheong (Chan Tuck Cheong)
Interestingly enough, I remember seeing a video about Fatty Cheong on Youtube. It wasn’t about lion dance though – he makes some of the best Cha Siu in Singapore!
Their last destination was Hong Kong, where most of the excitement took place! First, I want to tell a little story about lion head craftsmen in Hong Kong. Back in the 1900’s, Hong Kong had some famous lion dance equipment companies such as Lo An Kee and Bak Wan, but they slowly withered away. It was hard to make a living by being a lion craftsman, and took many years and lots of patience to master the art. Although Lo An Kee and Bak Wan, along with many others, are not in business anymore, a few lion craftsmen have become popular in this generation. Andy and Morris were lucky to have a chance to visit some of these fine lion craftsmen in Hong Kong.
One of them is Yu Ho, who has been gaining much popularity these past few years because of his originality and creativity on traditional southern lion heads. Unfortunately, Andy didn’t purchase a lion head from Yu Ho this time because his team bought one recently. But, they did have some good conversation and Andy also picked up a discontinued style of Dai Tau Fut mask.

Discontinued style of Dai Tau Fut masks

Andy with Yu Ho
Because Morris is from the USA Yau Kung Moon branch, they were able to attend a banquet hosted by the Hong Kong’s Yau Kung Moon Association. There were lots of lion dance and kung fu performances. They even got to take a picture with the chairman of Yau Kung Moon Association, Ha Tak Kin.

Ha Tak Kin with Andy

Morris with Ha Tak Kin
The next popular lion craftsmen are Hui Ka Hong and his teenage nephew, King Demon Lion. The company name is Hong See Lau (雄ç…樓). Andy was able to bring back a set of three lions from them, one for each of the three famous generals from the Three Kingdoms. These are some epic traditional lion heads with a modern twist.

雄ç…樓

Zhang Fei, Liu Bei, and Guan Yu

Immortals members Tommy, Elisa, and Andy with Hui Ka Hong and King Demon Lion
The next and last lion craftsman they visited was Hon Cheung Ho, also known as Hong Kong’s No Shadow Hands (香港無影手) for his drumming skills. He made a red and gold Jow Ga style lion for the Immortals.
Below is a picture showing five lion heads made by modern day Hong Kong lion craftsmen. It is definitely a rare sight to see this variety of Hong Kong lion heads all in one picture. On the left is a lion made by Yu Ho. The three lions in the middle are the three generals from the Three Kingdoms made by Hui Ka Hong. On the right is the red and gold Jow Ga lion made by Hon Cheung Ho.

From left to right: Fut San lion made by Yu Ho, Three Kingdoms’ generals made by Hui Ka Hong, and Jow Ga lion made by Hon Cheung Ho.
Before ending their time in Hong Kong, Andy and Morris watched a lion dance competition sponsored by adidas. According to Andy, this was one of the most eye-opening lion dance experiences he’s ever had. I take that back. This WHOLE trip was one of the most eye-opening lion dance experiences he’s ever had. Hopefully, I will be able to join them on their second epic trip to Asia!

Lion dance competition sponsored by adidas
P.S. Regarding Project T7, I actually forgot to post an update after I last worked on it. Here’s a picture of what I finished last break. I couldn’t get much done because a lot of other stuff happened, but at least some people will now understand why it’s called Project T7!

Project T7 Sharingan

Project T7 in its current state
After Andy told me about his trip to Asia (especially his experiences in Hong Kong), I had a new spark of inspiration for the art of lion making. I can’t wait to work on it again.
Until next time.
No, I am not a lion dance addict. In fact, I haven’t lion danced at all this season! But if you want to know a lion dance addict, meet Andy Ta from Long Beach, California.

Andy Ta
He dreams about lion dance, lion dances for breakfast, lunch and dinner, lion dances on the toilet, lion dances while brushing his teeth, and even lion dances!
Anyway, the real reason for this blog was to promote a video he directed for his class. The narrator in the video is Nathan Phuong, who only recently started learning lion dance last May with Andy. When I met him earlier in January during my trip to SoCal, he was already a great lion dancer full of dedication and enthusiasm. Enjoy!
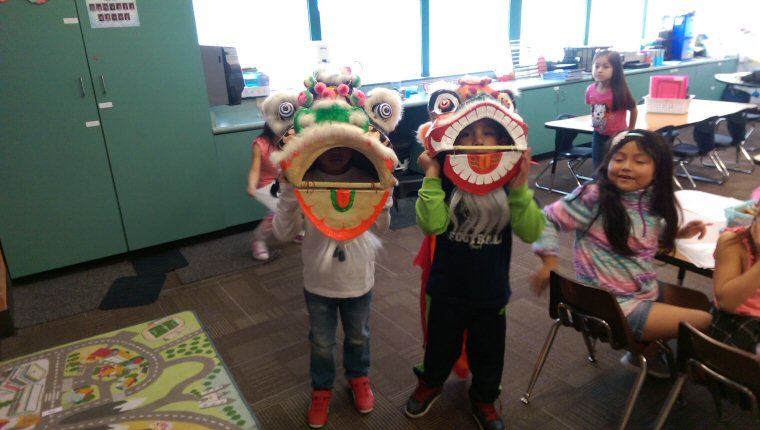
Today, we have a guest blogger – Annie, a kindergarten teacher from La Joya Elementary School. You may recognize her name because her baby lion head was featured on this blog in 2013. This past Chinese New Year, she put the lion head in action! Enjoy the read!
“Last week, the kindergarten classes at our school had our Chinese New Year parade through the school. We had read some stories to learn about Chinese culture and the significance of Chinese New Year during the days leading up to the event. I brought in the lion head from my childhood (featured on this blog before!). We also borrowed some of Ryan’s child-size instruments for the parade. We had the kids decorate some red butcher paper to look like a dragon tail and we took out some other instruments to make some noise in the halls.
We had two separate parades with two classes. Some of the upper grades came out to watch us as we marched around the track. We also went through the office and through the halls with the afternoon group.

First group’s parade

First group’s dragon tail on the track

Lion leading the way

Second group’s parade

Second group’s lion leading the way
The kindergartners and other classes really enjoyed the parade! Although some aspects of our parade were nontraditional, I was glad I could share Chinese culture to my students.”
P.S. Happy Chinese New Year everyone! Sorry for the lack of updates.
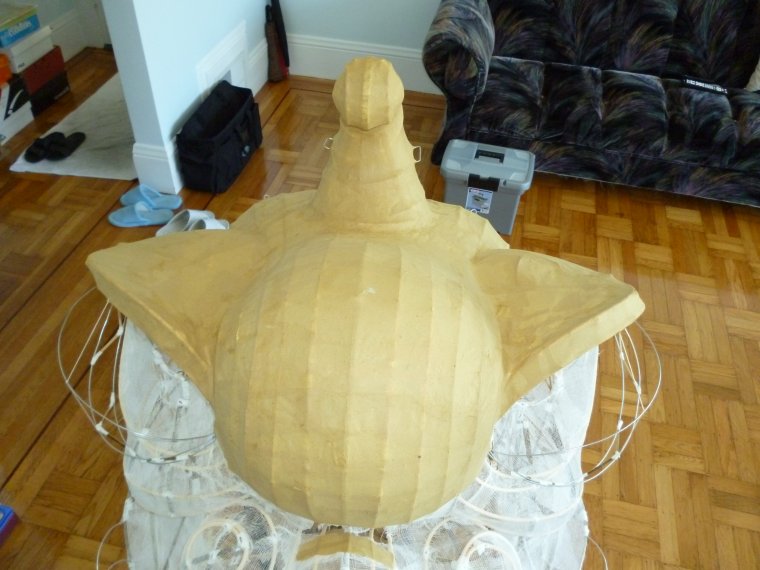
During this past winter break, I’ve finally decided to name the frame I built from scratch Project T7. Why T7? I can’t tell you yet! Maybe it has to do with the 7th thoracic vertebrae. 😉
Originally, I was planning to put five layers of paper on Project T7, but after the fourth layer, I decided there was a good balance between weight and durability. With one layer of cloth, two layers of grass paper, and two layers of rice paper, Project T7 should withstand everyday performances.

Project T7
There were only a few days of winter break left so I was able to paint the eyes. Blending black paint with other colors is still really hard for me! Black paint always overpowers other colors so I have to be really careful with the amount I use. Anyway, there’s one inner ring of red to represent the overall color theme. It may seem bland now, but I’m conceptualizing something cool for the eyes (or at least I hope it’s cool).

Project T7’s eyes
No one remembers about Project Blossom, but here is its current state.

Project Blossom
Together, Project T7 and Project Blossom make up the Lion Brothers Project.

Lion Brothers Project – Project Blossom and Project T7
I hope to get a significant portion of the painting done during my next break. More updates to come in April!
Break started two weeks ago, so I finally had some time to work on the Lion Brothers Project again. Last time, I finished attaching gauze to the frame I built from scratch and also paper mache’d about half of it. This time, I finished pasting the first layer of paper mache and got about half done with the second layer.

First layer of grass paper pasted!
For the first layer, I used a brown grass paper instead of the typical white rice paper. My friend recommended this type of paper to me several years ago and I’ve found it to be a bit stronger than some of the white calligraphy papers I’ve used. When both grass paper and rice paper are combined, they become a very strong and crisp surface to paint on. By the way, I don’t think rice paper is actually made from rice. It’s made from rice straw and other fibrous remnants from other plants like mulberry. It makes me wonder what combinations of fibers make the strongest paper. I’ve heard my parents tell me multiple times that Xuan paper is the best stuff for calligraphy, but I wonder if there’s better stuff for papering lion heads.

Second layer started. The other side does not have a second layer.
Only about half of the second layer is done so far. I used white calligraphy paper instead of grass paper to keep track of the number of layers pasted. That means the next layer will be grass paper again. One thing that I’d do differently next time is to double up on the grass paper for the first layer, since remoistening it with starch to attach the second layer made everything very wrinkly.
I’m planning to do a total of 4 layers of paper on the outside and 1 layer on the inside, for a total of 5 layers of paper with one layer of gauze. Should make a nice and beefy frame to paint on!
On a side note, I’ve been wondering about doing cloth mache for the other frame that I’ve repaired. I’ve read online that cloth mache is much stronger than paper mache. What if I did a base layer of cloth mache then finished it off with one layer of paper mache? So many ideas!
Anyway, school is starting again in a few days so I’ll have to continue papering the lion during winter break. Until then!
It’s been a while, but I’m back! Then I’ll be gone for a while again…
I’ve been on break for the past several weeks and made some good progress on the Lion Brothers project. Unfortunately, school is starting again tomorrow, so the project will be on hold once again.
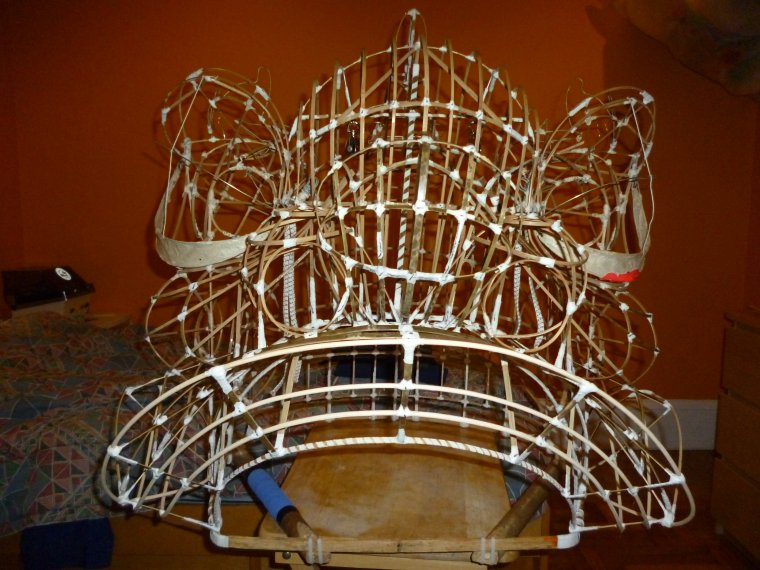
I last left off with a completely repaired frame and a partially completed frame that I was building from scratch. I’ve finished both frames now! Woot woot!
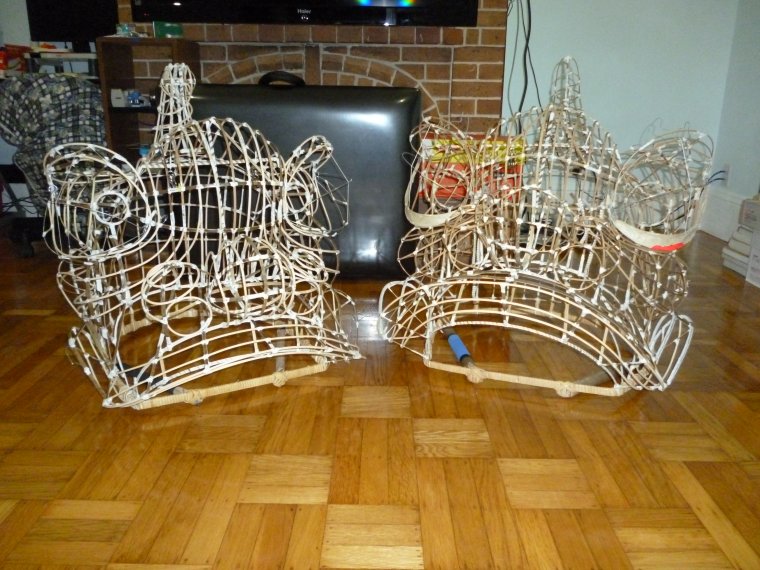
Front view of both lion frames
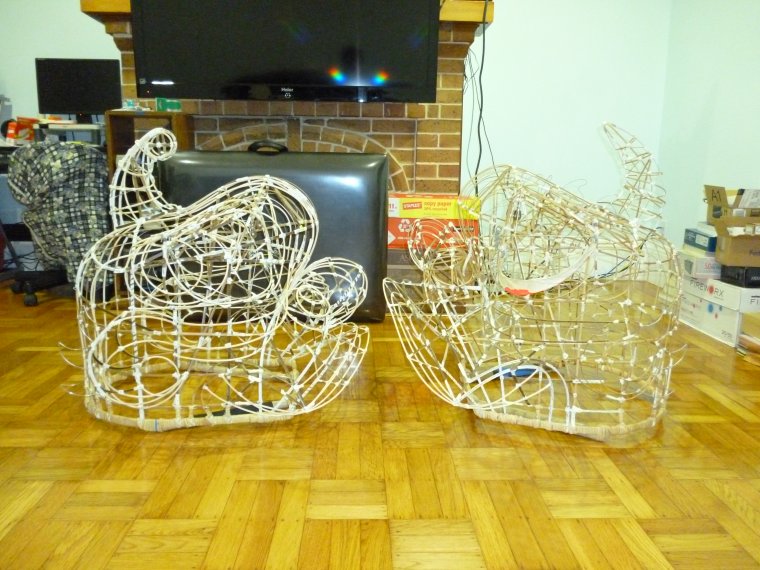
Side view of both lion frames
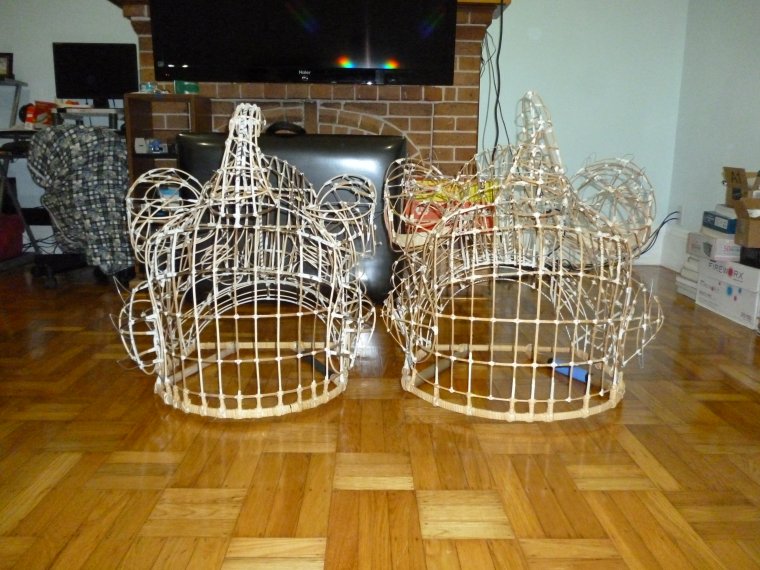
Back view of both lion frames
The frame built from scratch was quite a challenging process. Originally, I was going to copy the exact measurements from the other lion, but the two base rim measurements were too different. I decided to improvise some of the measurements. Oh yea, something random – I changed the color of the handlebar grip on the lion frame built from scratch because I’m not sure of the colors I want to use anymore.
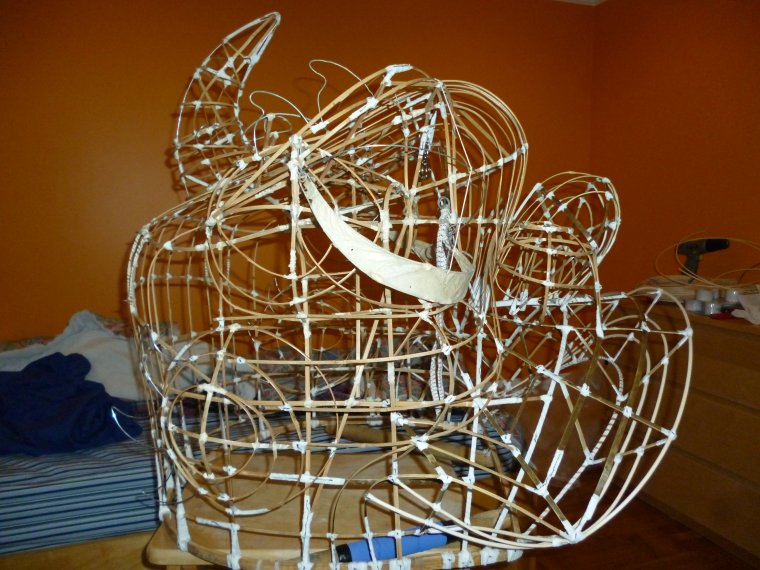
Nose and upper lip of lion frame built from scratch
As shown above, the nose has a really bulged out center piece. Not sure if I like it, but we’ll see after the lion is done. Unfortunately, the upper lip turned out way lower than I wanted. From certain angles, it looks really weird.

Eyes of lion frame built from scratch
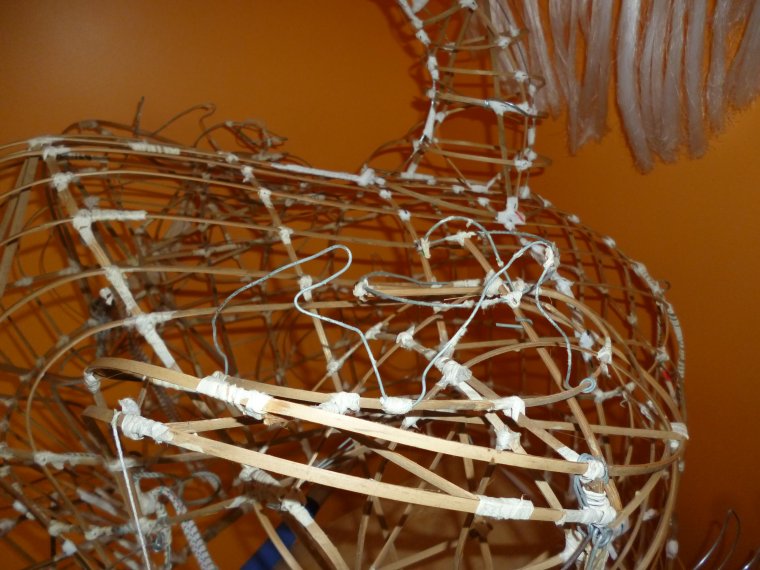
For eyes, I decided to make the eye socket circles snug with the shape of the eyeball to prevent the lazy eye look. Unfortunately, this also made the eye socket higher up than normal, which may be blocked by the eyelids with fur after the lion is complete. We’ll see how it turns out when the lion is done.

Side view of attempted Hok San eye
Also, I tried to add a more Hok San look to the eyes by pulling back the corners of the eyes just a bit. Not sure if I was successful or not.
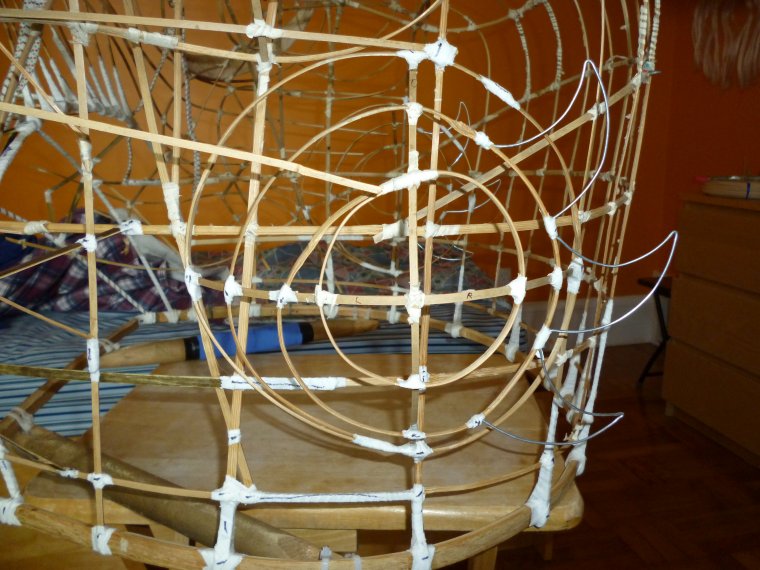
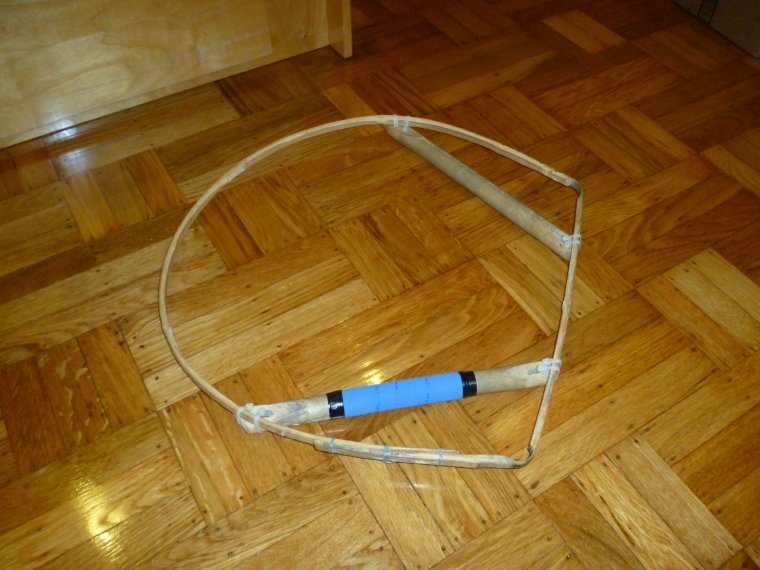
Fist horn
I gave this lion a fist horn because I was aiming for a Fut Hok lion. This horn was much more complicated to build than a bamboo shoot horn.

Single soy
Because the other frame had the circular gills, I gave this one a single “soy†for contrast. The fins are the same as the other frame though.

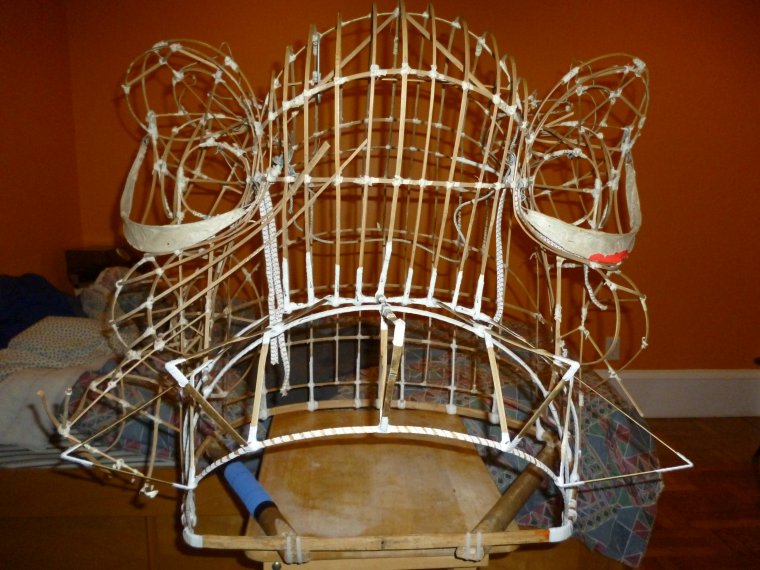
Side view of entire lion frame

Back view of entire lion frame
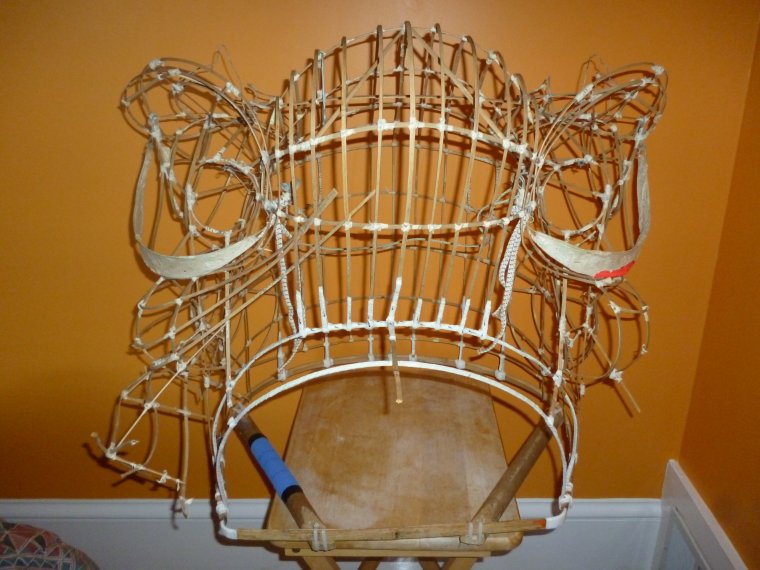
Honestly, I have no clue how the final product will look. There’s at least one thing on each part of the lion that didn’t turn out as I wanted. Oh well!
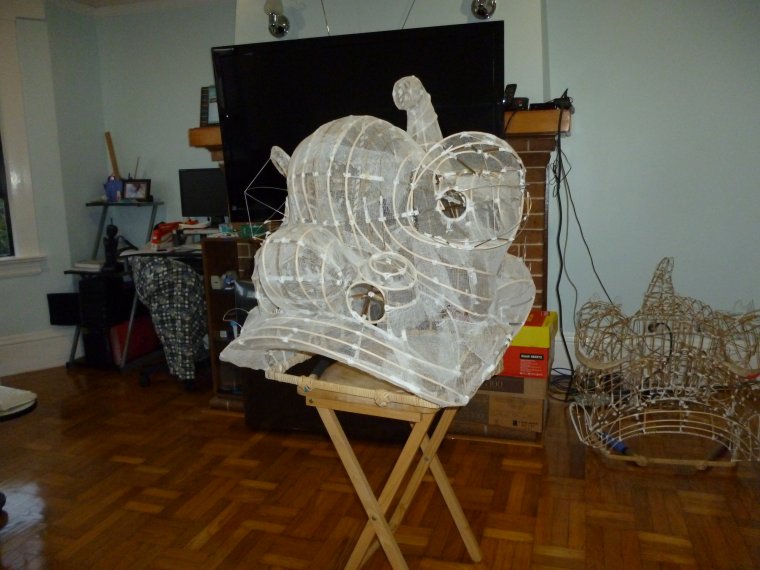
Entire frame layered with gauze
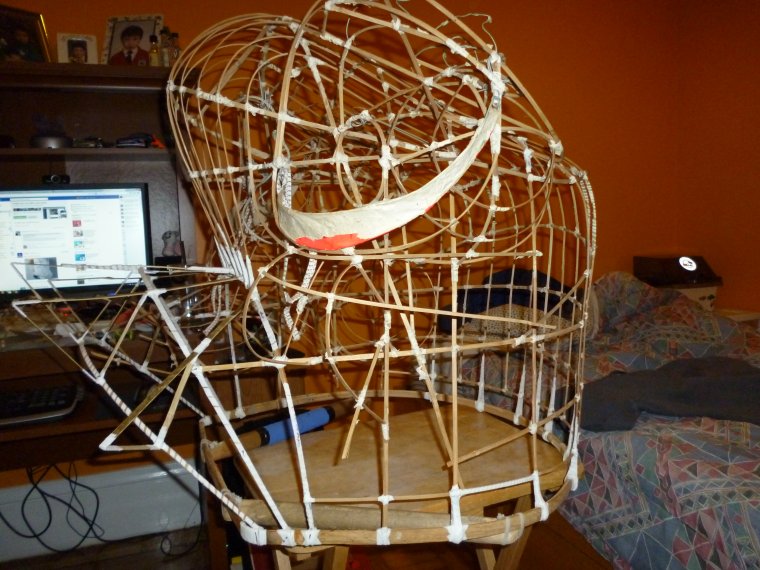
This is my first time using gauze for the entire lion head. In previous projects, I’ve only used gauze for certain parts of the frame that had huge gaps. I’m glad I used gauze for the entire frame because it made papering much easier.
First layer of paper
Â

First layer of paper
As of right now, I was only able to put a first layer of paper on the back, top, horn, and forehead. The project is getting really exciting! More updates coming during my next break.
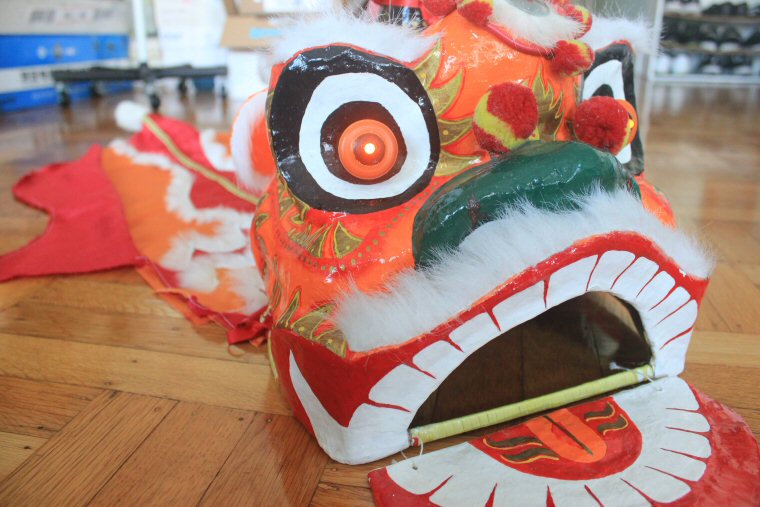
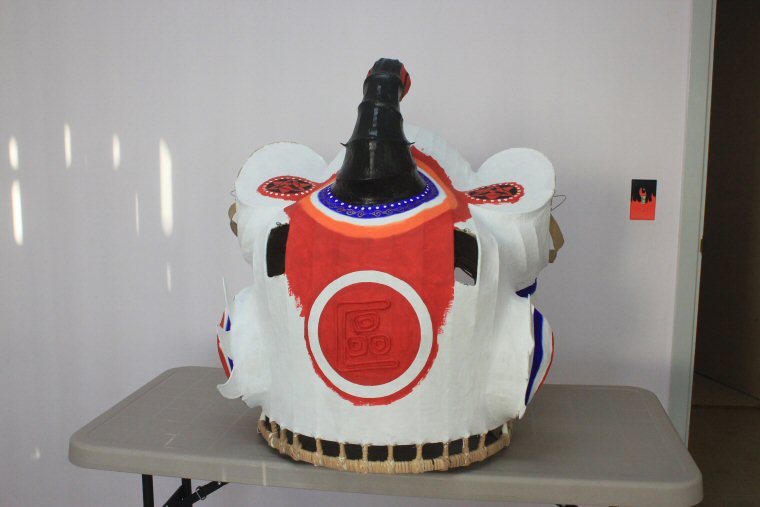
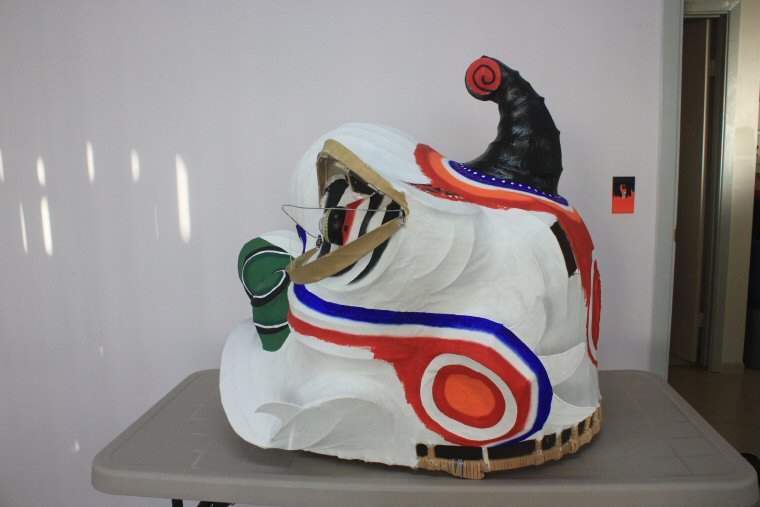
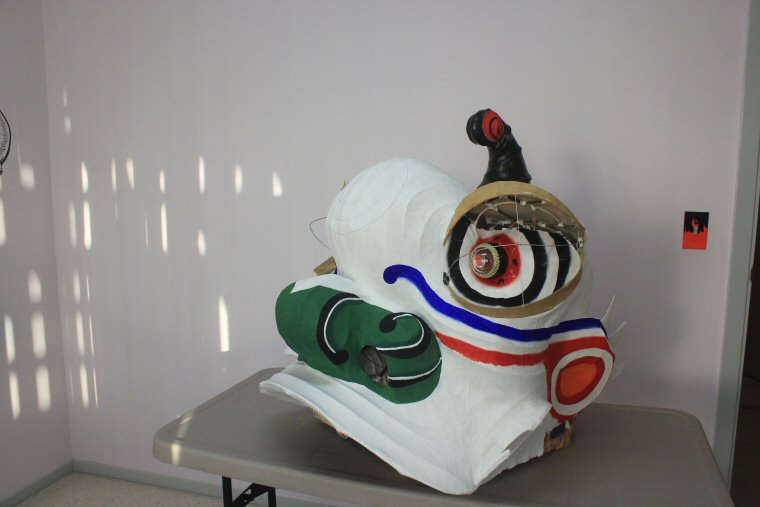
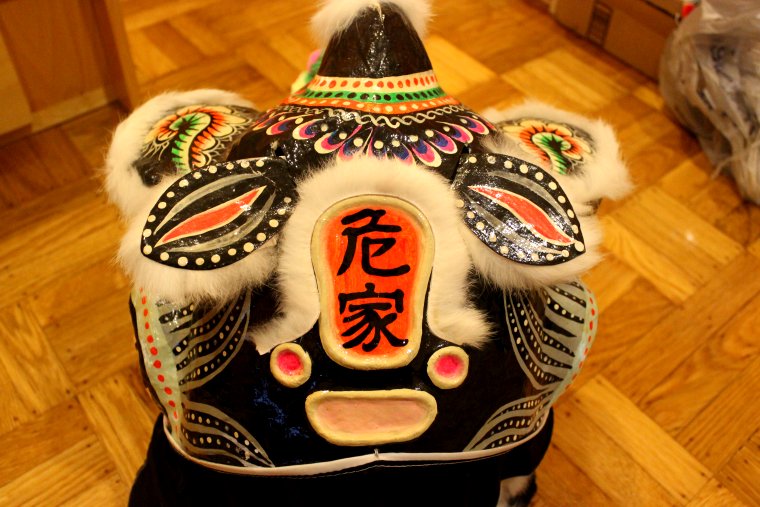
Woot woot! I finished fixing up Annie’s baby lion. Less words, more pictures. Let’s go!
Here’s a front view of the complete lion.

Front view.
Check out the lighted eyes that I installed!

Lighted eyes.
I also put a new mirror and used a different method to mount the pom poms.

New mirror and remounted pom poms.
Here’s a side view just for kicks.

Side view.
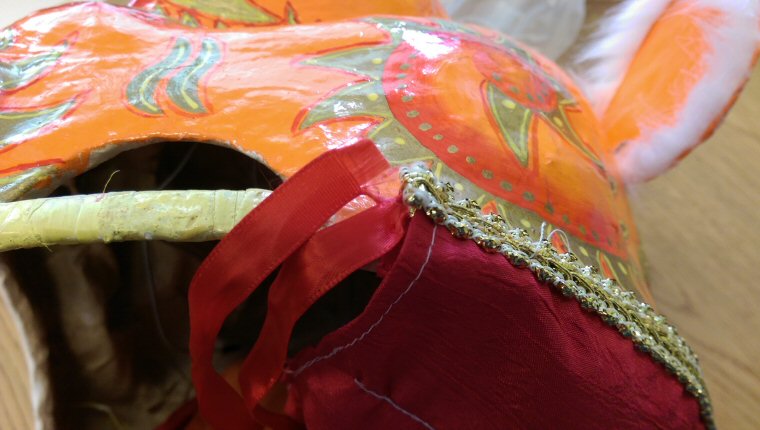
And finally, here’s a back view with the completed Zhao Pai. I retied the ears with elastic so it can’t droop.
Back view with retied ears and complete Zhao Pai.
Hoping to eye-dot this lion along with my baby orange one sometime in the future!
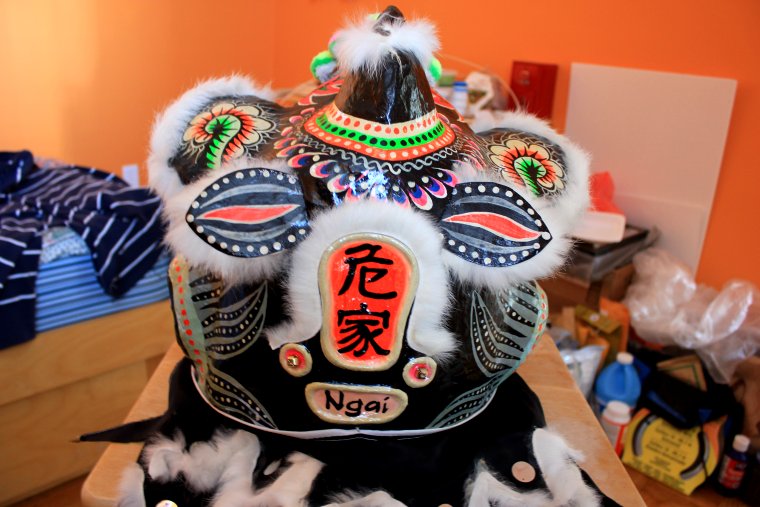
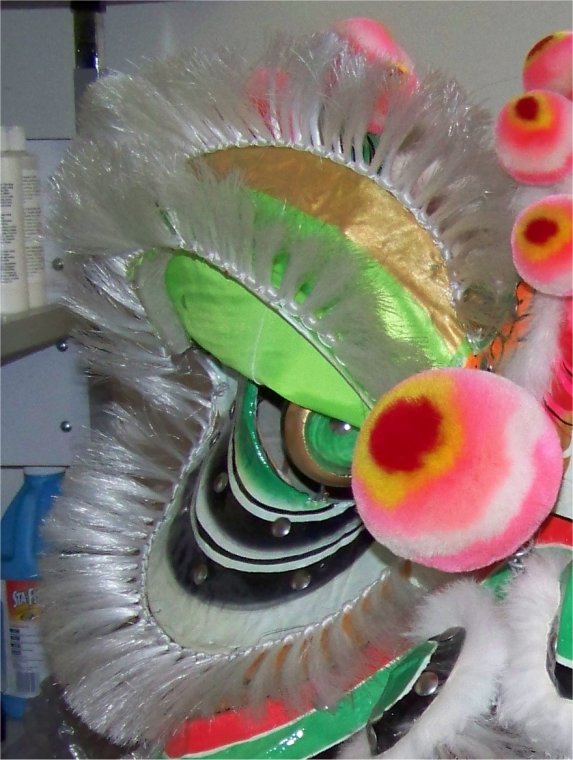
I took a break from studying today by finishing up the Zhao Pai on Annie’s lion. Normally, the two circles on the side would have the two characters for awakened lion (醒ç…), but they were way too small to write anything in it. I was planning to glue metals disks inside the circles, but decided on trying something else that I’ve been thinking about for a long time. The idea is to glue small bells in place of metal disks. Originally, I was going to use this idea around Ace’s horn, but decided that it might be too obnoxious with the large amount of bells. Since this lion will only have two bells, I decided to try it out. The truth is, I can barely hear the bells when the lion moves. Even with ten bells glued on a lion head, I don’t think it will be too obnoxious. We’ll have to find out when I actually do it!
I was also stuck on what to put in the rectangle at the bottom of the Zhao Pai. Initially, I was thinking of writing the two characters for awakened lion (醒ç…), but Annie came up with a better idea! Why not write their last name in English? It would fill up the space pretty well. And so I did it, and here’s the result:
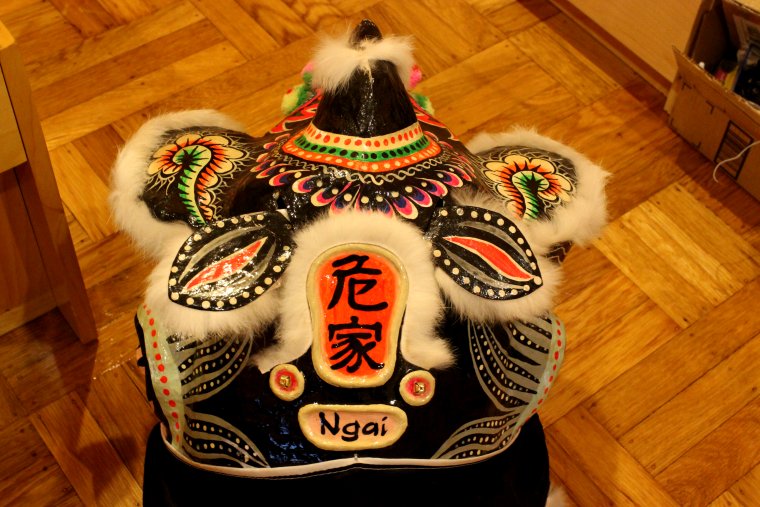
Completed Zhao Pai.
You guys may be wondering why I’m not working on the frame that I’ve started from scratch. No worries, I’ll be getting back to it soon…hopefully…
Back to Annie’s lion, I’ll be cleaning up other parts of the lion soon and then it’ll be like new again (or at least close to new?).
One thing that slightly bugs me is when I see a lion head with a blank Zhao Pai on the back. In my interpretation (and only mine haha), a lion with a blank Zhao Pai has no owner and therefore is untamed, or at least not as tame as it could be. I find it important to paint a last name or school’s name onto the back of the lion as a means of identification and ownership. Of course, this is only my opinion and not culturally based in any way. I’m probably just finding an excuse to get bugged by blank Zhao Pai’s. 😛
Anyway, I spent a little bit of time painting my girlfriend’s last name onto her lion. Here’s a picture:
Ngai Family Lion
My girlfriend brought over her childhood lion head this weekend so we were able to take some detailed pictures of it. The original plan was to restore this lion, but we decided not to because it’s still in pretty good condition. Also, the original paint and tail design are really nice for a baby lion (much better than a lot I’ve seen). I’m just gonna touch up some of the chipped off paint and clean it up a little bit.
The newly planned project is to make a copy of the lion with a different color scheme and maybe some changes to the paint design. Target completion year = 2050 hahaha
Enjoy the pictures!

Front view of the lion.

We’re gonna have to do something about those reverse crossed-eyes haha

The reflective part of the original mirror is missing, but plastic piece around it is still there!
The paint design above the nose.

They used marbles for the pupils. Gonna have to clean up the paint around it.

I really like the design around the horn.
Side view of the lion.
Although simple, I really like the design behind the eyes.

The design behind gills.
The design above the eyes. Really eye-catching!
Back view.

The lion tail is also really cool. It’s different than many of the baby lion tails I’ve seen.

Here’s the manufacturer’s label glued inside the lion. Anyone ever heard of them? I think they’re supposed to be a garment factory of some sort?
I finished the main part a little over a week ago but haven’t had the chance to blog about it. Here’s a picture:

Check out that forehead bulge!
Compared to the first frame, this one has a much bulkier and pronounced forehead. I will be trying to change the dimensions of the mouth and eyes to match this shape better.
Also, I am taking detailed measurements of every single step for this frame. Who knows, maybe the shape will turn out amazing and someone will want to duplicate it? In my dreams…haha
You guys are probably wondering why the title says “blossomâ€, huh? Here’s a sneak peak of the prototype I’m working on that will be part of the lion frame that I’ve already finished.

Glowing Blossom
The first part of the Lion Brothers Project will be now officially named “Blossomâ€. The rest of the explanation will remain a mystery until I’m done with the entire lion head. 😉
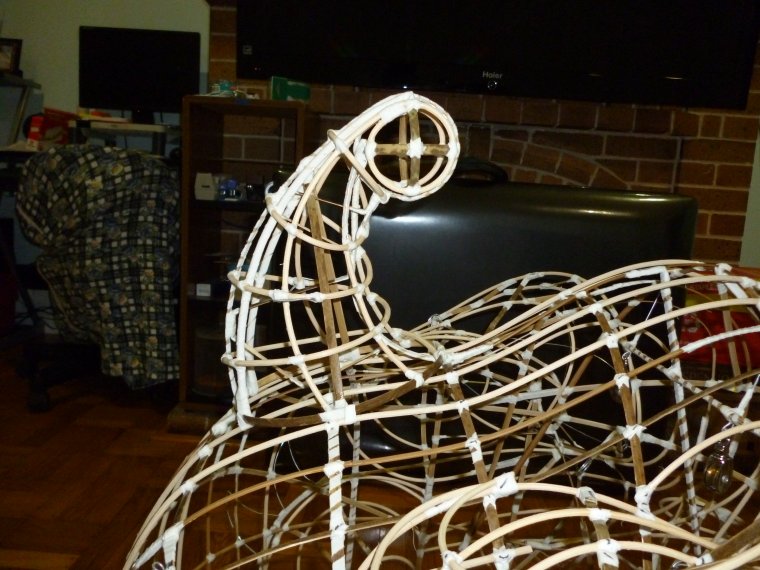
As for the 2nd part of the Lion Brothers Project, I’ve already begun building the lion from scratch. Mad respect to those who have already built one from scratch – it is indeed very challenging. I started by cutting handlebars from an old broomstick and attaching them to the salvaged rim I acquired.
Base rim with handlebars attached. Can anyone guess the color scheme of this lion?
I then started adding bamboo strips to form the basic shape. This part was the most challenging so far, because each strip I added changed the shape of the previous strip. That is when Chris Low mentioned the A frame/inverted V frame. It is supposed to temporarily keep the bamboo pieces in the right shape until enough strips are put on so it can hold its own shape. It can also help with keeping the frame symmetrical. This method was actually mentioned to me a long time ago but I completely forgot about it! Hope the shape comes out okay without the A frame/inverted V frame.  Here is a picture of what I’ve done for the first two days:
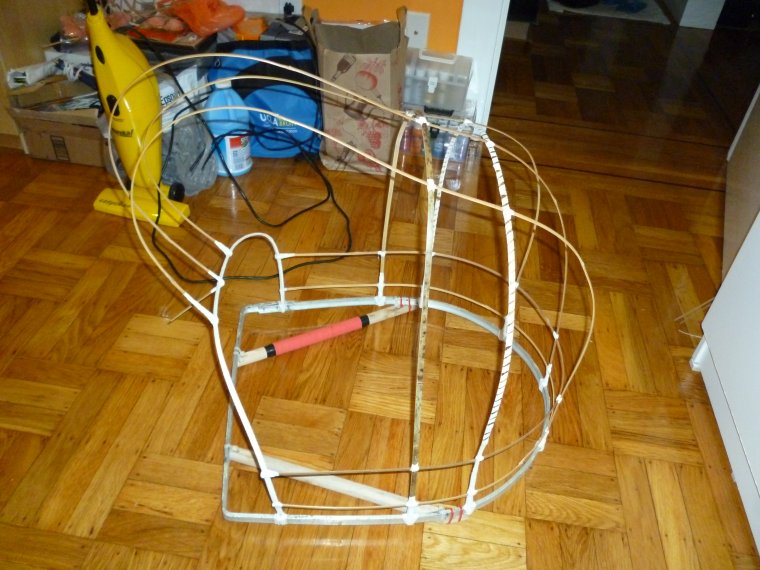
Two days worth of work
More updates coming soon!
I spent several hours today wrapping the base with cane/rattan. This step is actually really important because it keeps the handlebars tight and the lower joints secure. You can probably tell that I’ve only done this once in the past from the messiness in the picture below. Practice makes perfect! Hopefully, it’ll be neater on my next one.
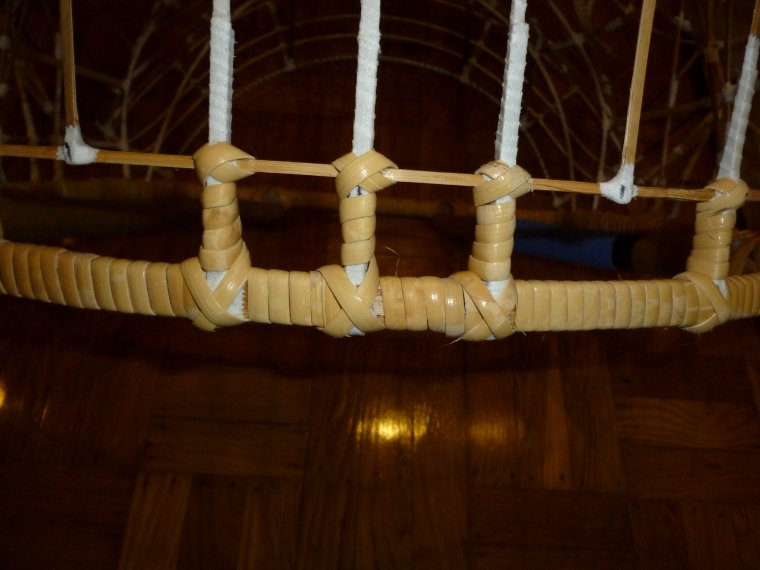
Base all wrapped up!
I’m pretty much done with the lion frame! There are a few pieces of bamboo I want to add and some fins to modify. I also need to make the ears and lip, but other than that, the frame is finished.
After finishing the fins last week, I decided to repair the cross brace inside the lion and install a pulley system for the blinking eyes. Installing the pulley system was actually a really helpful tip given to me by my mentor, Corey Chan, many years ago, but I’ve started seeing pulley systems being installed in lions made by Emplion. The pulleys reduce friction between the wire loops and rope, which in turn prevents the eye-blinking ropes from snapping during a performance. It also allows for a faster, sharper blink. At 2-3 dollars a pulley, it’s a really good investment.

Pulley system installed.
Next, I started working on rebuilding the mouth. Since the mouth was practically nonexistent when I got the lion frame, I had a really hard time trying to figure out the proportions and measurements. In the end, I decided to just wing it and rebuild the mouth by improvisation. It turned out okay, so I’m glad!
I decided to use rattan for some pieces of the mouth, since some of the bends would have been a little harsh for the thick bamboo strips. Plus, I had a whole coil of rattan lying around! Here’s something I figured out though: cutting a small groove in the rattan will keep it from slipping while binding. It also increases the surface area of contact, which I’m assuming would give a stronger joint. I only cut a groove for the more important joints that are prone to slipping, since it’s quite time consuming to do it for every single joint.
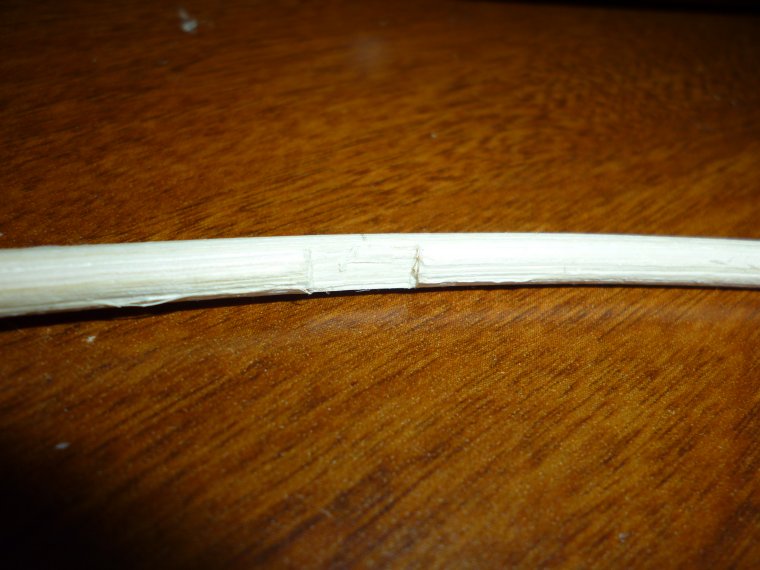
Cutting a groove in the rattan prevents slipping of the joint while binding.

Side of the mouth.
Front of the mouth.
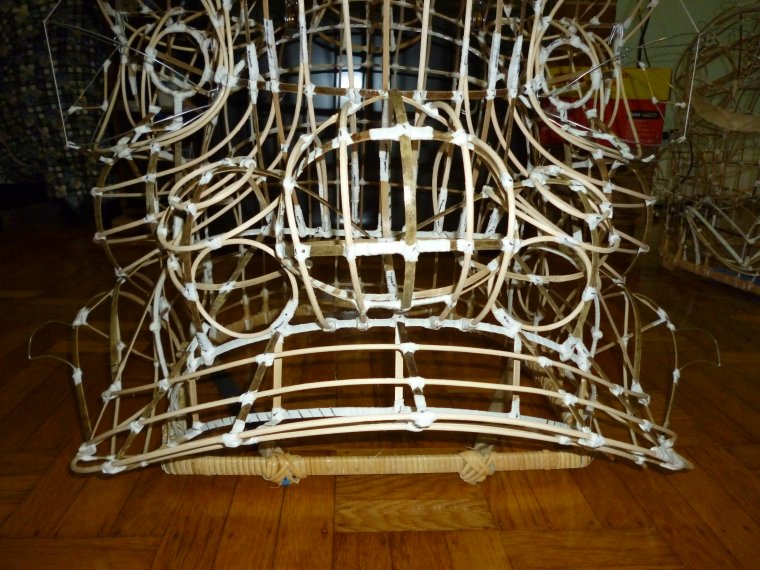
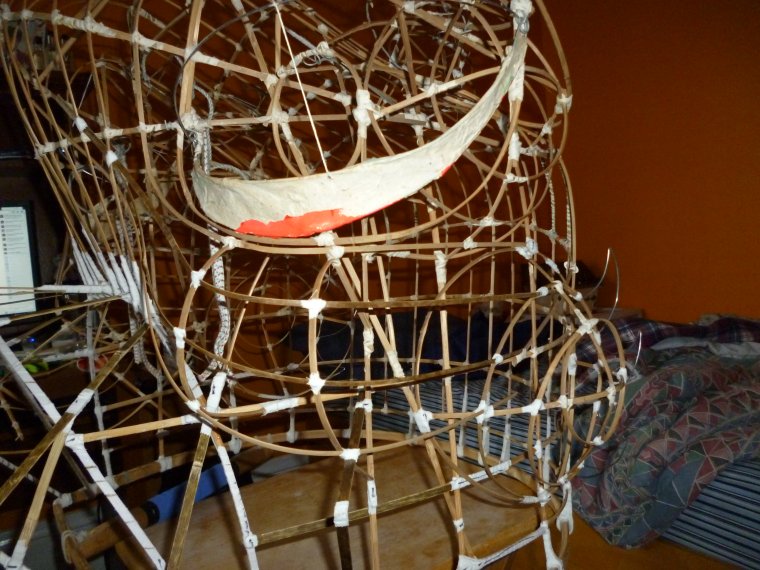
Lastly, the nose was rebuilt. This was a lot more confusing than I was expecting. To make matters worse, the original nose shape turned out to be really weird, so I won’t be using it as a template for the next build. I kept it for this lion frame though since I worked so hard on it and was recycling bamboo strips from the old nose.
Nose complete!
*edit* 7/22/2013 @6:45pm *edit*
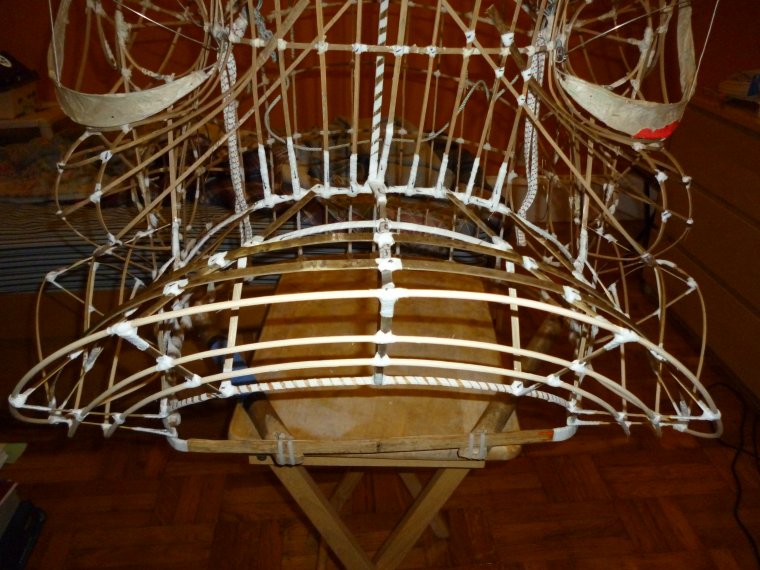
Here’s a side view of the completed frame. By the way, some people are probably wondering what those black marks are on the joints. I use this marking system to keep track of which joints have been coated with glue and which joints are fresh.
Side view of the completed frame.
These past few days, I’ve been doing some small/miscellaneous repairs and modifications scattered throughout the frame.
First, I modified the eyelids by adding a piece of wire to hold the eyelid up while the eye is open. For some lions, this piece of wire is unnecessary – it all depends on the shape of the eyes. In the past, I’ve noticed that some Bak Wan replica lions have the droopy eye syndrome, where the eyelid covers a small portion of the eyeball.
Droopy eye syndrome on a Bak Wan replica.
Some people like this feature but I prefer the eyelids to be fully retracted when the eyes are open. I’m not sure if the shape of the eyes for this frame would produce the droopy eyelids, but I put the wire in there as a precaution. It’d be too much trouble to put the wire in after the eyelids have already been put on.

Eyelid wire suspended with string.
Next was the repair of the left cheek. The old cheek had some pieces of bamboo missing, so I just took it all off and rebuilt it from scratch. Splitting bamboo evenly was a challenge for me, so the middle piece is actually a lot thinner than the top and bottom pieces. Hopefully, it won’t bring any problems.

Front view of left rebuilt left cheek.
Side view of rebuilt left cheek.
Lastly, I repaired the two original fins and added a third fin. Oddly enough, the original lion only had two fins on top of the eye. Maybe I’m just used to seeing three fins, but I decided to add a third fin to this frame.
The two original fins were either crushed or misshaped.

Original fins repaired with the addition of a third fin.
During the last week or so, I’ve been slowly repairing different parts of the frame. Last time, the left gill was taken off for repairs and the addition of three new fins. I did the same to the right gill and reattached both of them back onto the main frame.
Gills reattached.
I used some parts of the broken horn to build a new one and also reattached it back to the main frame.

Horn built from old parts.

Horn reattached to main frame.
Updates on the mouth and cheek area as I repair it!
The Lion Brothers project started in early June with the restoration/rebuild of a damaged frame that I got from a friend. I started by remounting the handlebars onto the base rim with plastic cable ties. Originally, the handlebars were attached by two pieces of wire with a thickness of around 14-16 gauge. Although this method holds the handlebars really securely initially, the hardness of the wire eventually digs into the softness of the wooden handlebars, loosening them from the base rim. Since plastic is much softer than metal, I opted for the cable ties instead. Also, the width of the cable ties spreads the force of the attachment over a larger surface area than the wires, which should minimize them from digging into the wood. Not to mention, plastic doesn’t rust like metal does.
Base rim with handlebars reattached.
There are two more things noticeable about the base rim. First, it is asymmetrical. I was thinking of ways to make it symmetrical again but couldn’t come up with anything. I decided to move on and hope for the best. So far, the asymmetry hasn’t given me any problems. Second, the corners were really thin compared to the rest of the base rim. I wrapped them with two layers of sports tape and brushed a layer of glue on it. Hopefully, this is enough reinforcement to keep the corners from cracking.
After the handlebars were mounted, I proceeded to reattach the rest of the frame onto the base rim. One of my mentors once told me that the key to a solid attachment is actually the vertical strips of bamboo folding back up around the base rim. Unfortunately, they were all broken off already. I improvised and used a second piece of bamboo to wrap around the vertical strips and base rim. Lots of sports tape and glue held everything in place.

Frame reattached to the base rim.
Because the mouth area was so damaged, I had to take off the nose to repair the mouth. The nose itself is actually damaged too, so I might just end up making a whole new nose for this lion.
Nose off for mouth repairs.
Repairing the mouth area is still not finished as of today. It’s pretty challenging since I have no reference/template to work off of. I had to look for hints of old attachment points, different lengths and areas of crossing, etc. Of course, there was also a lot of guesswork involved. I eventually got four of the main mouth supports on.
Mouth supports attached.
Next, I took off the left gill to repair the side of the mouth. Since the gill was off, I tightened all of the joints and added three fins to it.
Left gill off for mouth repairs.

Left gill with three new fins.
That’s it for now! More updates coming soon.